
-
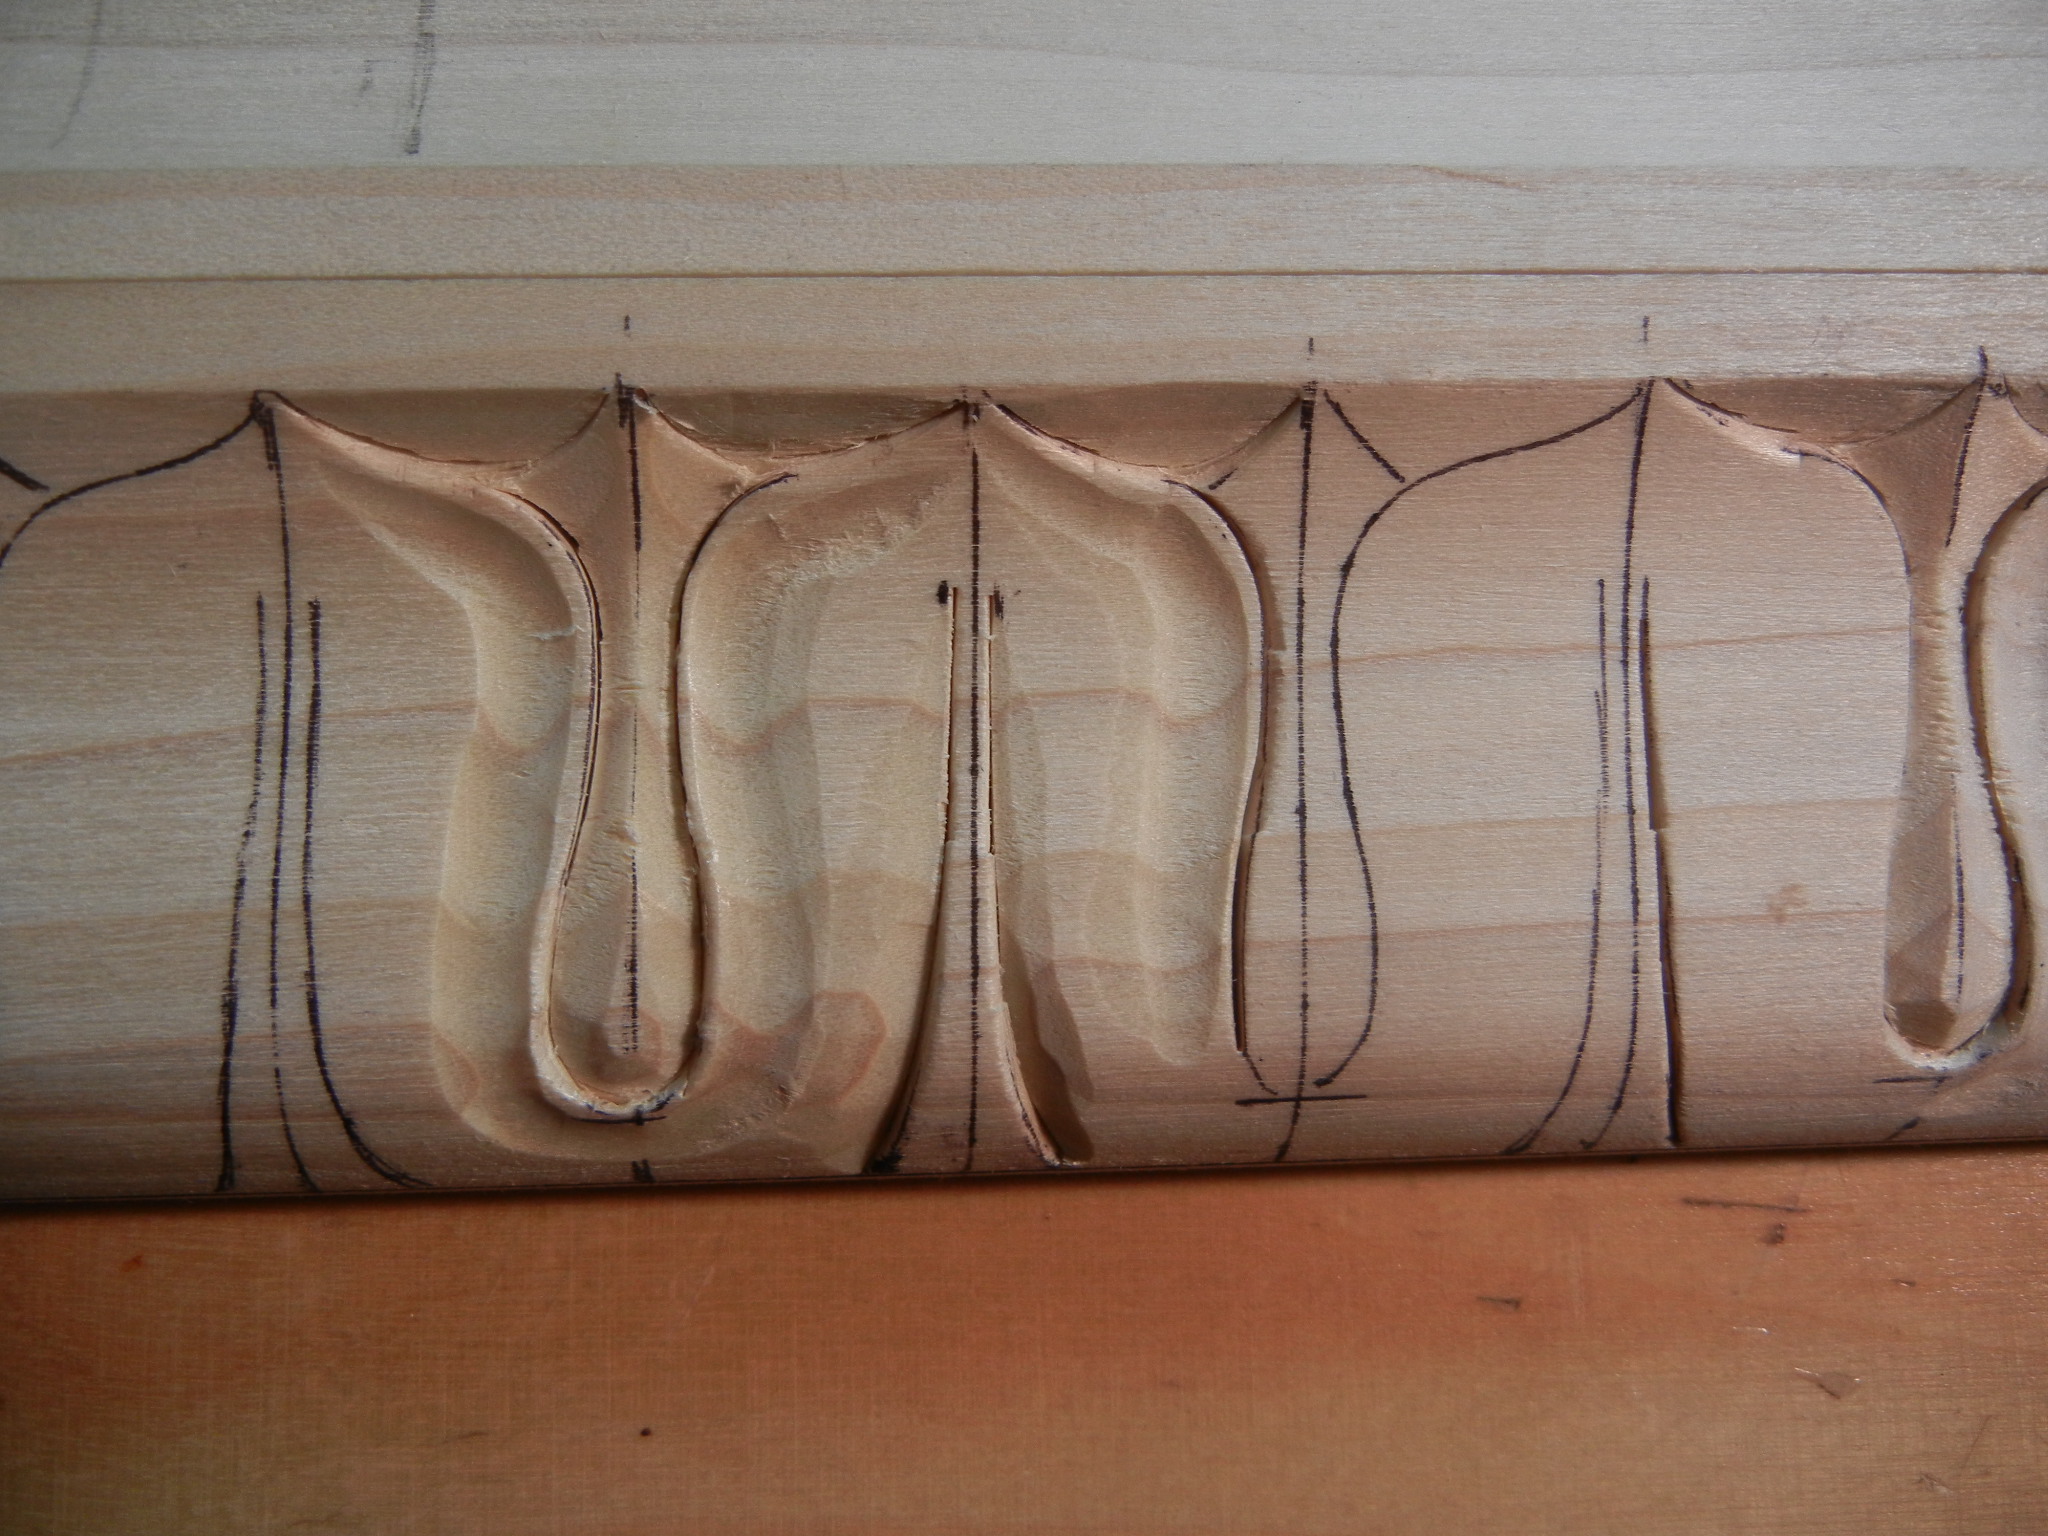
- After a light sanding to soften over the chisel marks
-

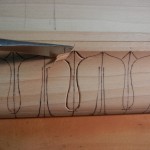
- Finished – almost…
-
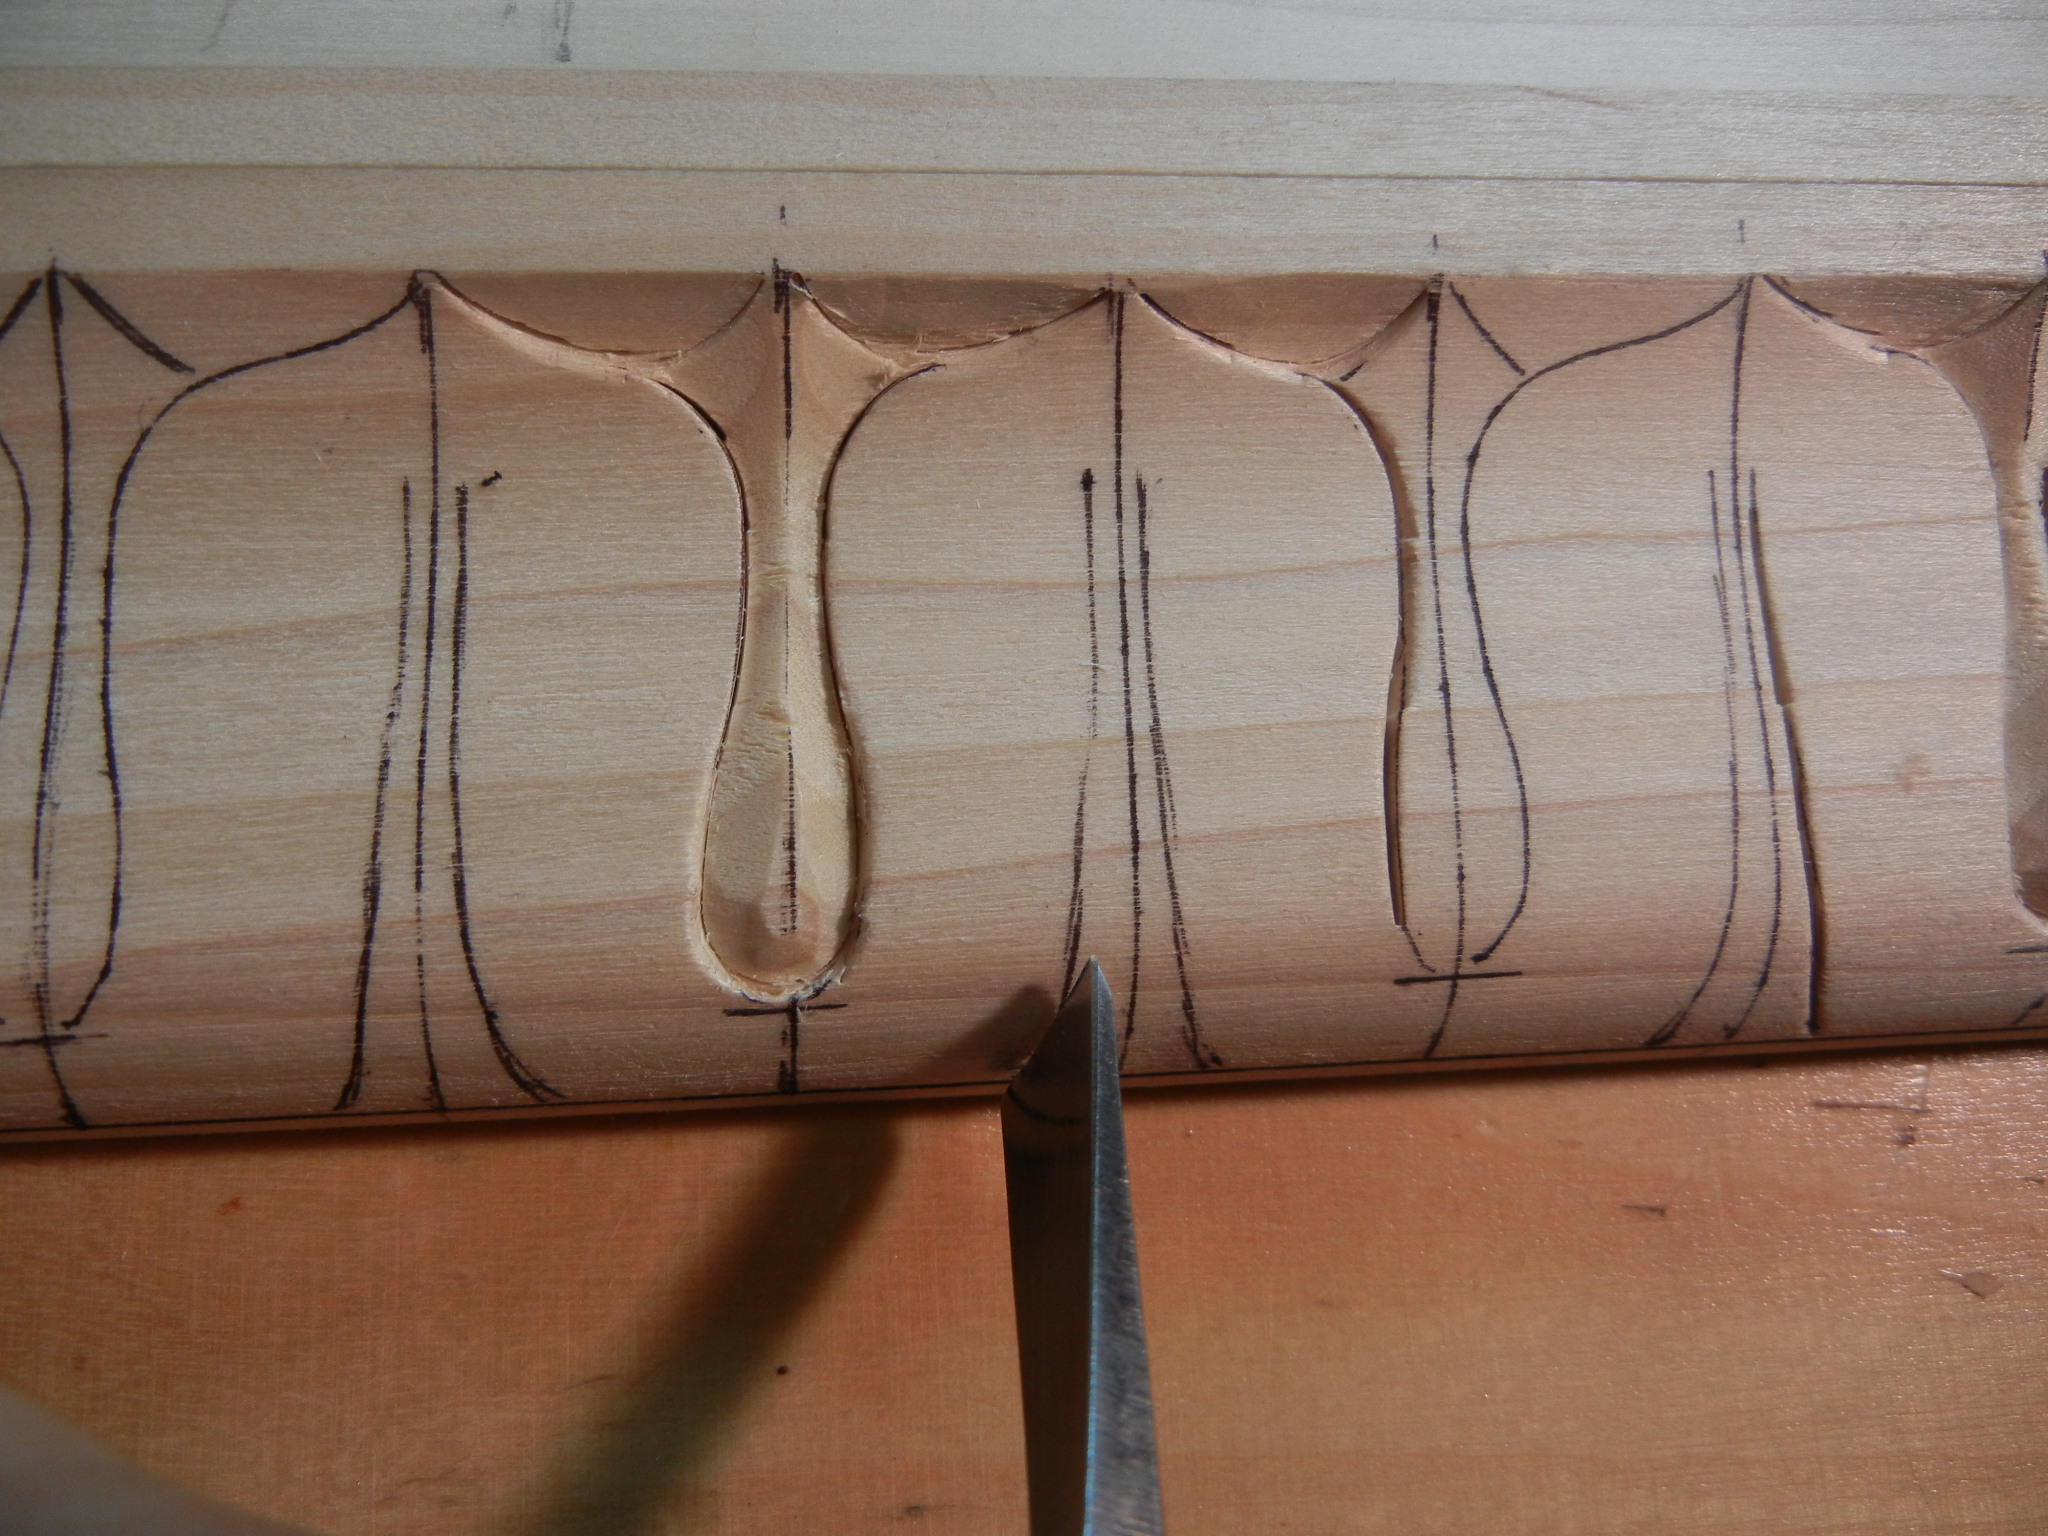
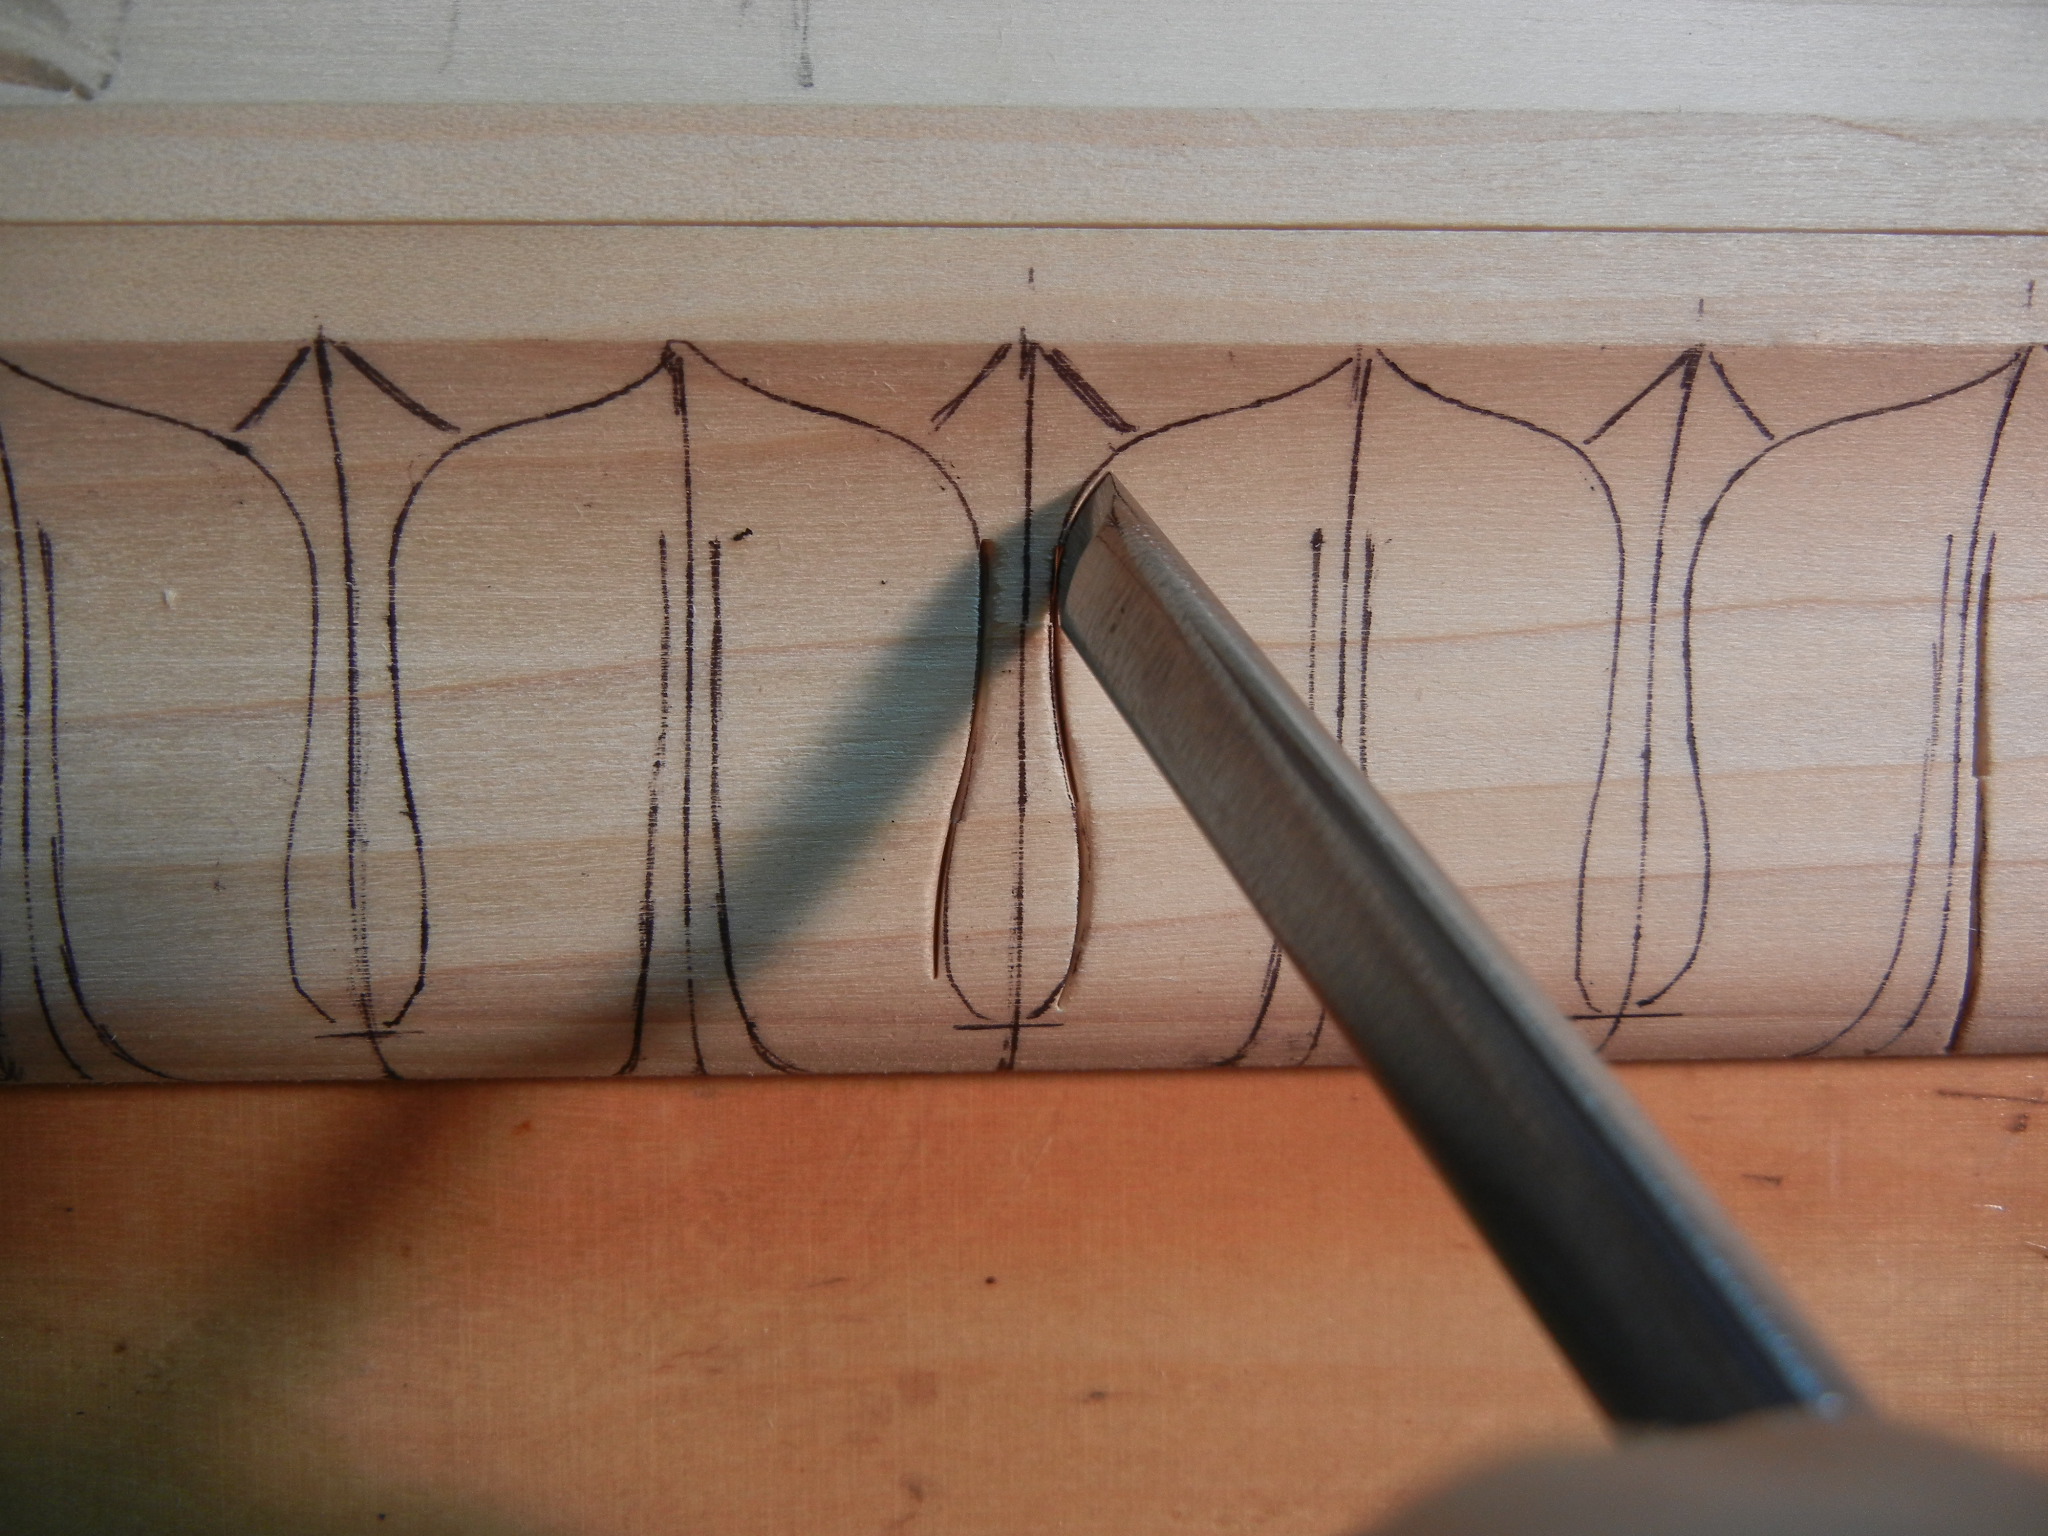
- With a #3, 14mm or #3, 6mm soften over the sharp edge to blend this into the leaf

-
- With a #8, 6mm, hollow out along the edge of the leaf
-
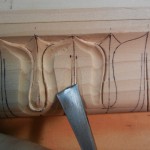
- With the #3, 14mm, continue to round the leaf down to the vein line
-
- With a #3, 14mm lower down leaf to the vein line to give the appearance of the vein being raised
-
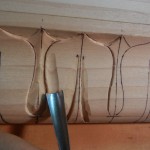
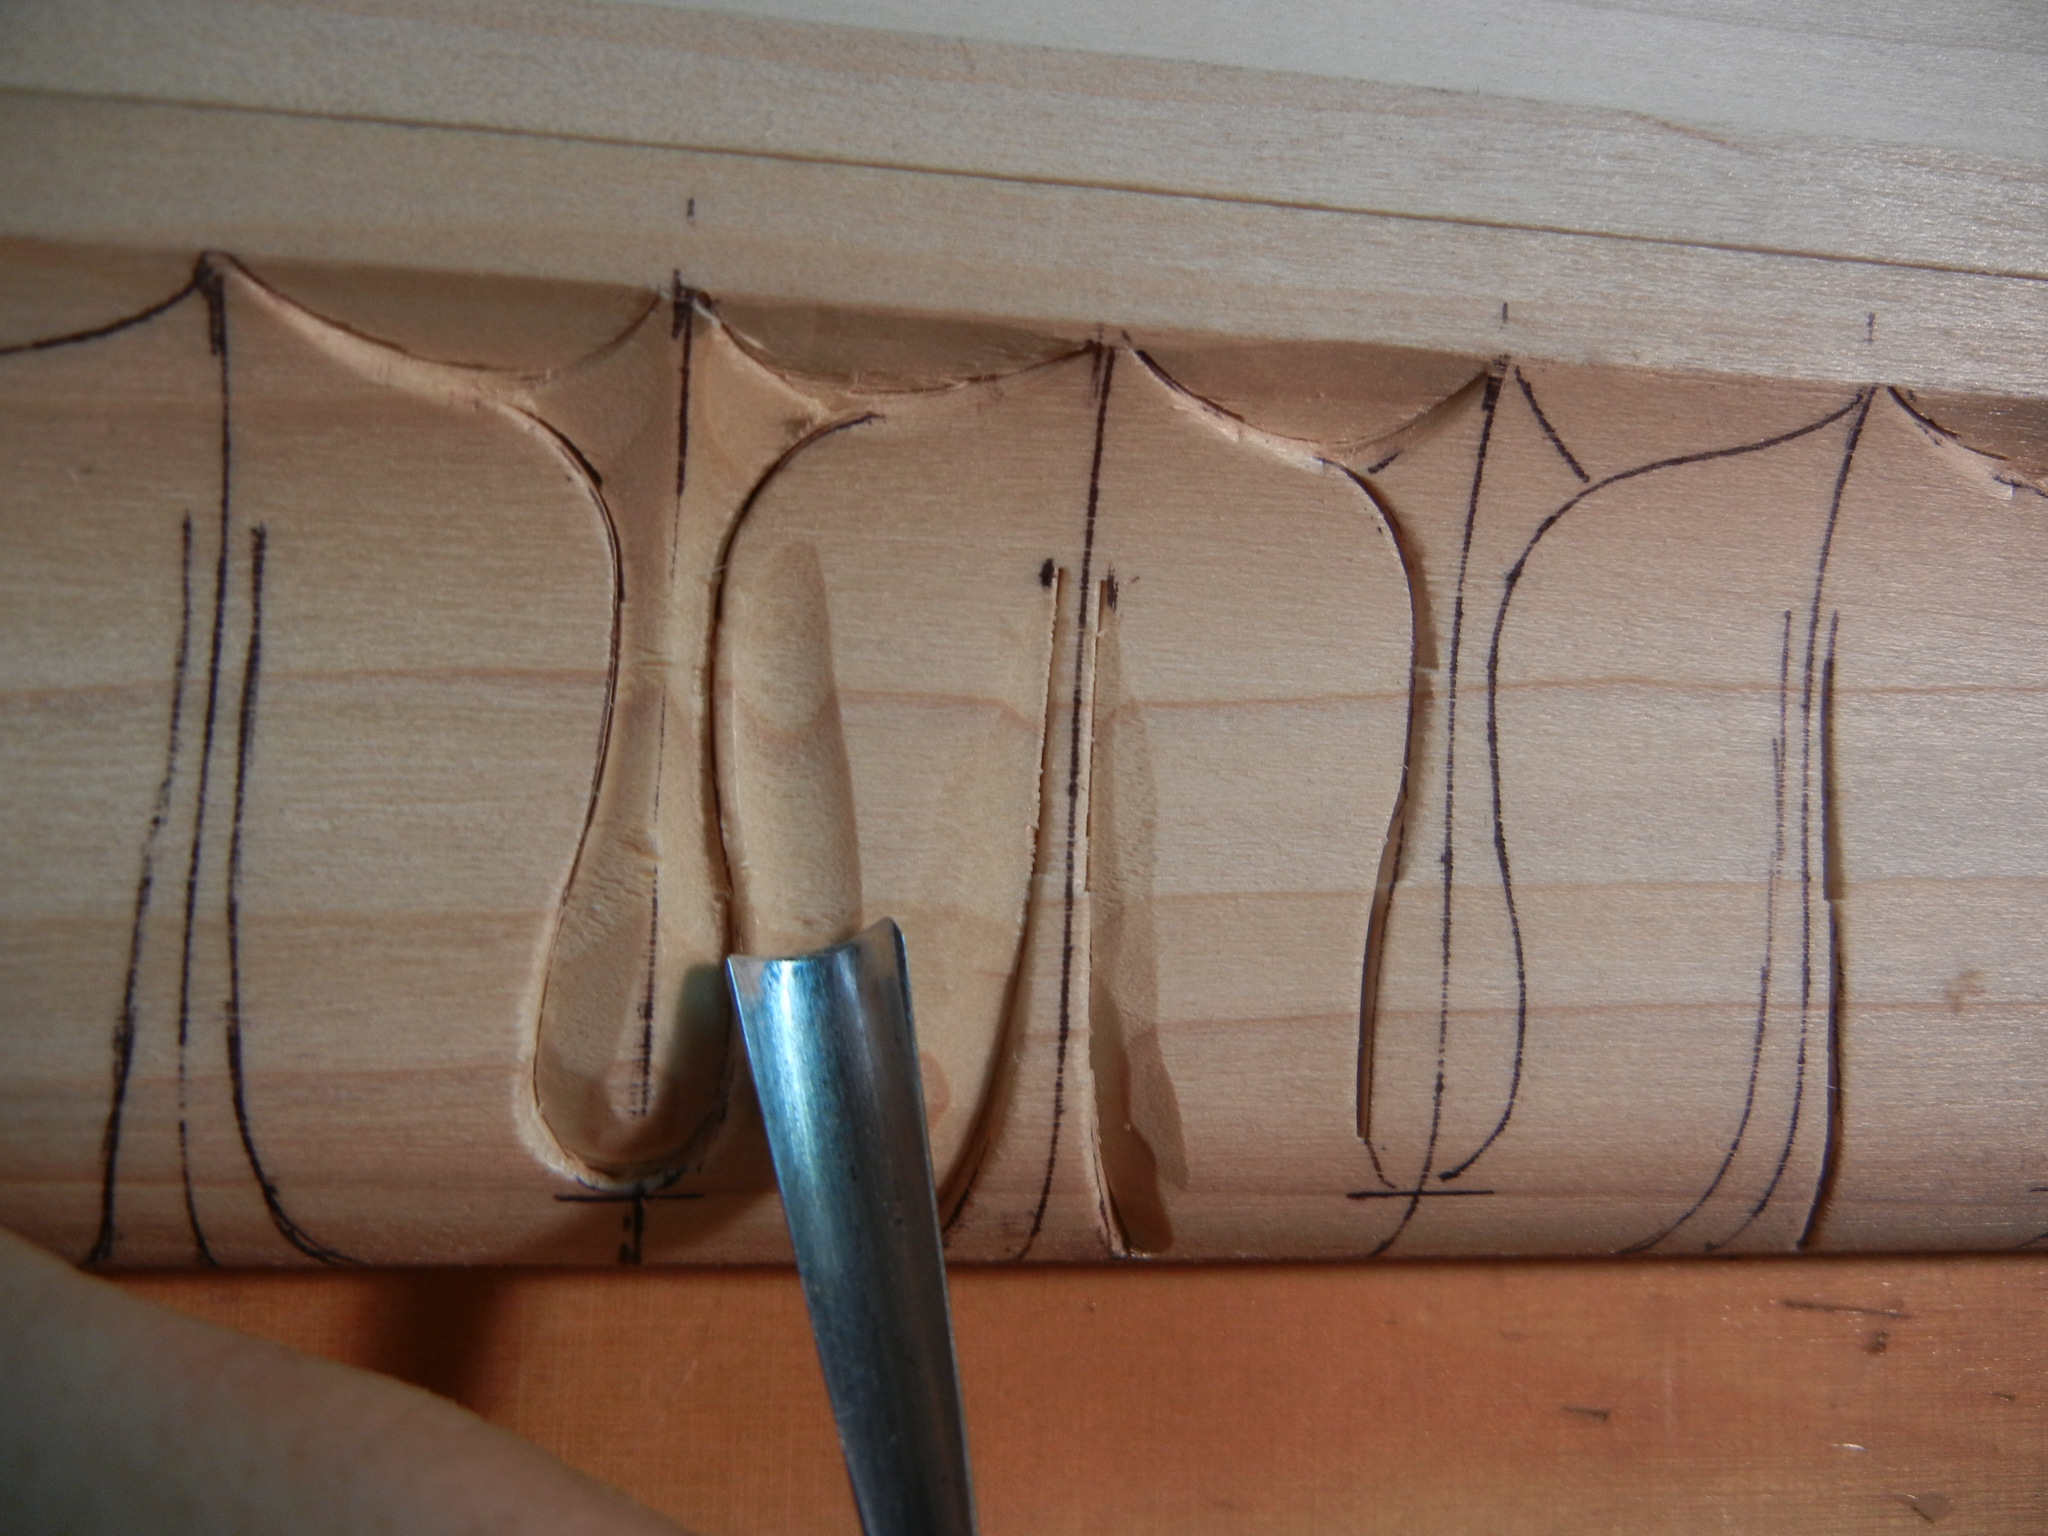
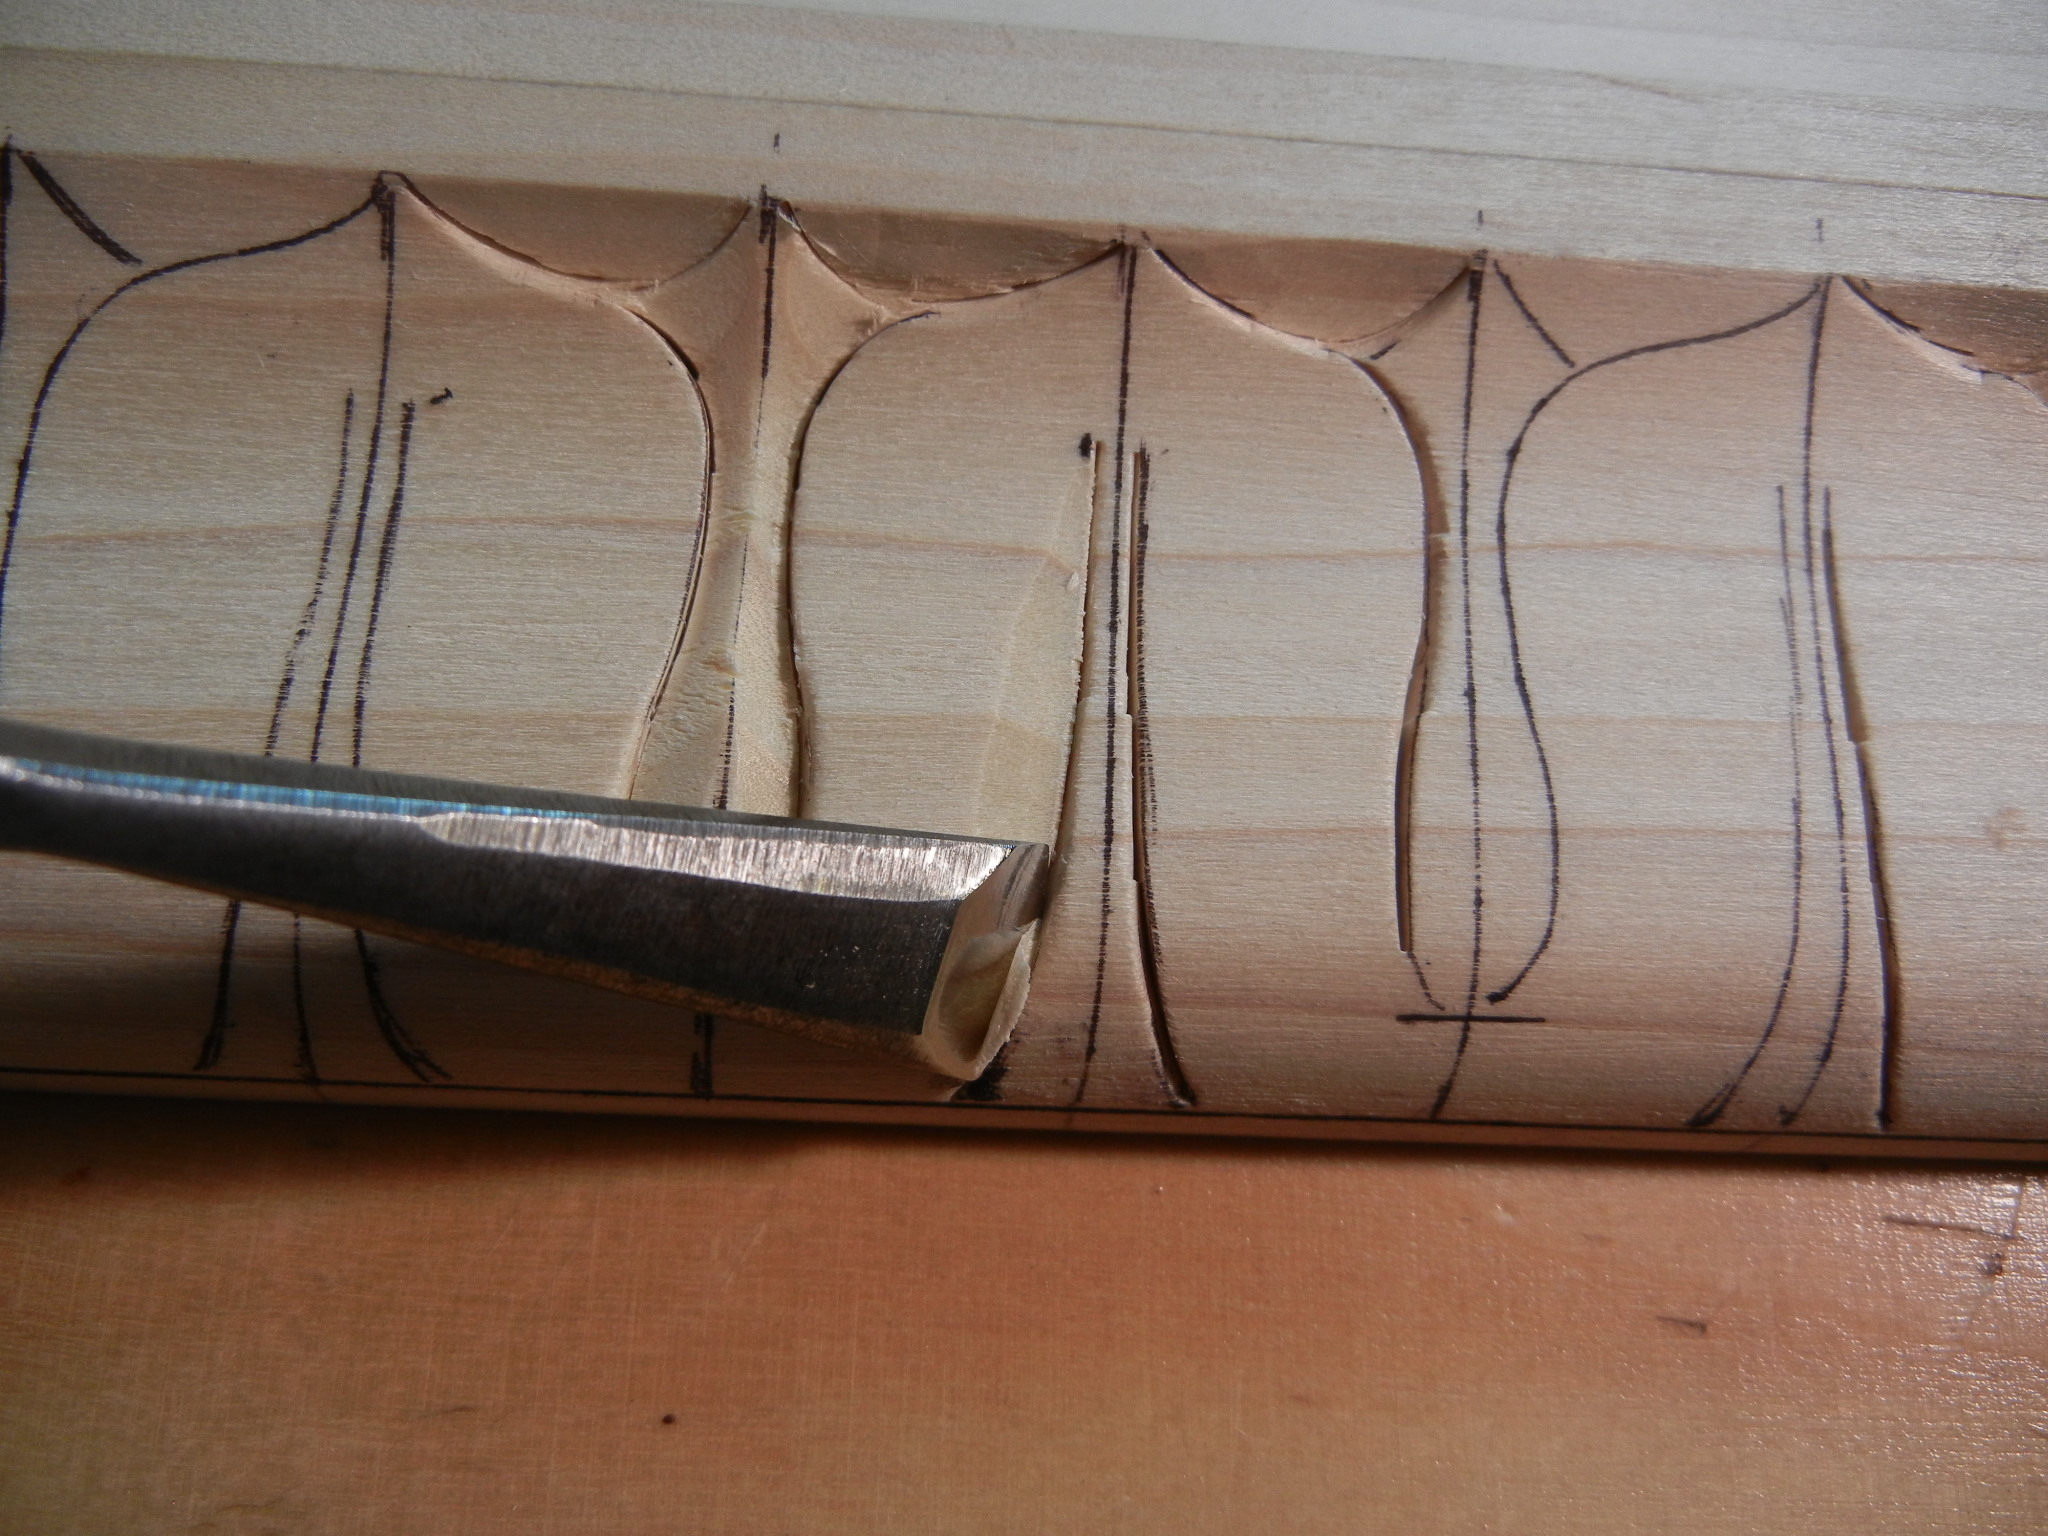
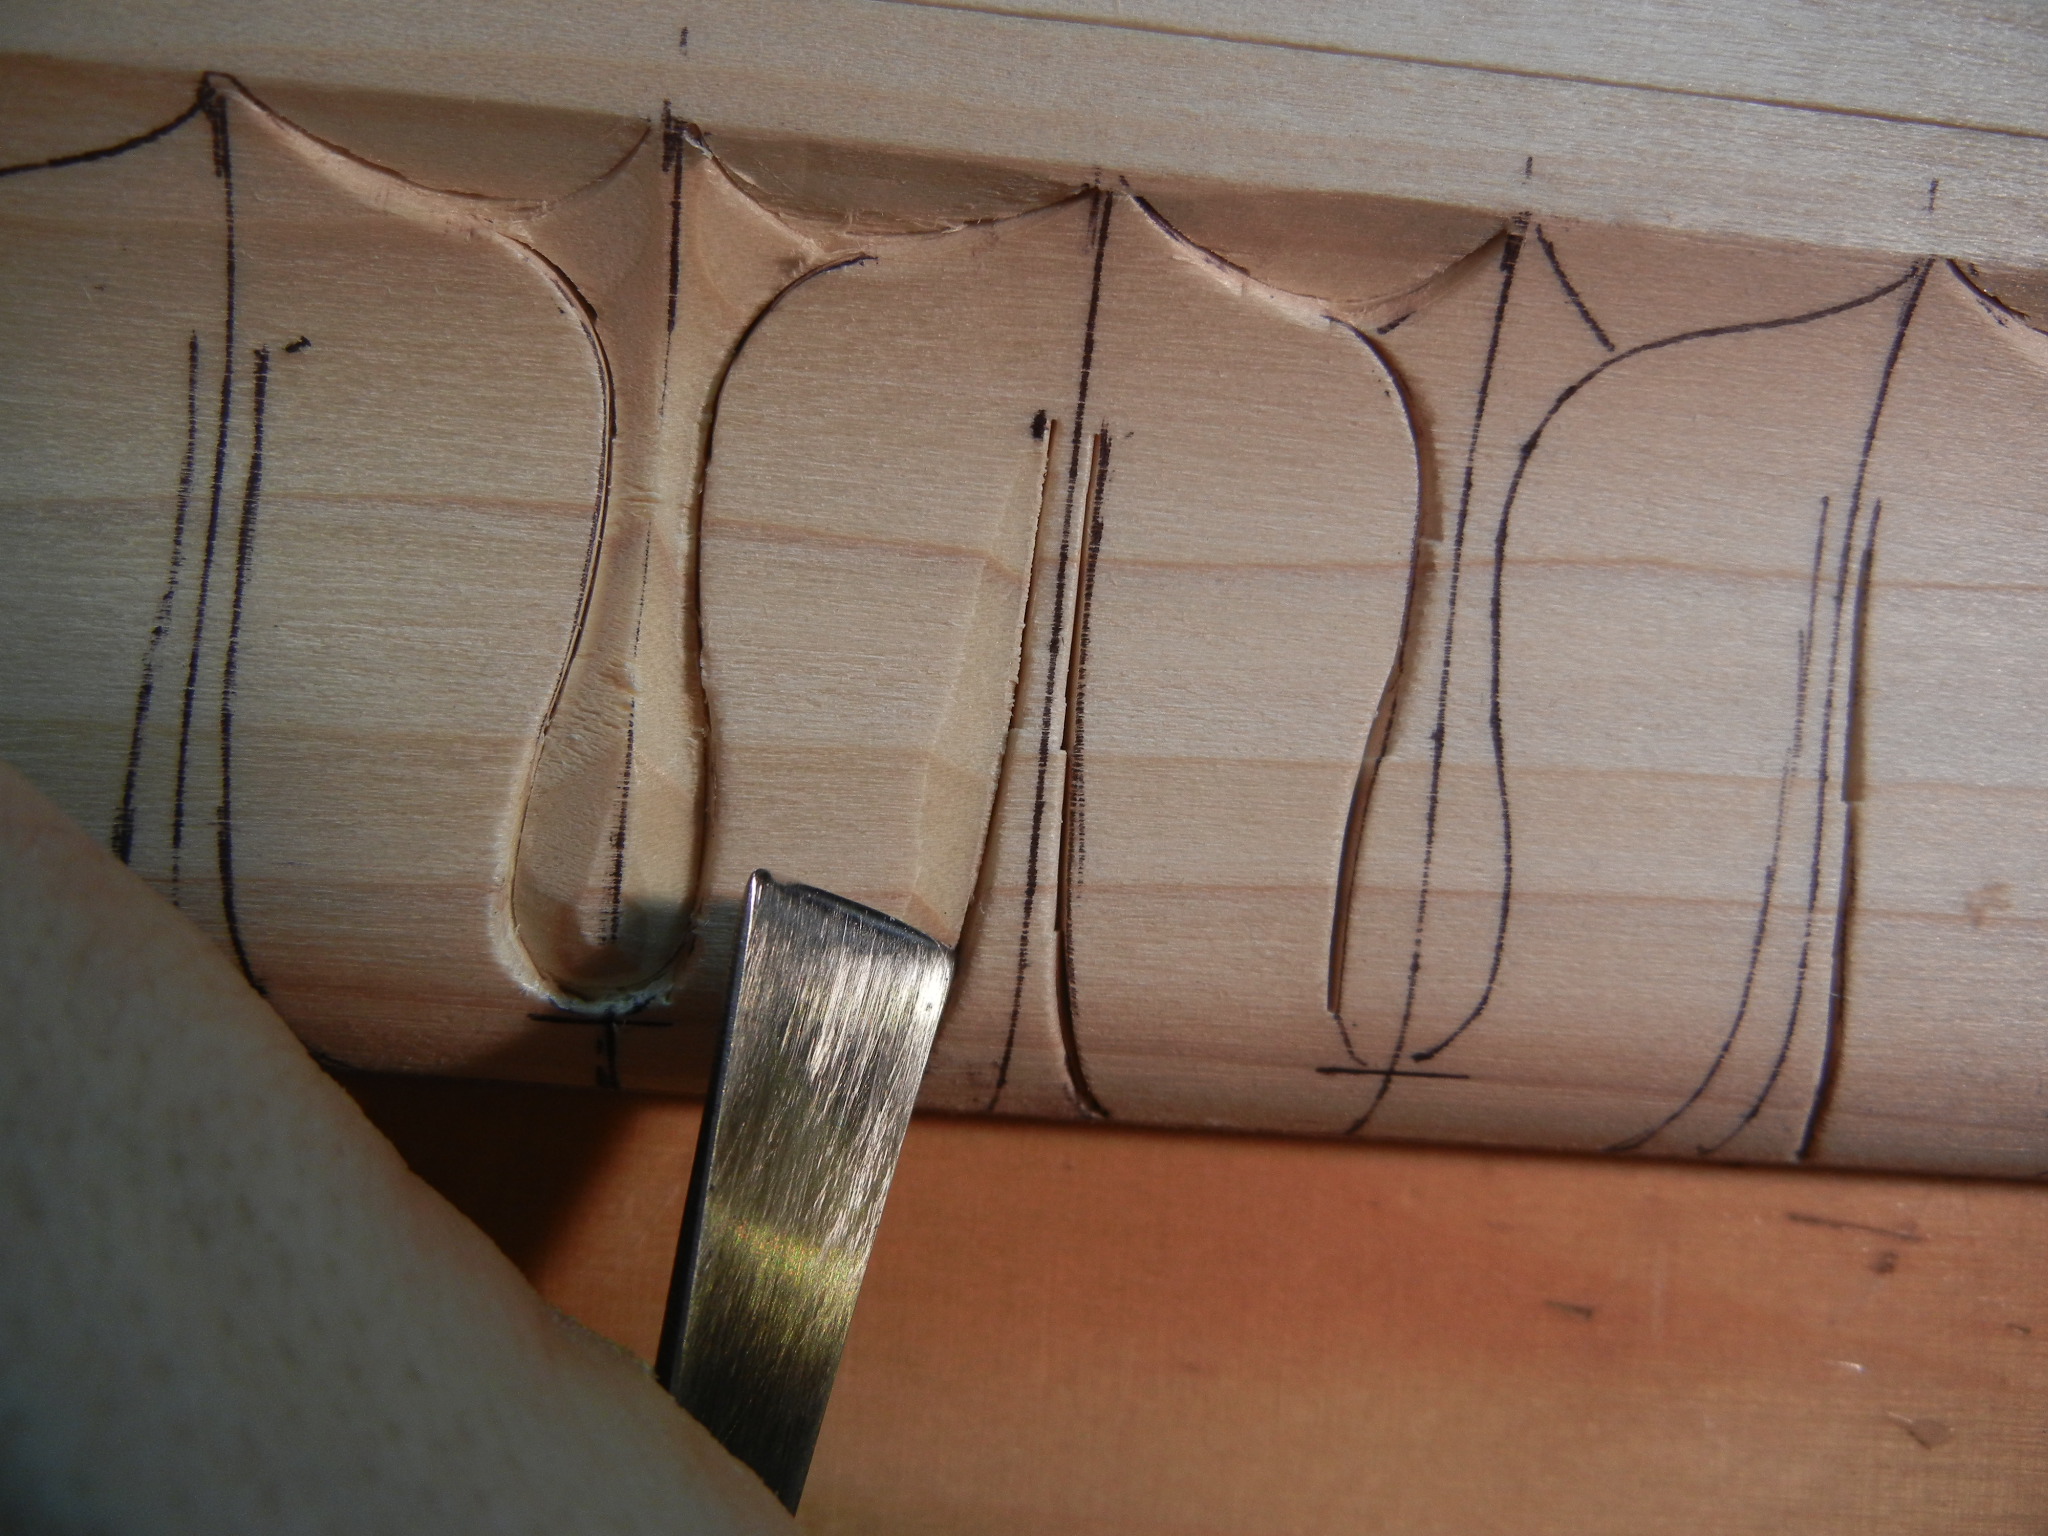
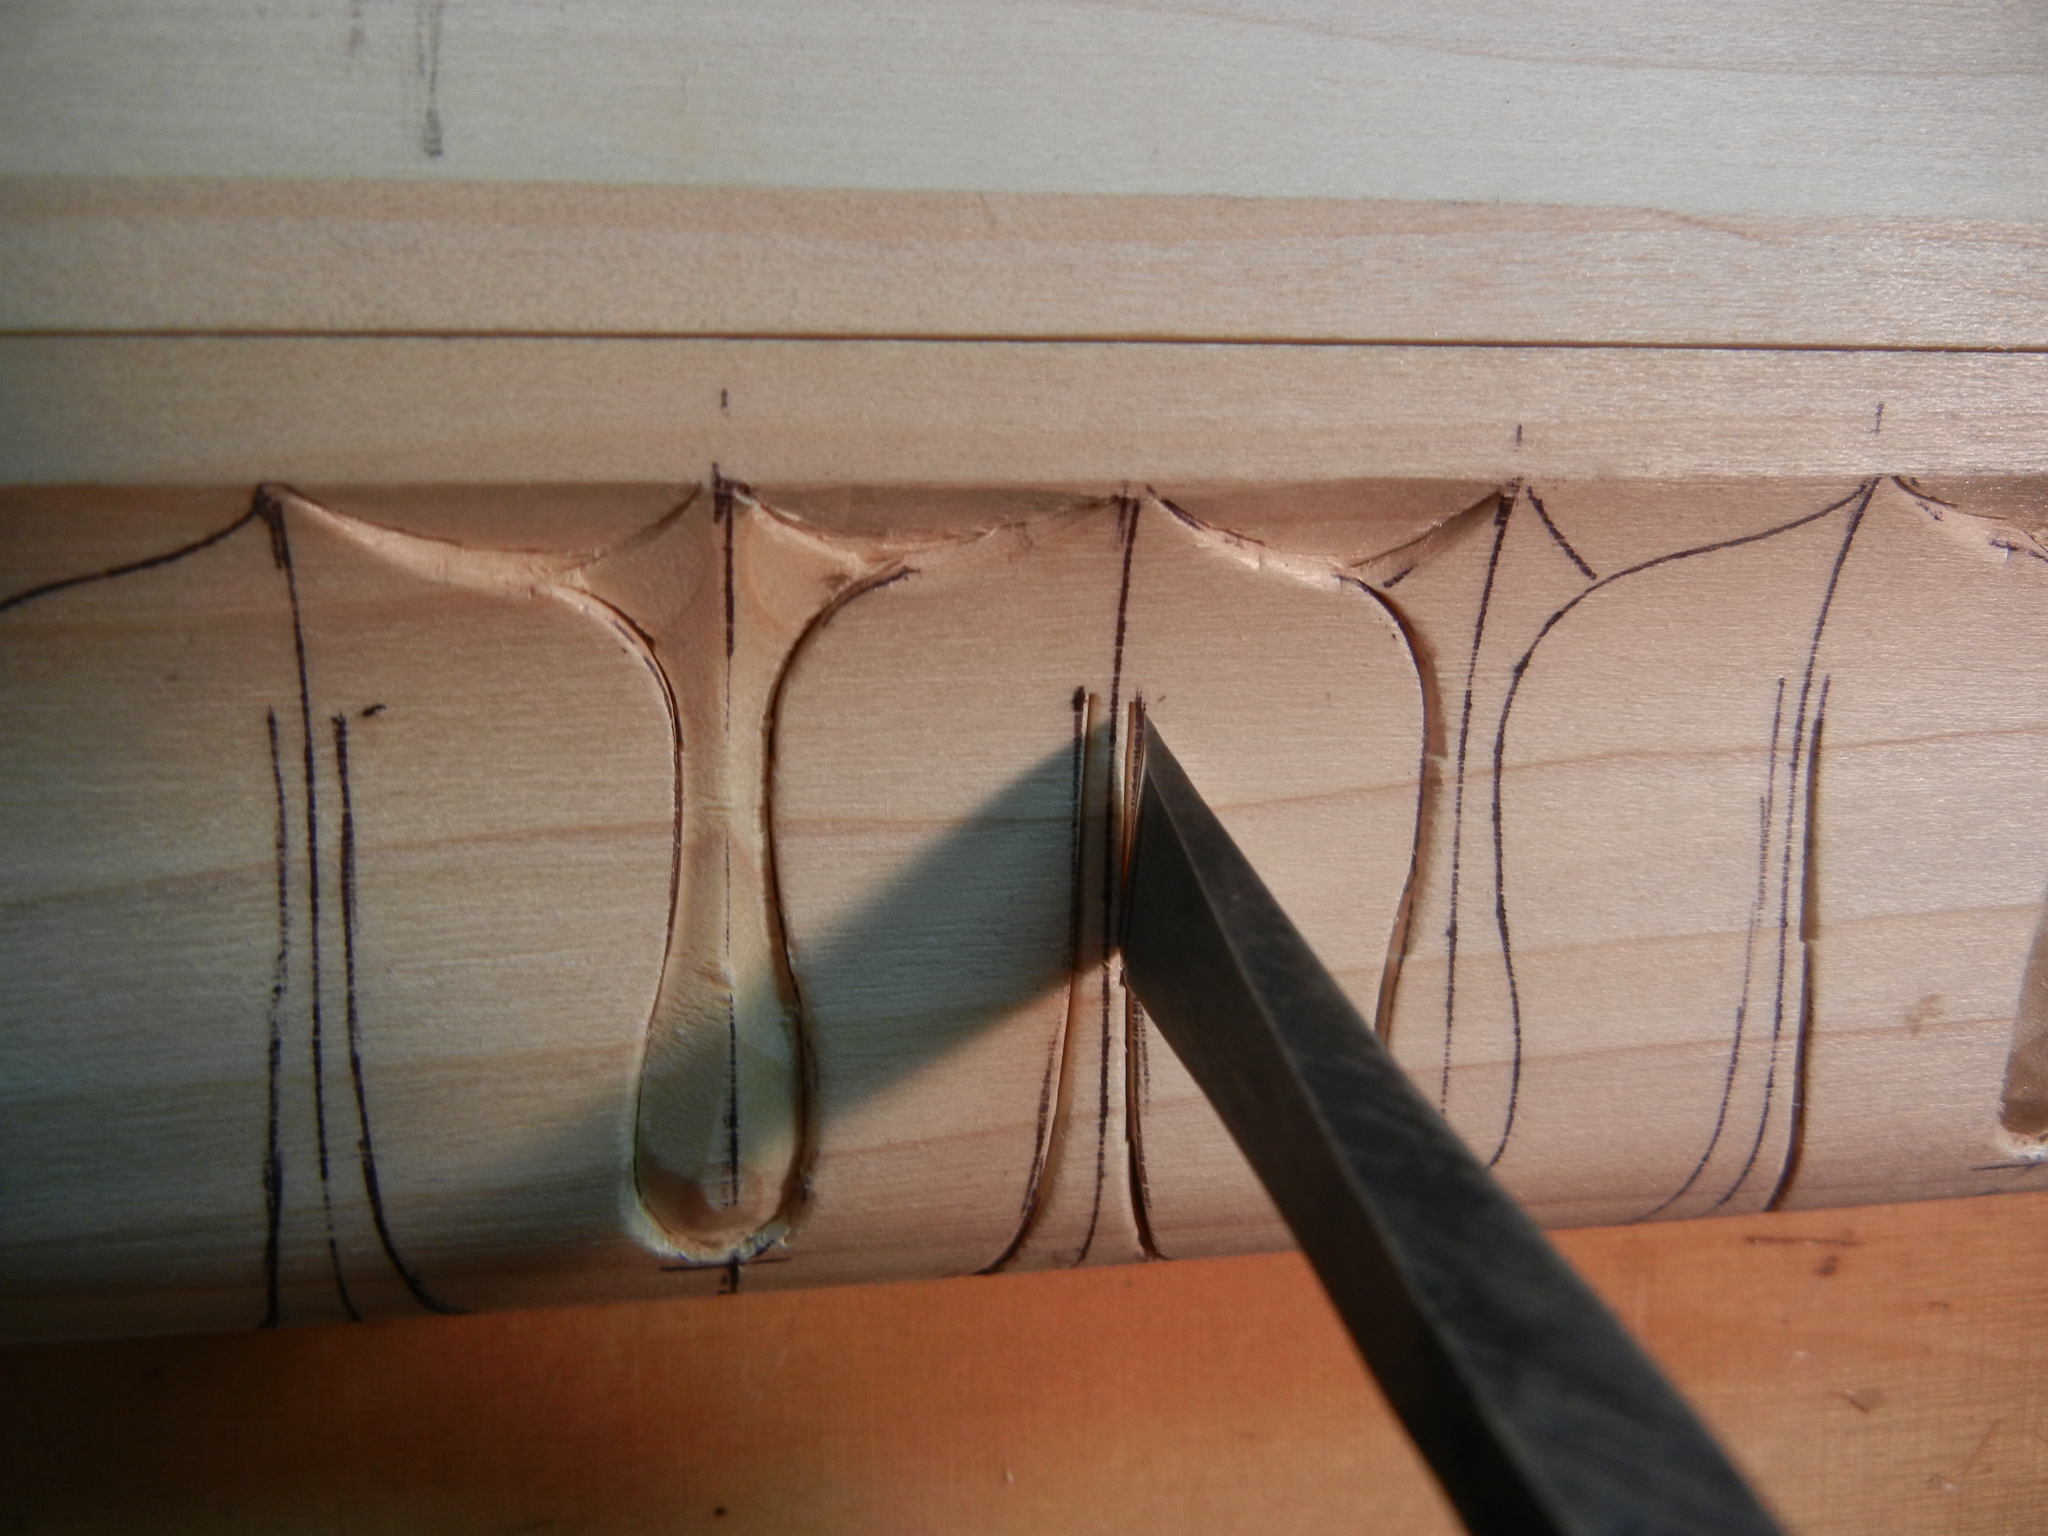
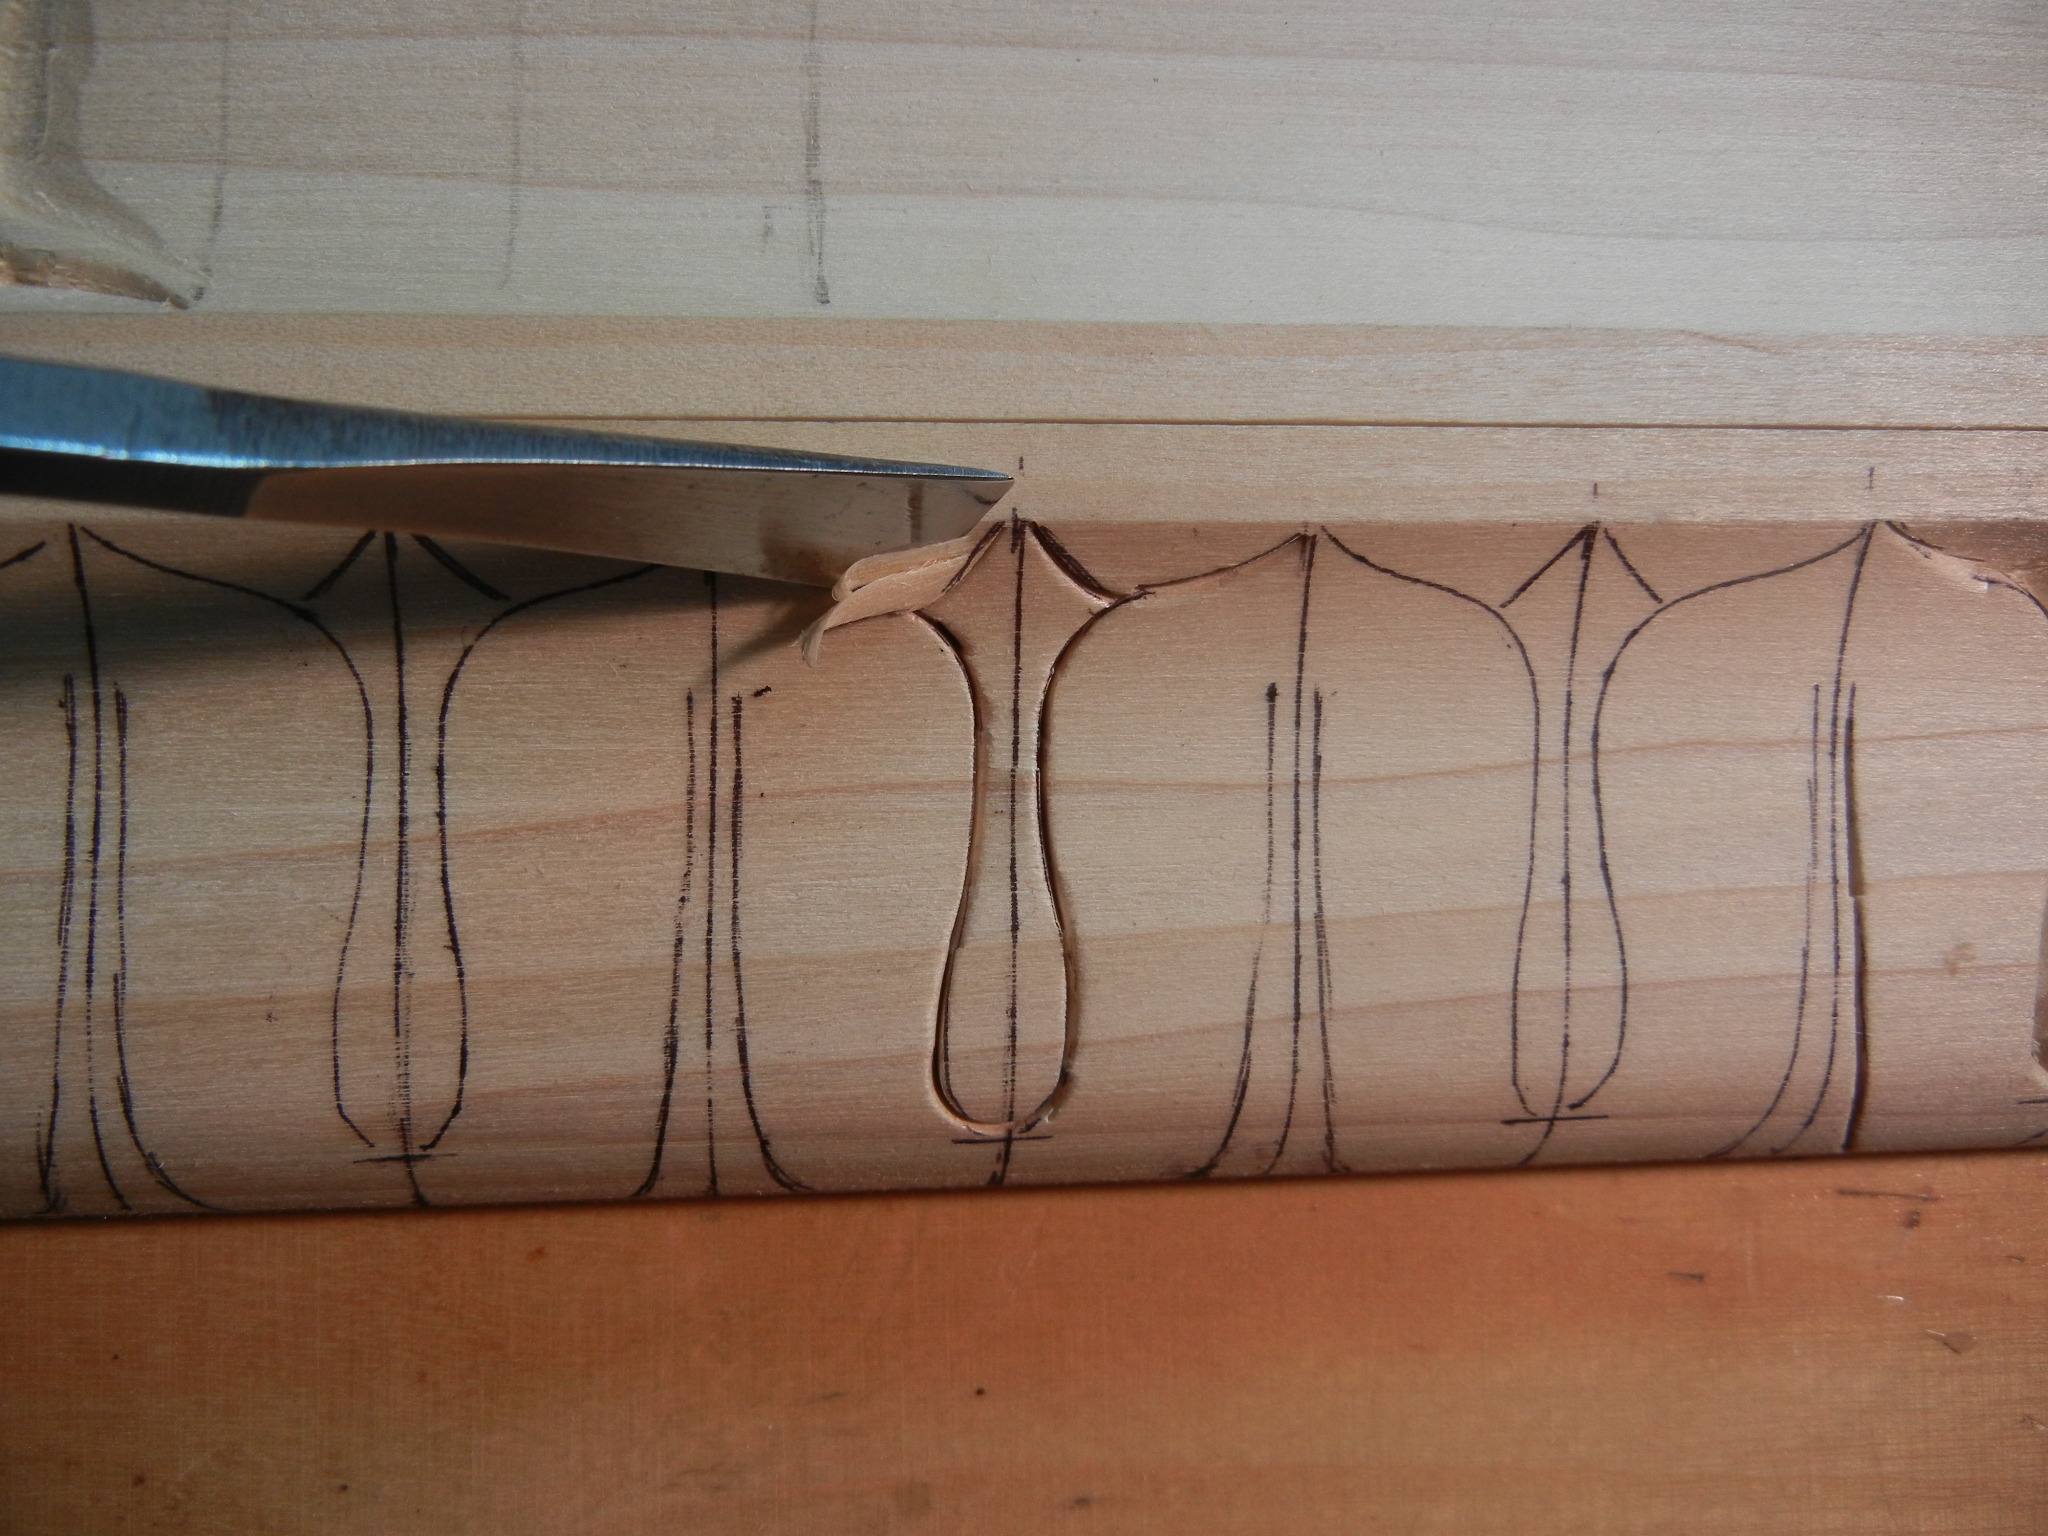
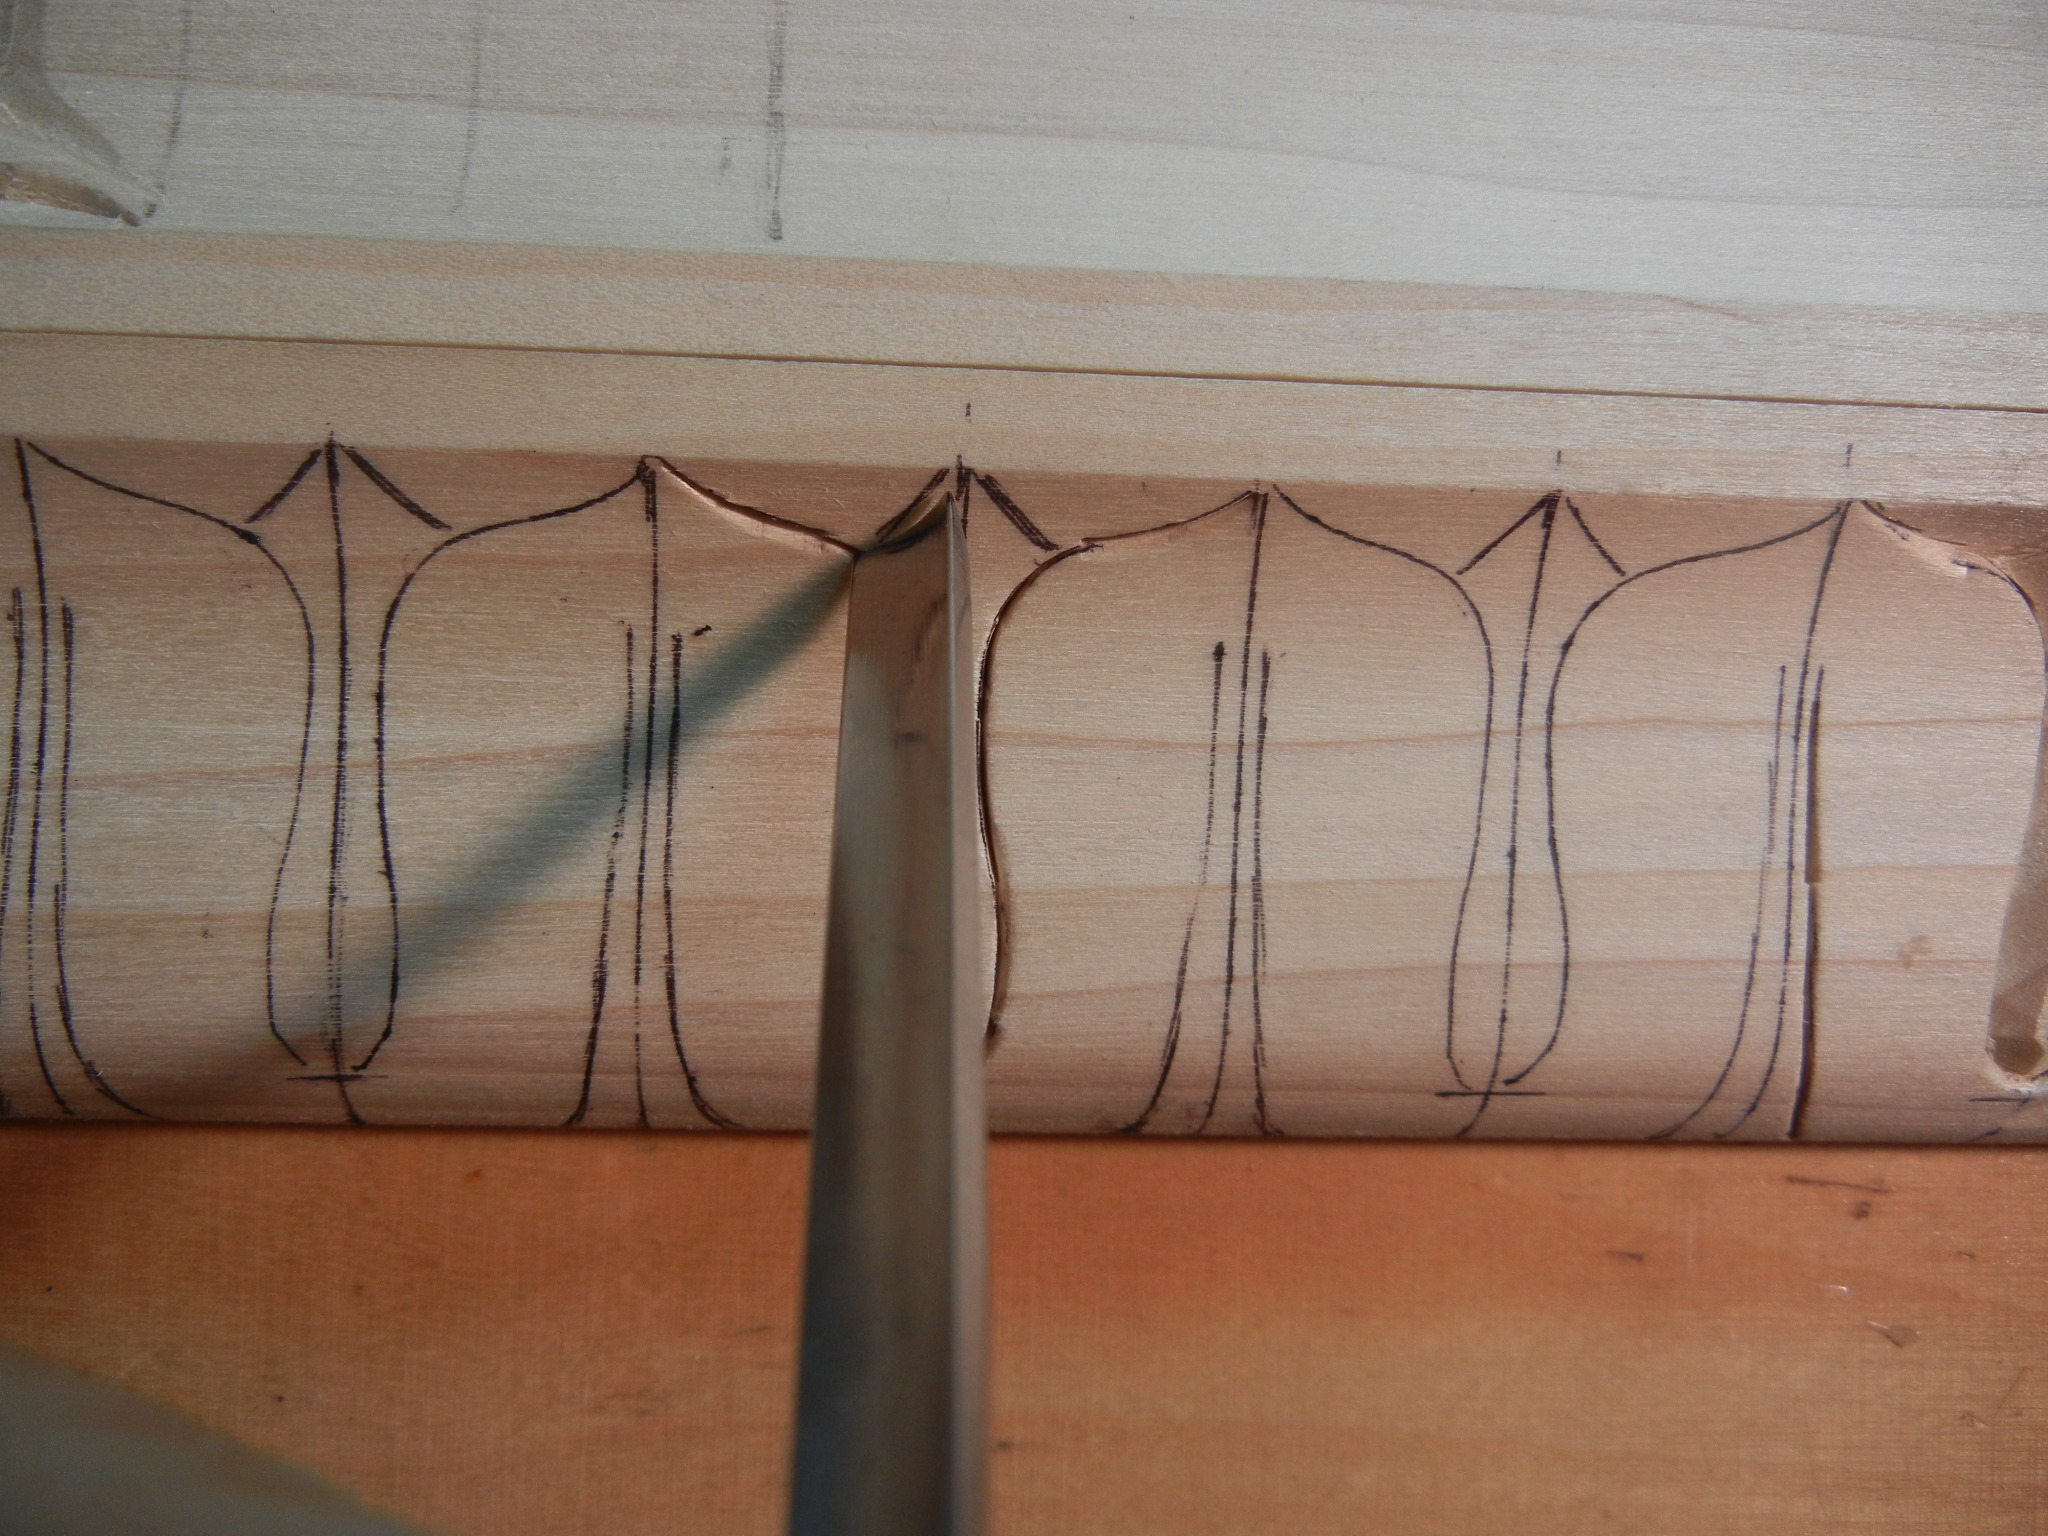
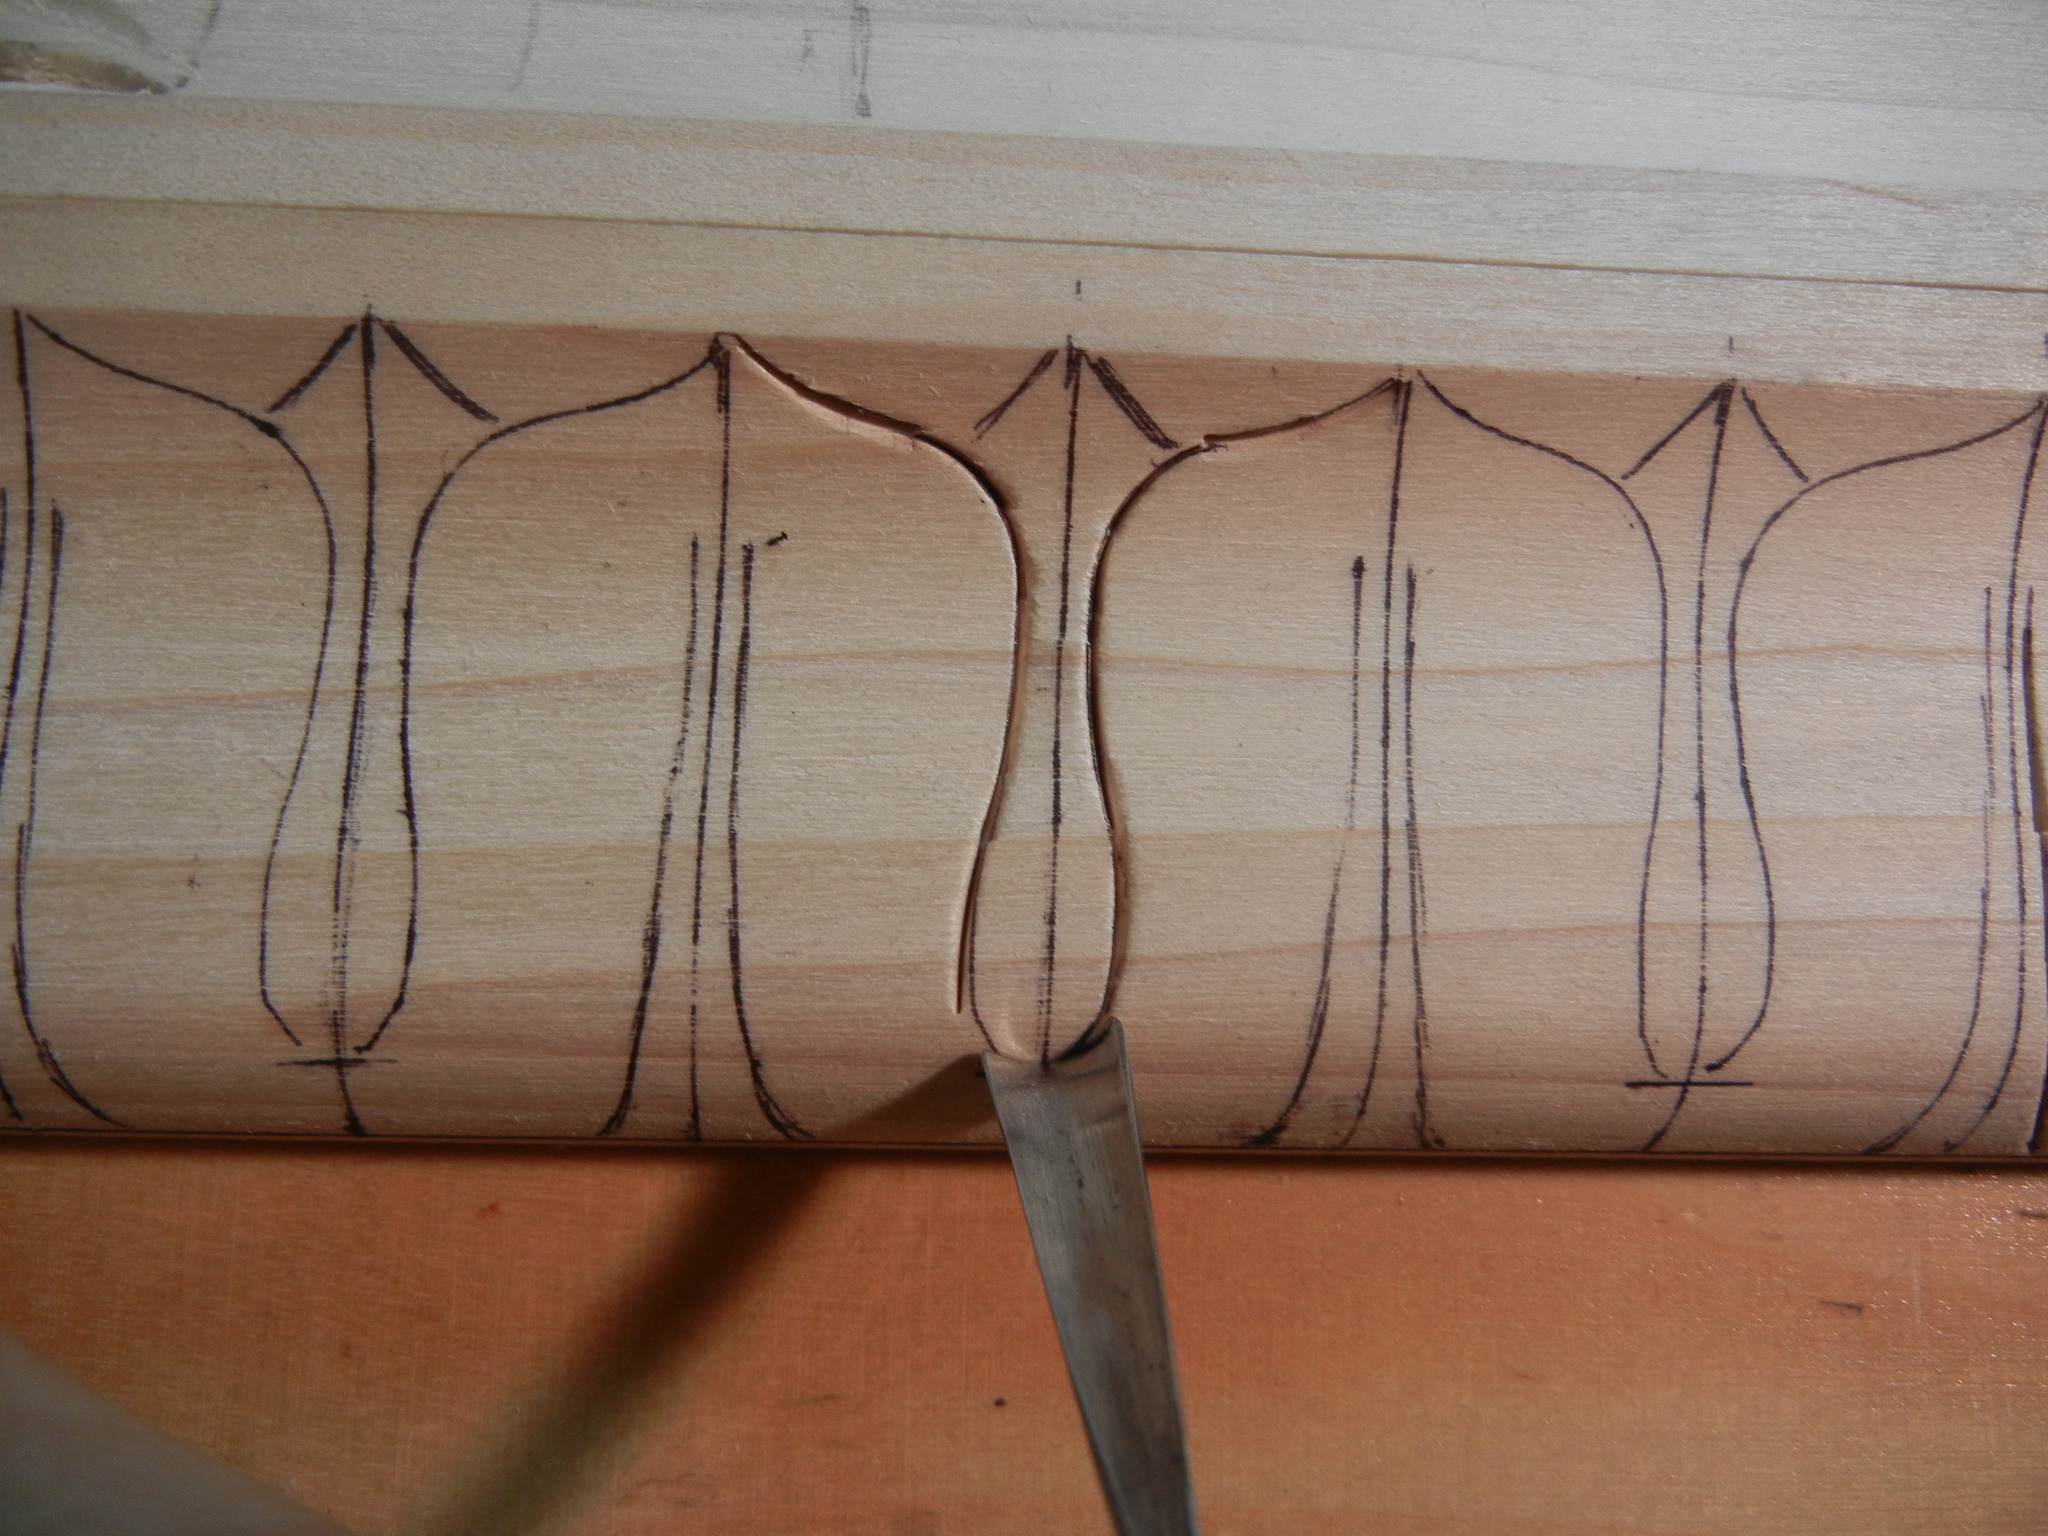
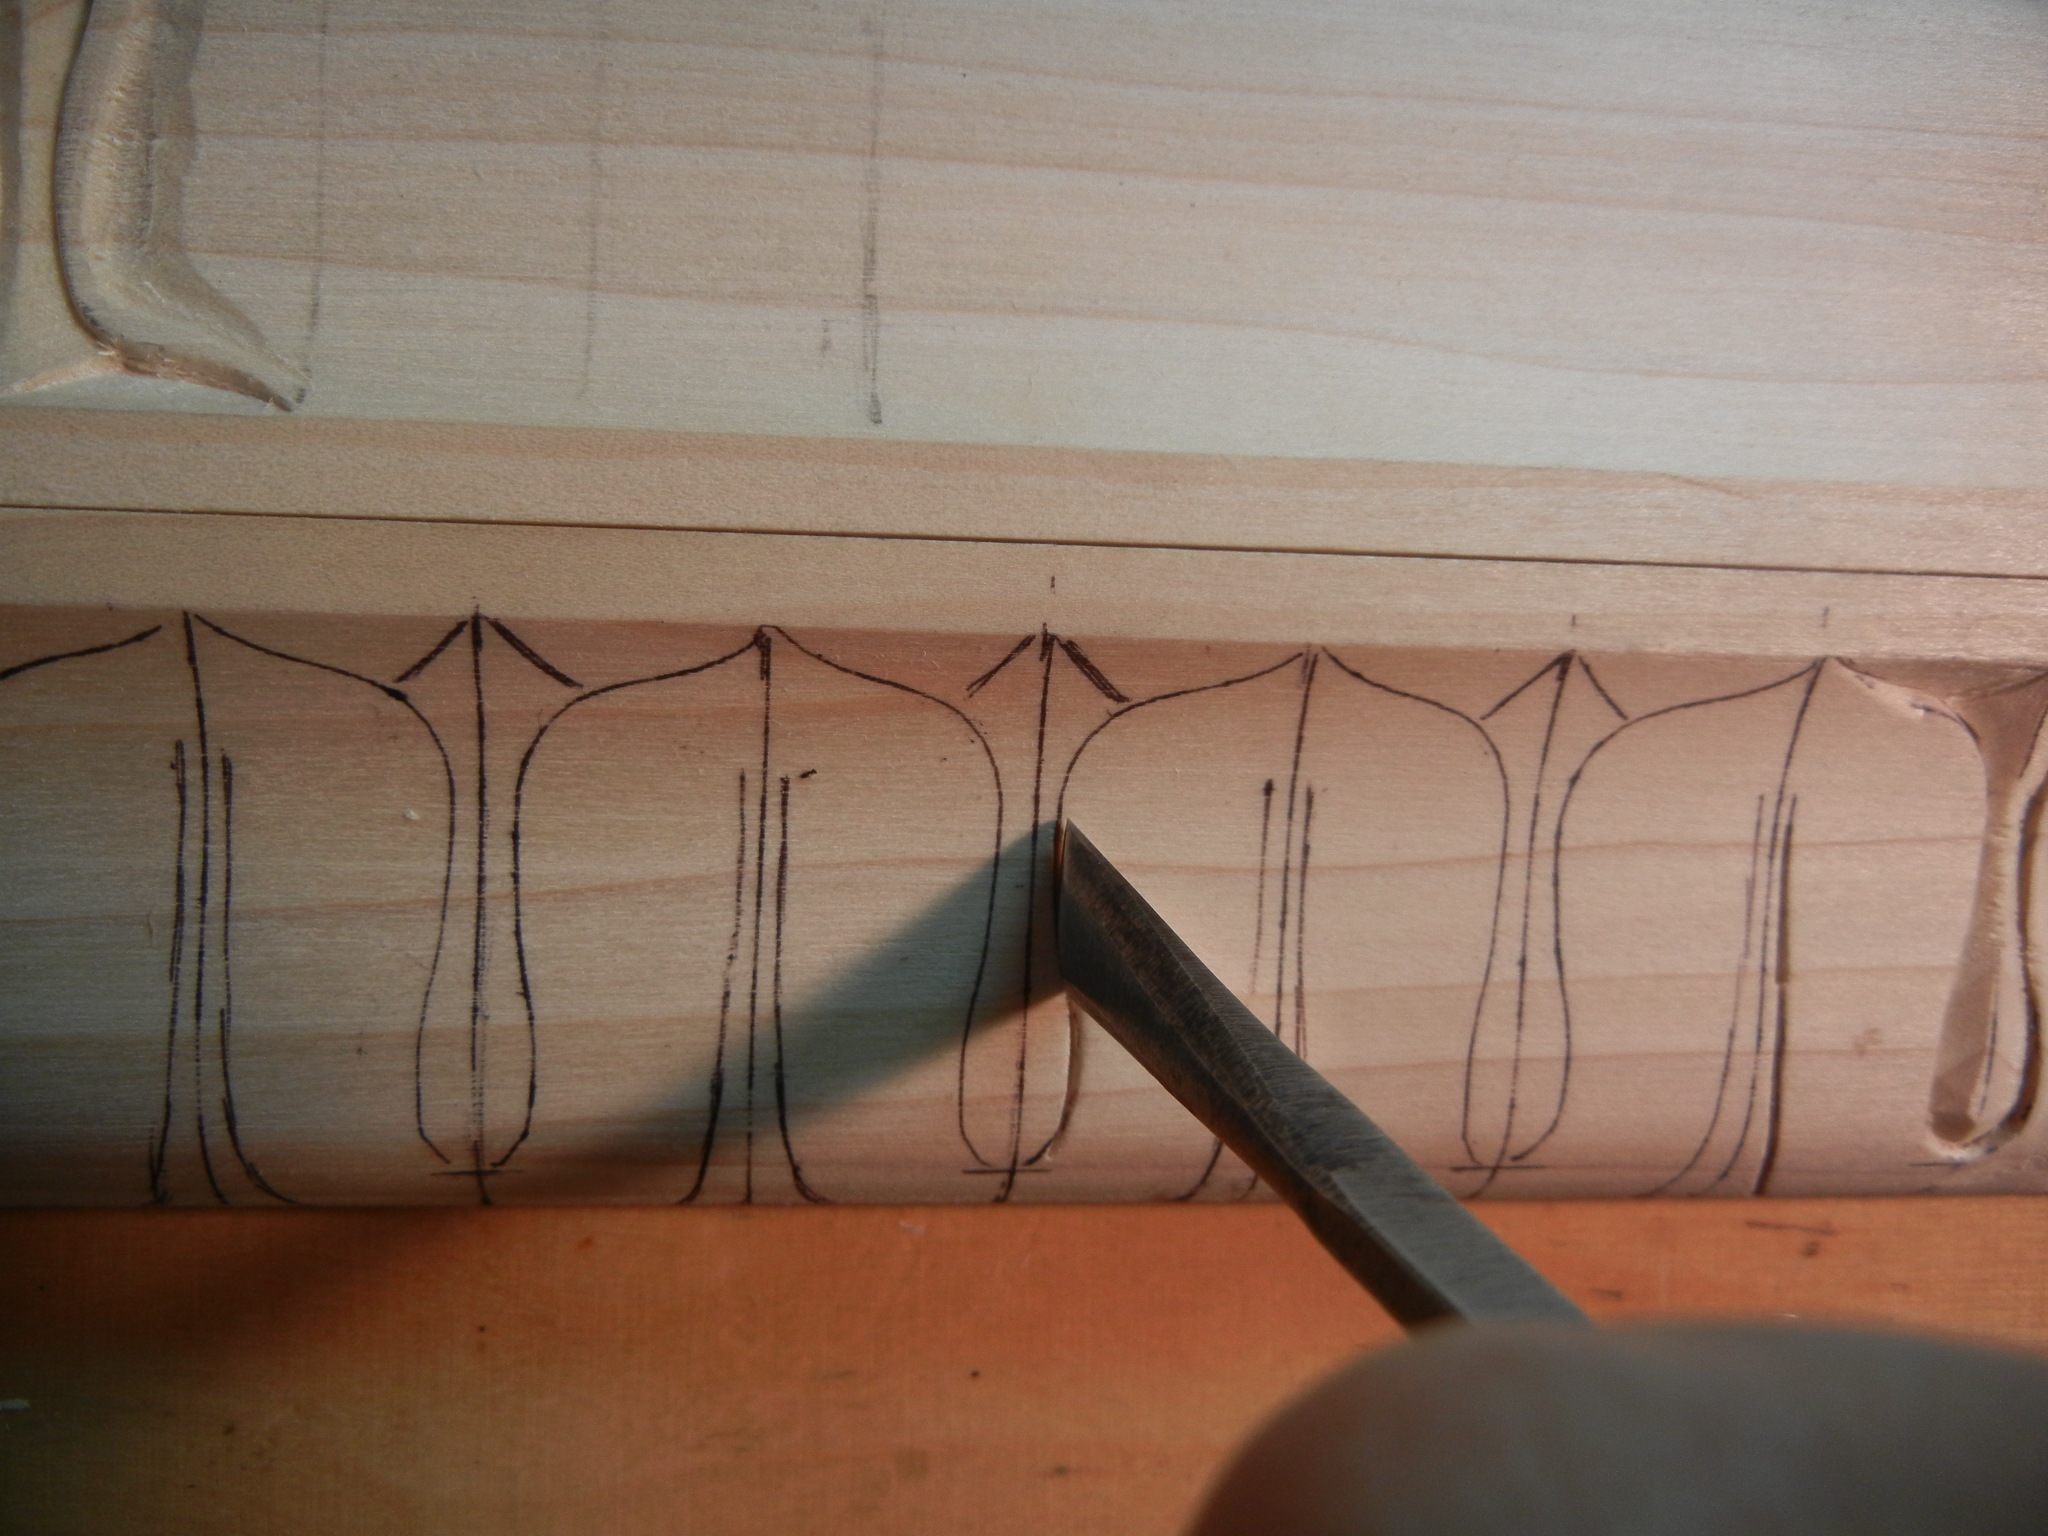
- With a #1, 14mm flat chisel, continue to make stop cuts up the vein line where the vein gets straighter
-
- With a #3, 14mm make a stop cut along the lower part of both sides of the vein
-

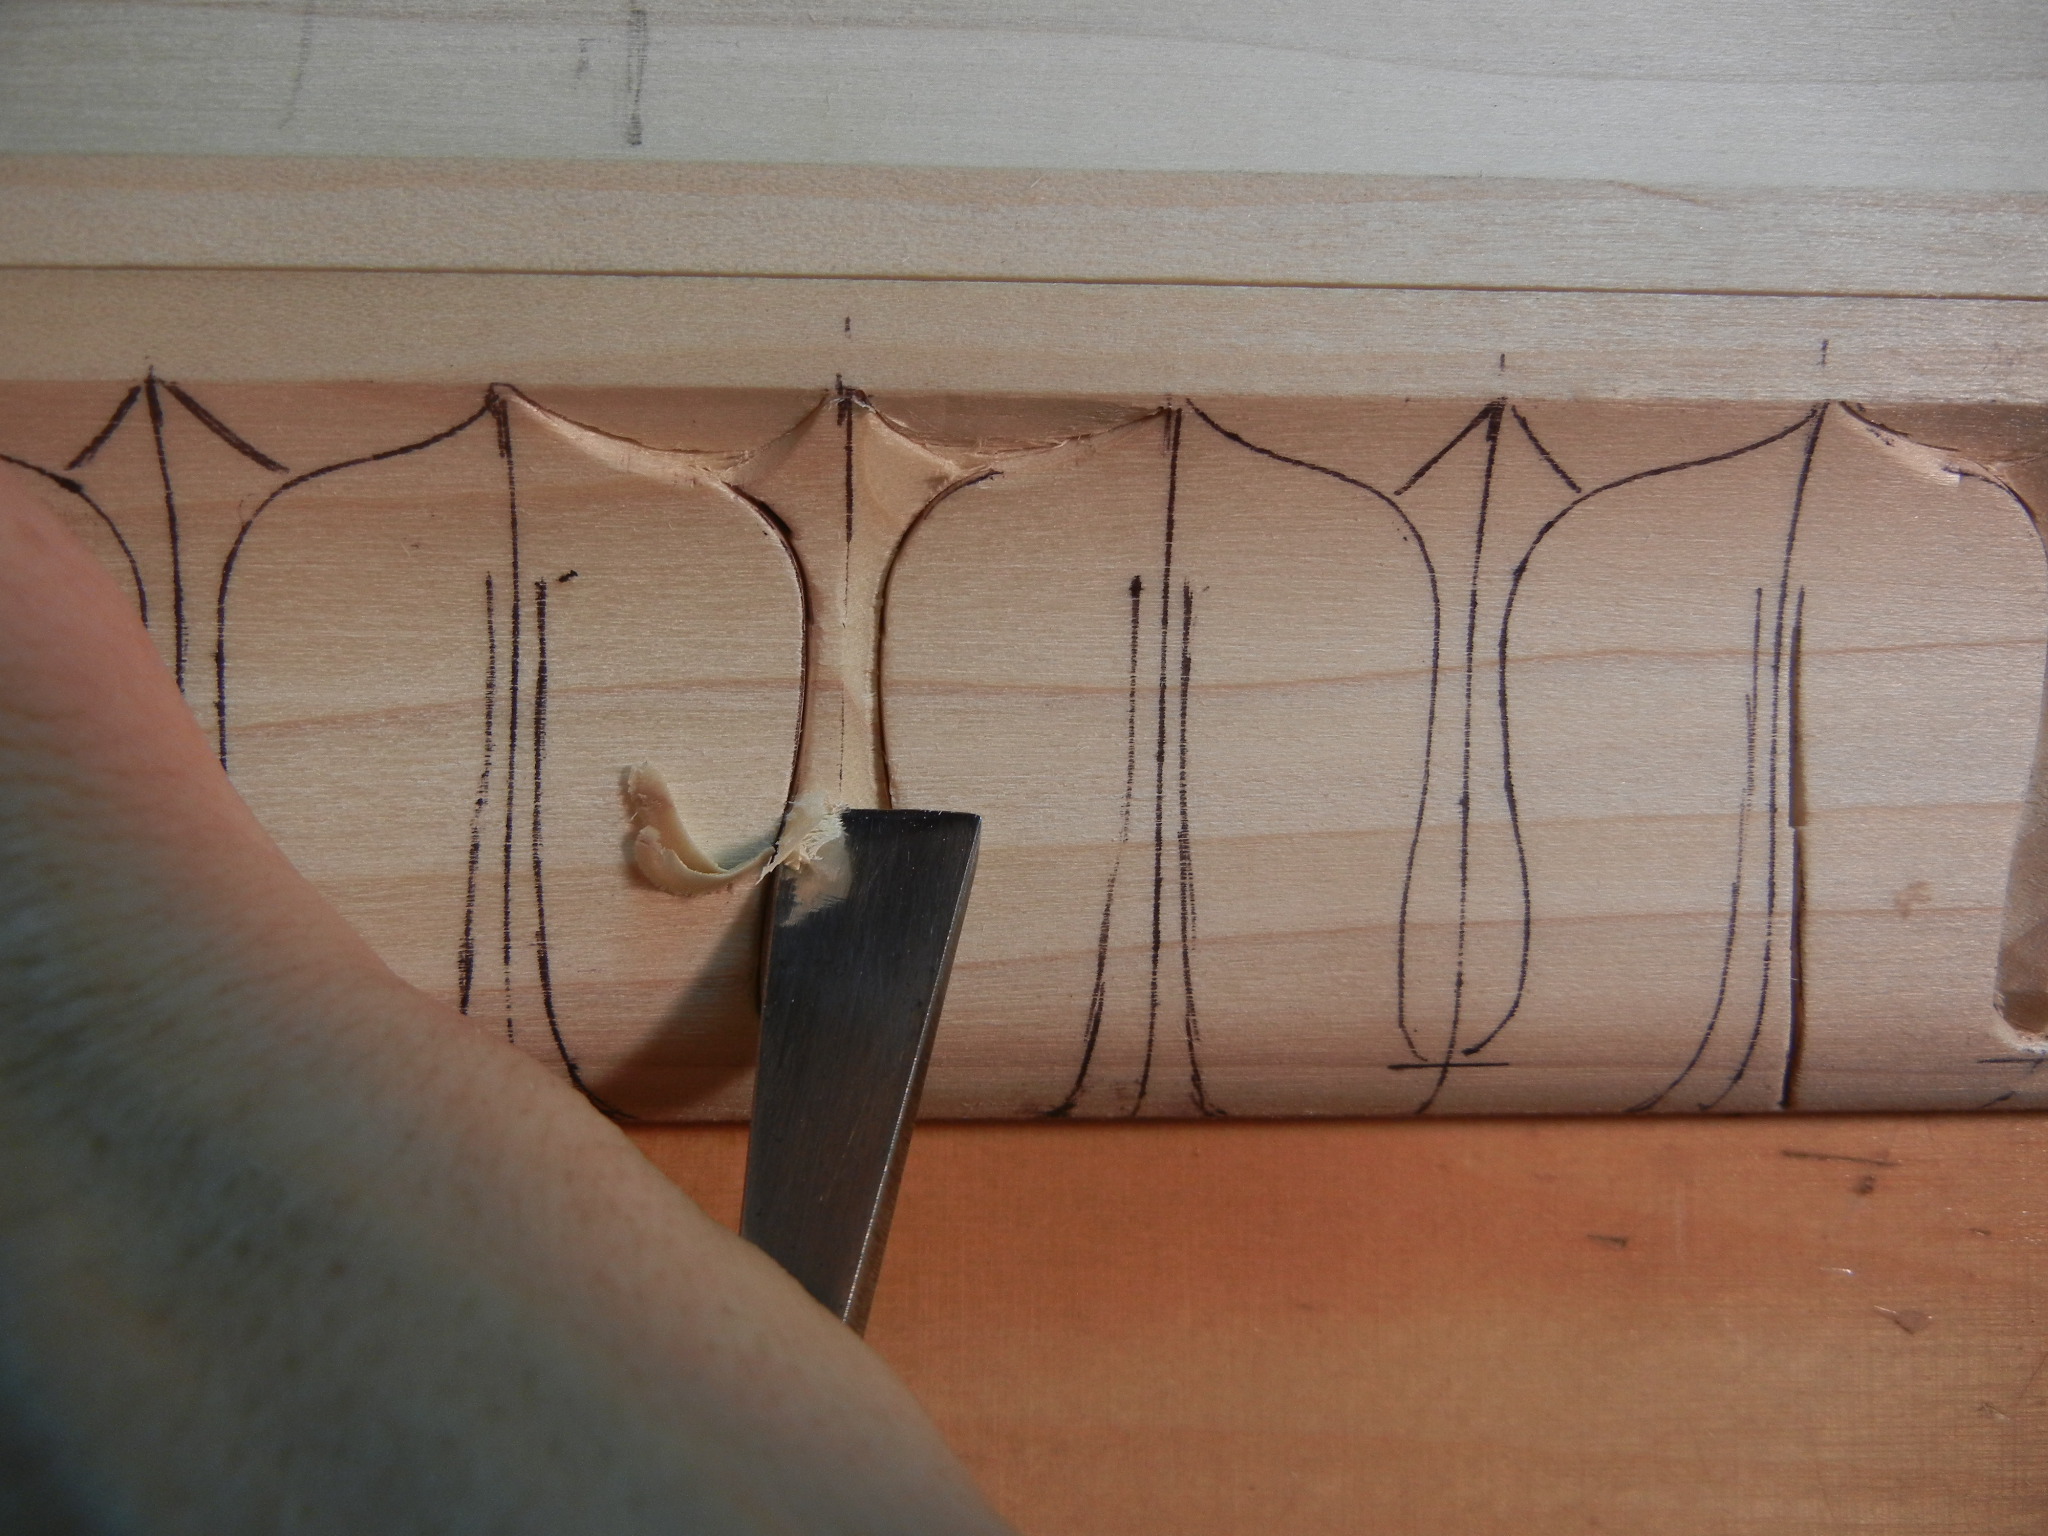
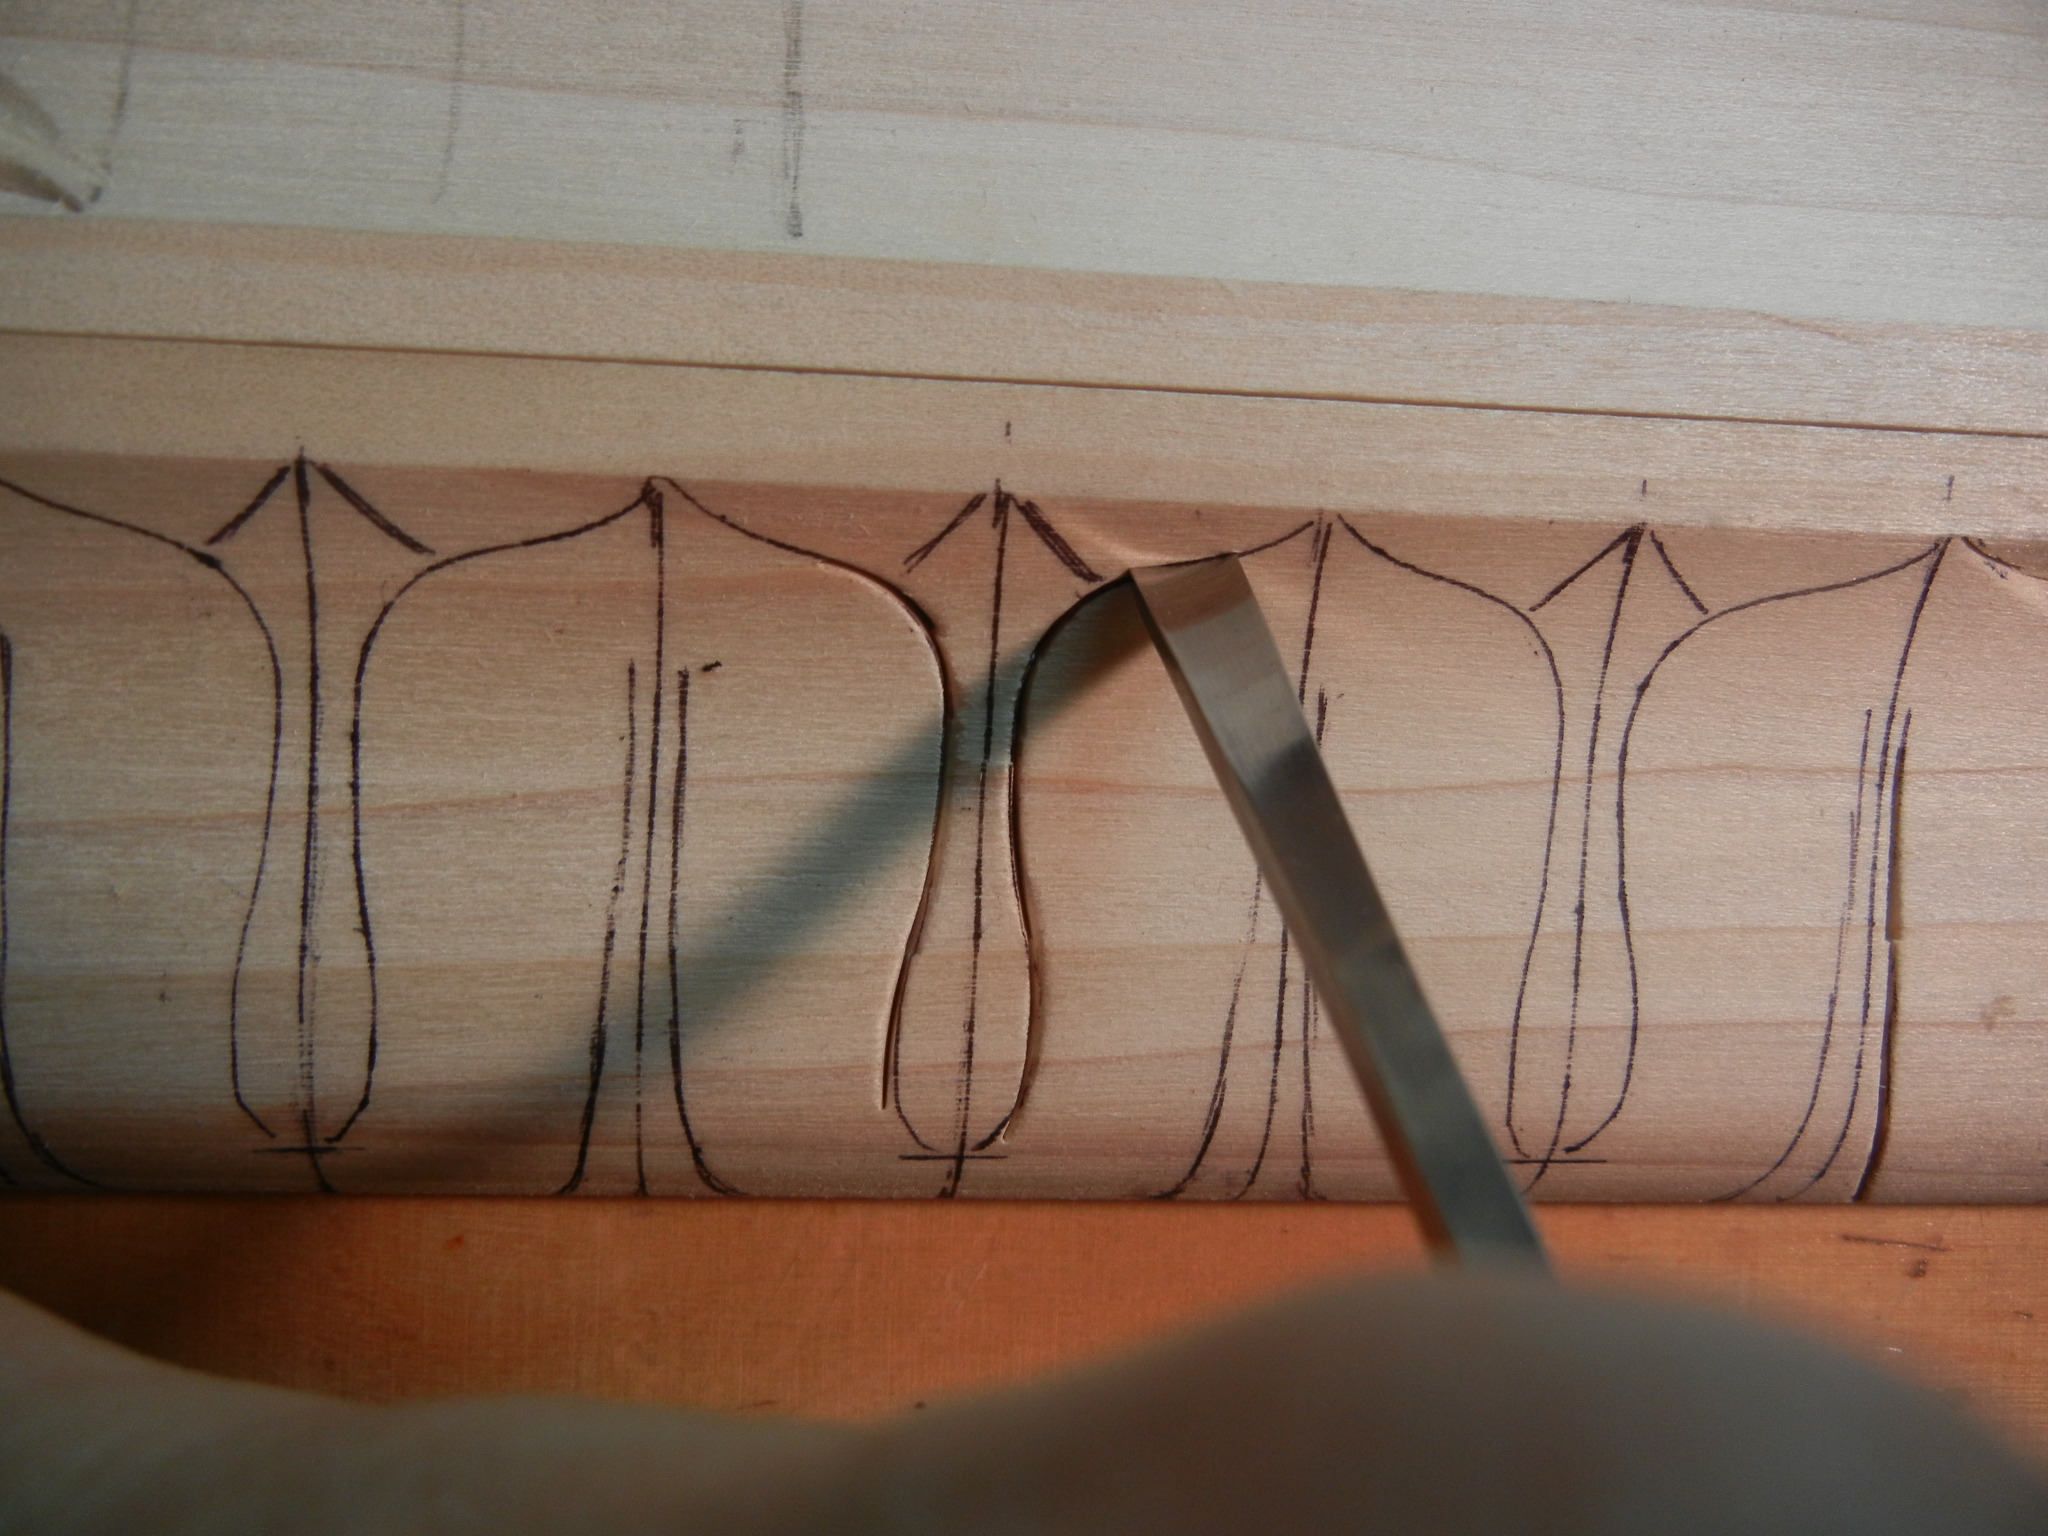
- With a #3, 6mm lower down the bottom section of this smaller leaf

-

- Continue to carve down other side of this smaller leaf – leave a high corner in the center of this leaf
-

- With a #3, 14mm, lower down this small leaf (the leaf positioned underneath) to give the appearance of it going under large leaf
-
- With a #3, 14mm lower down this section at an angle
-
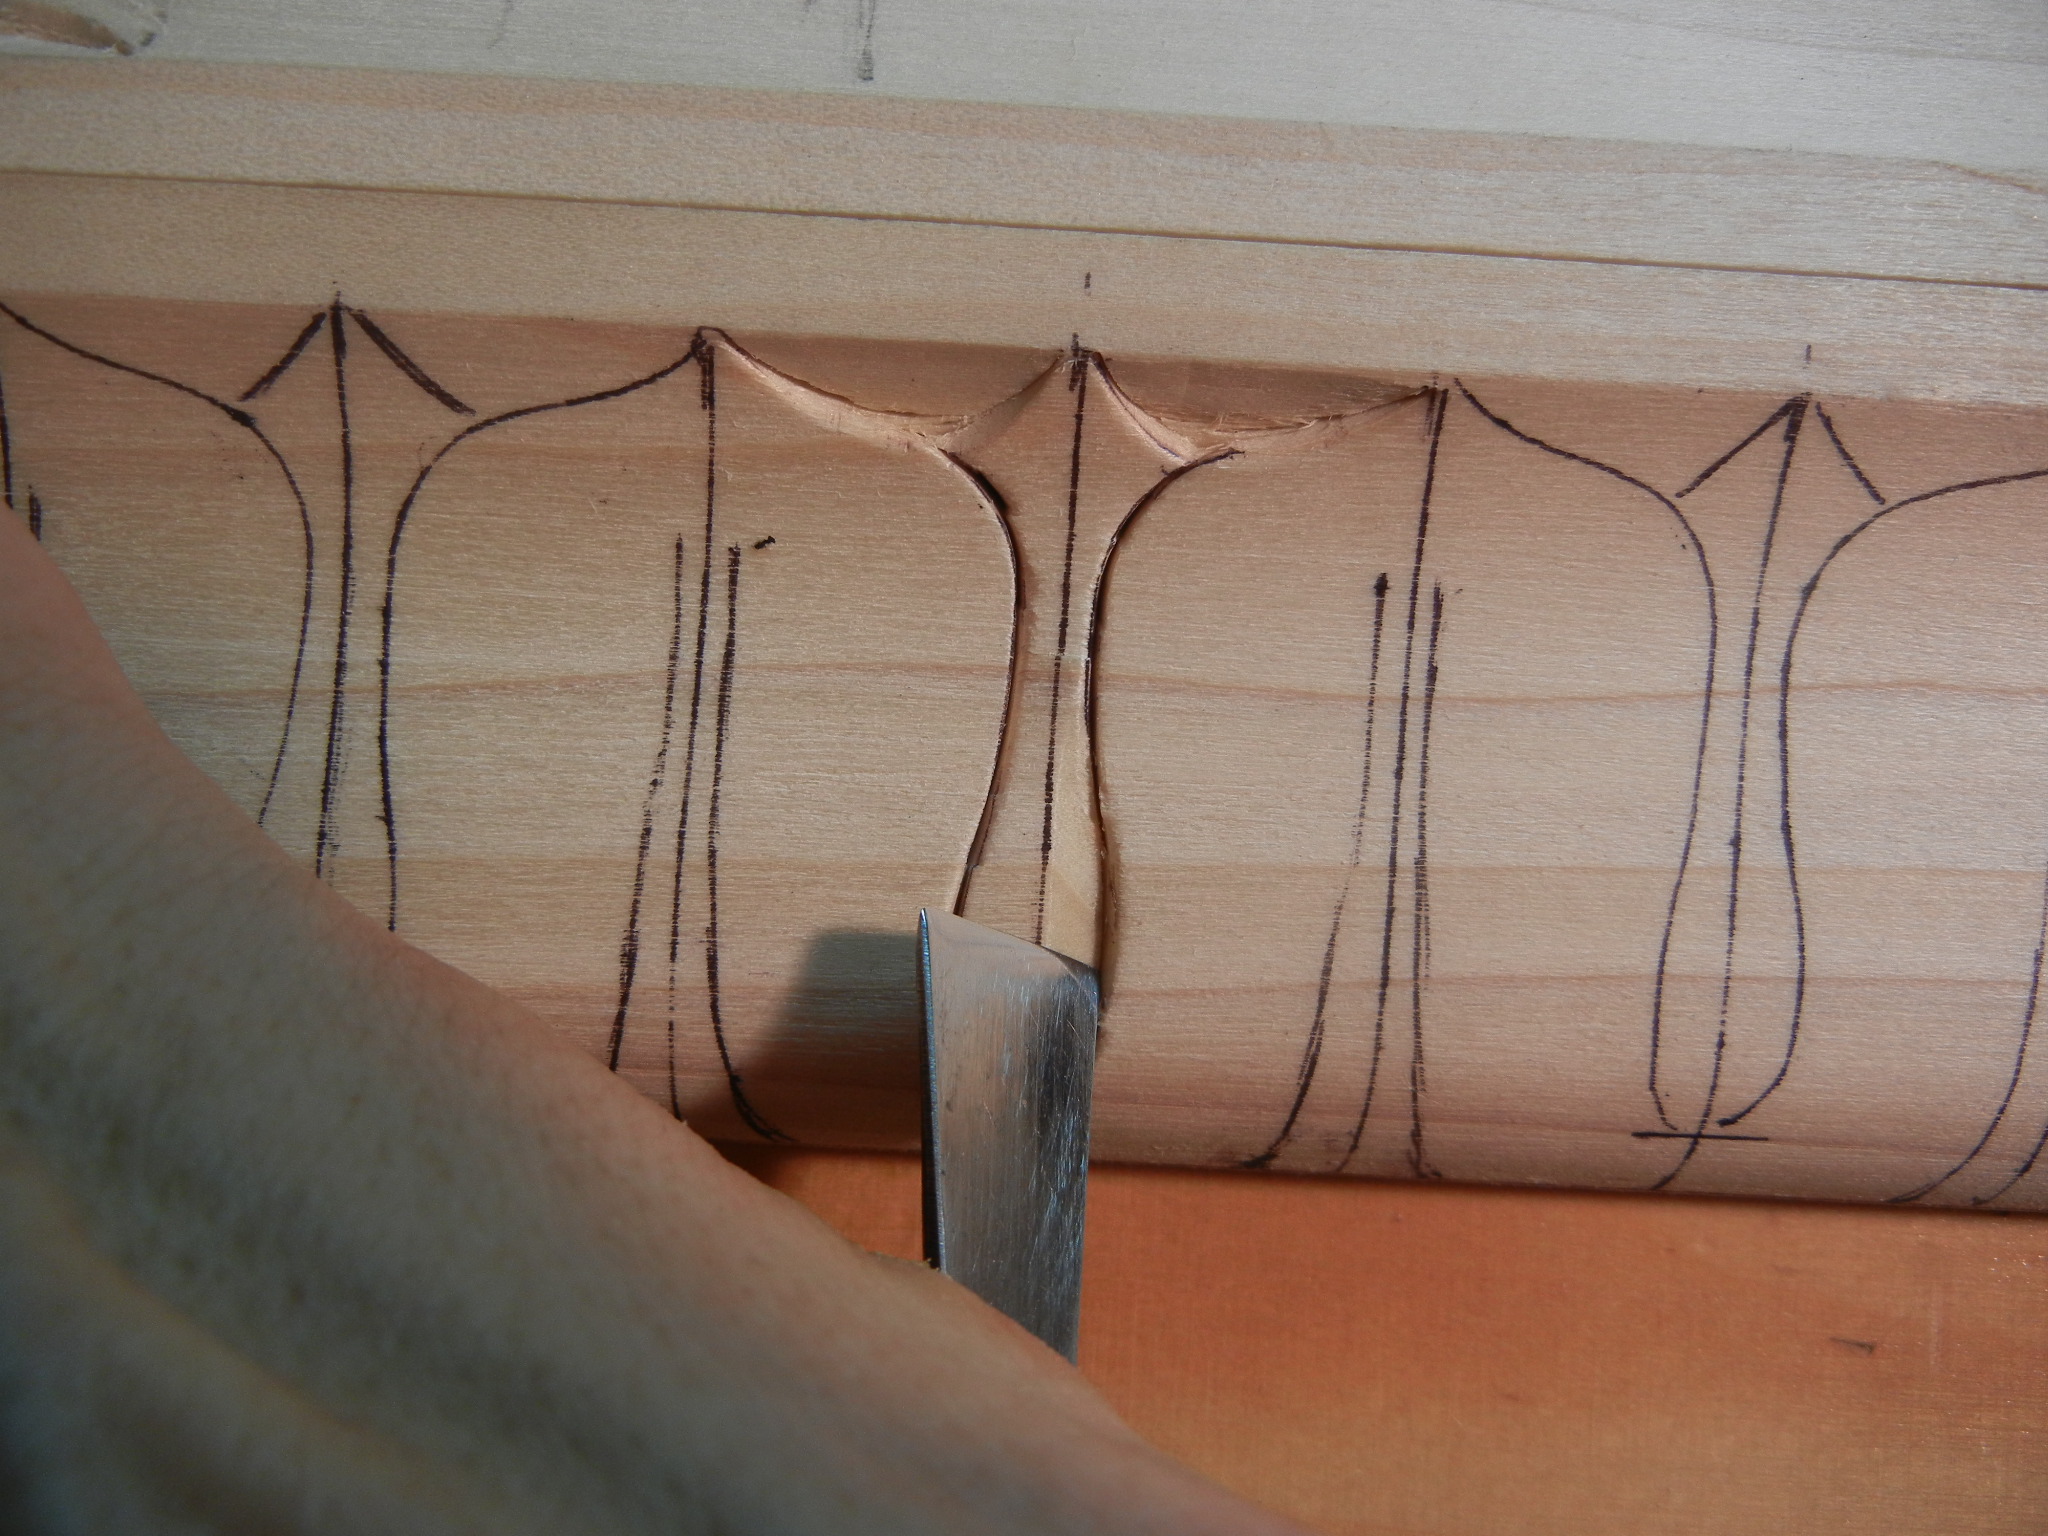
- With a #6, 8mm make a stop cut at the little leaf or point
-
- With a #8, 6mm make a stop cut at the bottom curve
-

- And finish off the edging of the leaf with a #3, 6mm
-
- With a #6, 8mm, continue edging the leaf
-
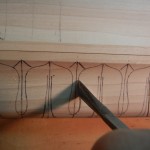
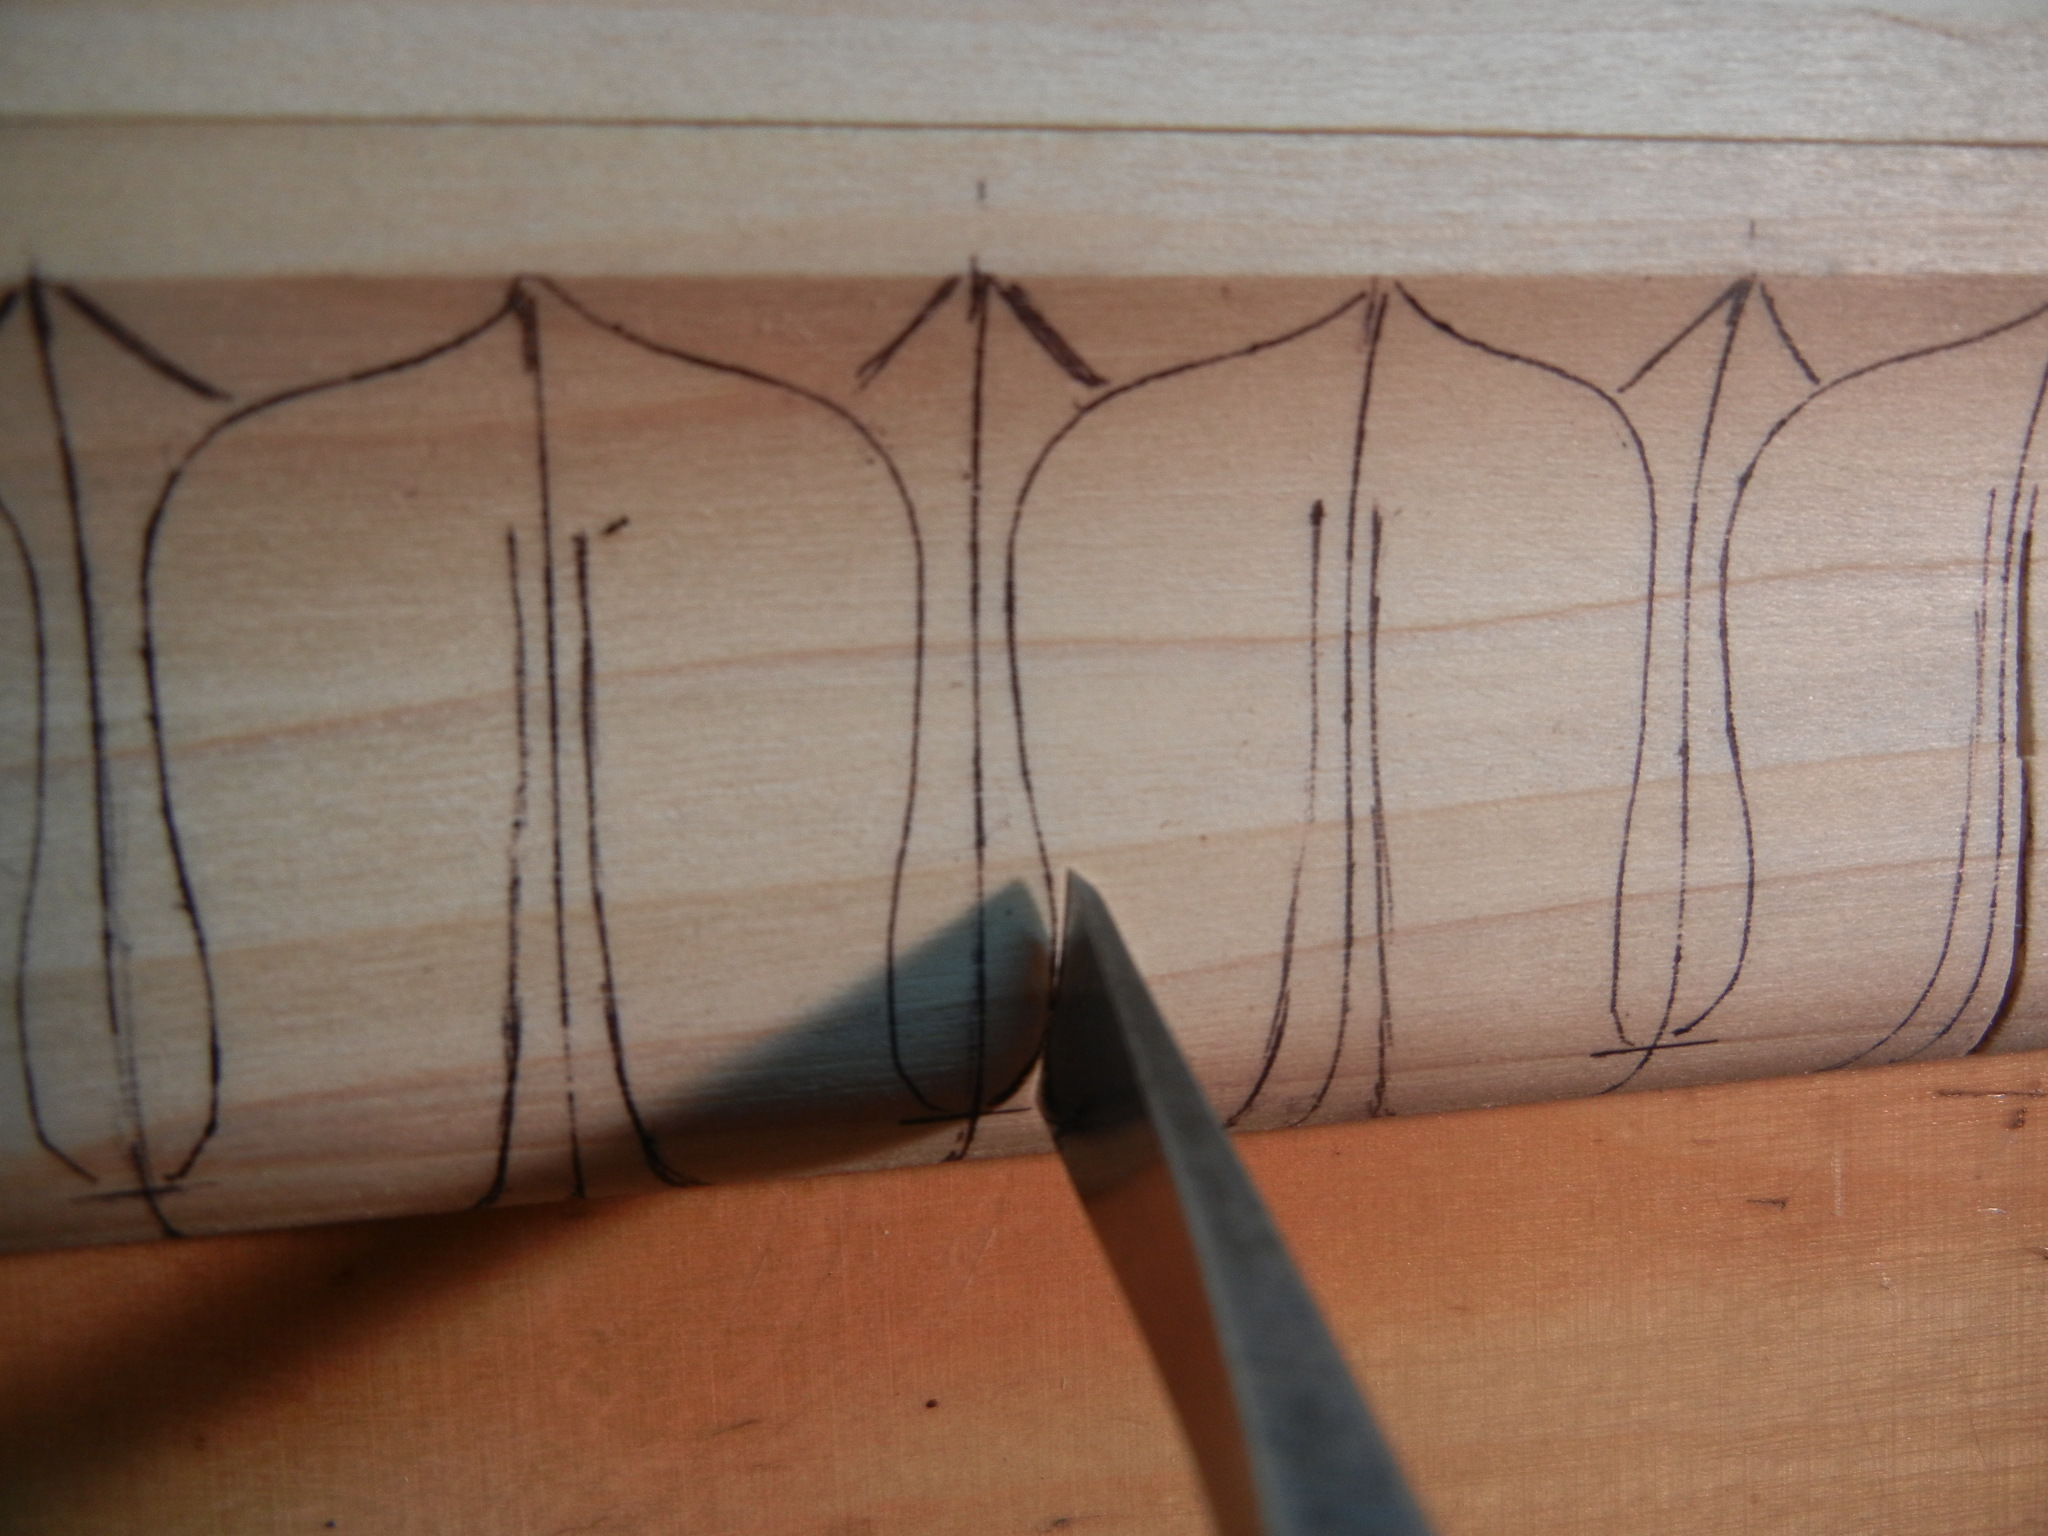
- With a #3, 14mm, continue making stop cuts along edge of leaf
-

- With a #3, 14mm start making stop cuts along edge of leaf
-

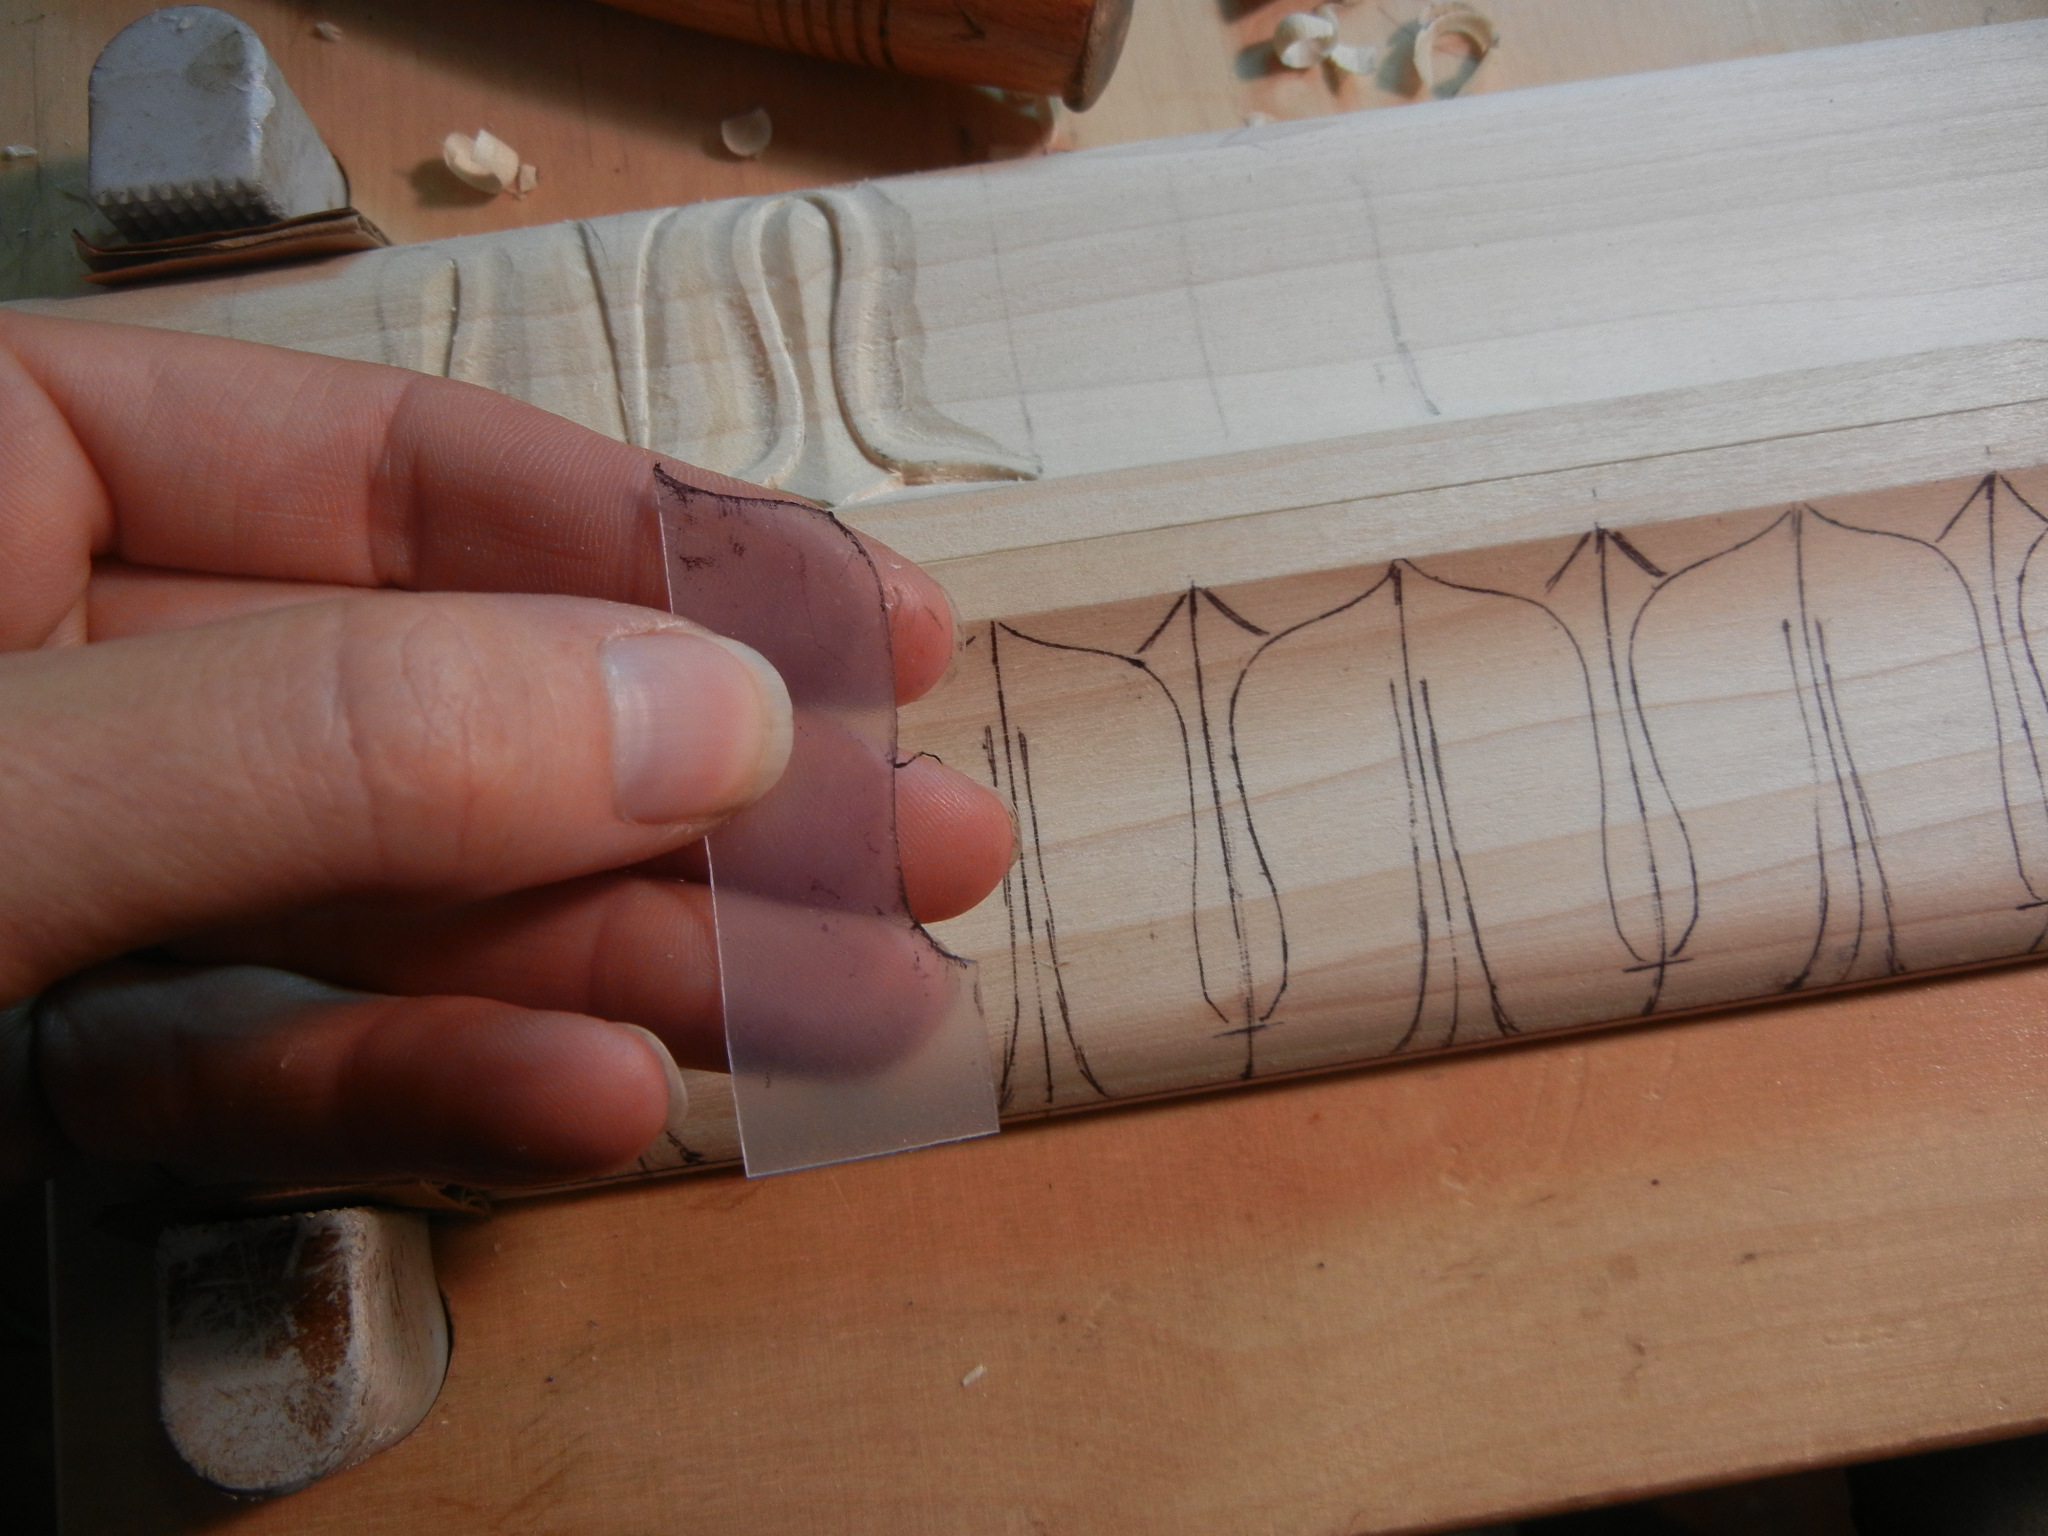
- Make a plastic template to lay out design
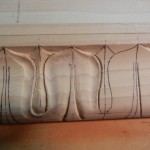
This is a demonstration of how to carve a simple leaf molding in poplar. This project was for Greg Guenther in Savannah, GA.
Notice that the technique is mainly stop cuts (and not my typical v-cut first) with a mallet. Poplar, because of its soft, spongy characteristic, really handled the stop cuts very well without having any damage to the wood – even on the very thin fragile areas like the vein line. If I were carving this in oak, mahogany, walnut, or any other hard wood, I would definitely make a v-cut first along the stop-cut line, and then make the stop cut. This allows the bulk of the wood to be removed, and then the pressure from the stop cut gives towards the v-cut and saves the wood that is going to be carved from being damaged. But.. not with poplar! Different rules…
It is really important to make sure your tools are very sharp. I often used my strop to touch up my gouges, as most of the cuts are cutting straight across the grain. There must be something in poplar that dulls the gouges quickly, because after carving about 15 of the leaves, I could tell the grain starting to open up and split as I cut across it. Just touching the tools on a strop seemed to do the trick.
I only had about 8 feet of this molding to do. It went quickly when I went down the whole length of molding with each step. It keeps it consistent also. Imagine decorating your whole house with this??? Go on… I give you a challenge! OK, maybe just a piece of furniture for start… and then on to bigger and better!
Mary, what shape did you begin with for the molding? Did you use a router bit, or how did you create the basic shape before you began carving the leaf molding?
I live far from anyone who carves in this style – when I mention carving, people assume I am talking about whittling. About 10 years ago, I drove 8 hours each way to a morning class once a week with a wonderful carving instructor, but I don’t have the resources to do that anymore. However, I did get a wonderful foundation, and am thrilled to find your site. Carving is to me a sacred experience – I don’t know how to explain that, but it fulfills a deep creative need somehow.
Joyce,
Wow! You are certainly dedicated! I love to hear when people will do whatever it takes to learn how to carve. I feel that way myself. Some way, somehow, you will figure out a way! Before I even started taking classes, there was something in me that knew this would be a big part of my life – such a desire and craving to learn. I truly understand how you feel. Sometimes I feel that after over 20 years of carving that the joy and excitement has faded some. And then I get a real challenging project where I continue to learn and grow, and that same fire builds again.
RE: molding. The people I was working for cut the profile of the molding out on a shaper before I carved it.
Keep on learning! I hope the video web site will help in your journey.