I just finished editing the video on carving reeds on a sphere for pedestal table and put it up on my video school. This style is based on an 18th century Chippendale style 3-legged pedestal table. I carved this for Greg Guenther of Savannah, GA. He turned the pedestal and also built the rest of the table.
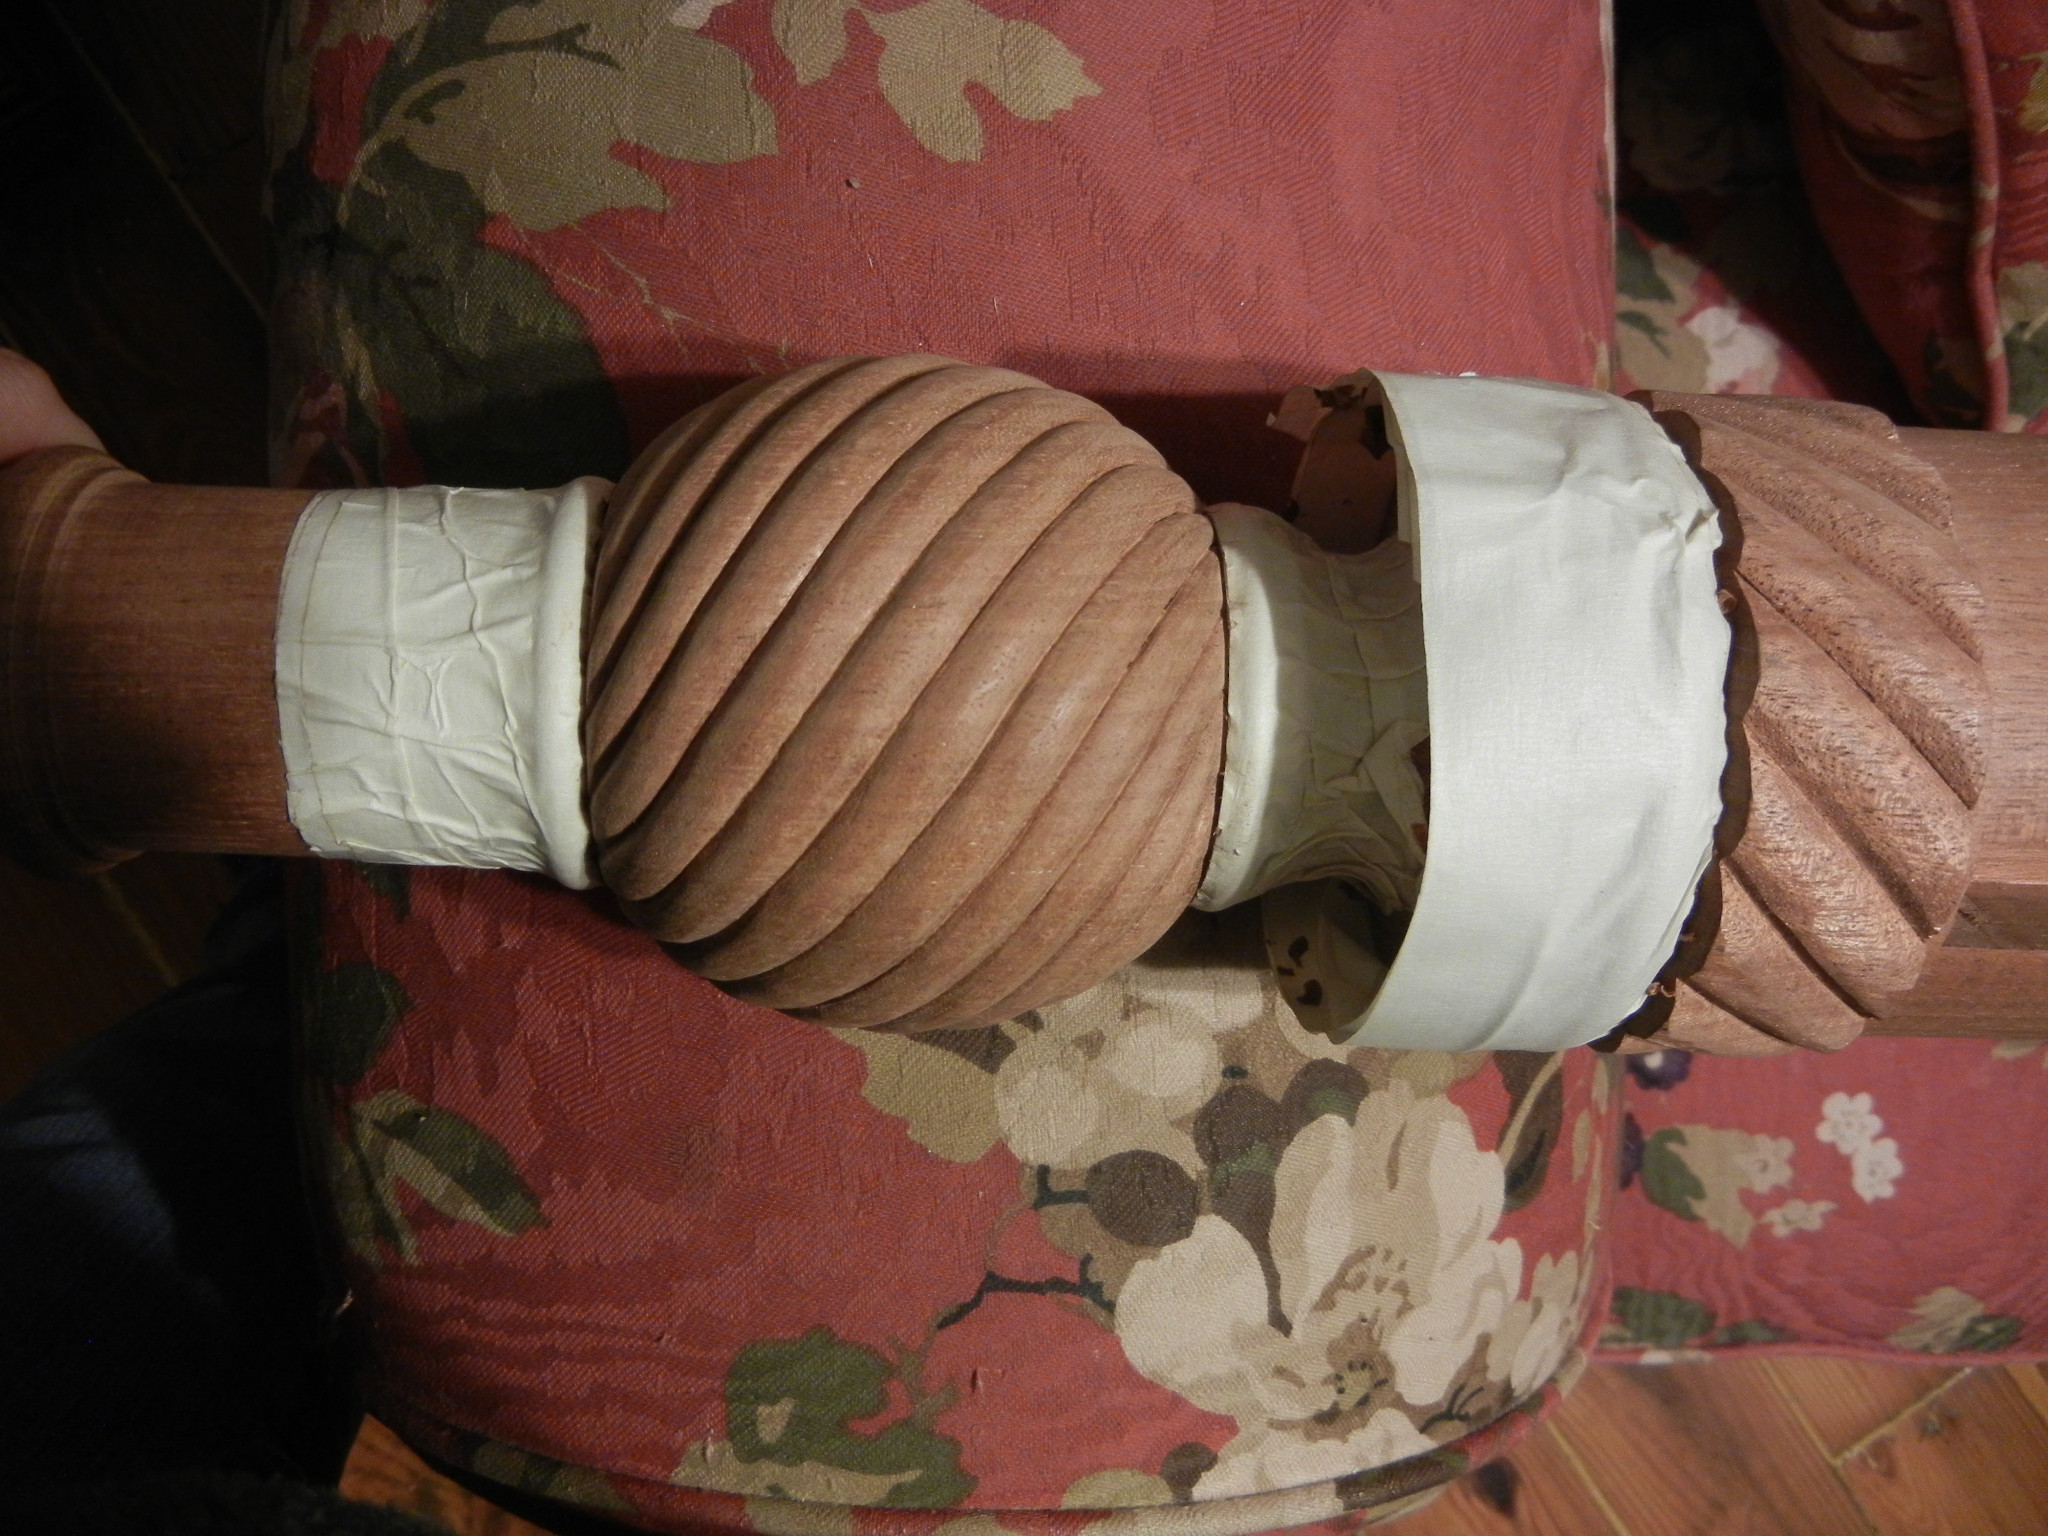
I put several layers of masking tape on the turned bead that is next to my carving because any bump or scratch from the carving tools will effect the smooth turned surface. There were a few times when the carving tool cut into the tape, so I am SO glad I chose to do this. The tape was just thick enough to protect any light cuts.
The technique I used was:
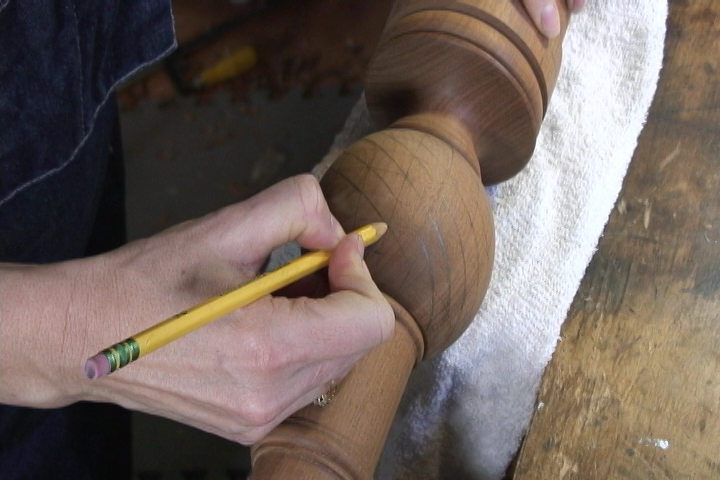
1. Lay out the lines – 8 sections tall x 16 sections around the circumfrance. I laid these lines out while it was still on the lathe. Then connected the corners which provided approx. 45 degree angled lines.
2. Take a 6mm v-chisel and cut about 3/16″ deep on all angled lines drawn. Sorry, no photo available.
3. Take a 20mm and 14mm straight chisel and make cuts directly on the v-cuts to make a solid and clean line slightly deeper than the v-chisel cut down the full length of the v-cut. This is a good way to keep these lines straight and create a sharp corner. Set each of these cuts so it slightly overlaps the previous cut. This helps to keep these lines straight and without steps.

4. With a #7, 12mm gouge, round over the reeds. Because you need to carve in the direction of the grain, one side of each reed is carved in one direction, and the other side is carved in the opposite direction. As you get towards the ends of the reeds, you will need to be adjusting the direction that you carve. Just carve VERY slowly and try and sense when the grain might split out – and then STOP – turn it around and go the other direction.
Use a #3, 3mm to carve the ends of the reeds.
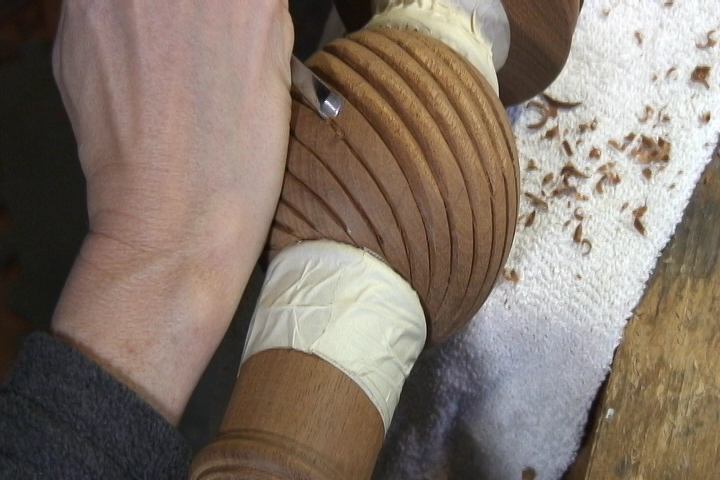
The finished reeds can be lightly sanded and the v-cuts can be sharpened and cleaned up with tiny riffler files.
Check out the video on this. It’s 17 minutes of non-stop excitement! Well, I guess it depends on what you consider “exciting”. But I was having a good ol’ time!
Great lesson Mary. This is one of those decorations that look very complex and difficult yet really isn’t, especially when broken down like you have.
One tip some readers might find helpful: Instead of using the v tool and straight chisel to define the bottom of each spiral, you can use a small, thin saw, like a back saw, dovetail saw, gentleman’s saw or Japanese pull saw to cut and define this line. Just mark the depth you want to cut on the saw with a felt marker, piece of tape or clamp a piece of wood to the saw to act like a depth stop. It will give you great control over the important step of defining the baselines of the spirals.
John,
Great tips! It really depends on what tools you’re more comfortable with controlling. I personally just feel more comfortable with a chisel in my hand than a saw. It really depends on what tools you have learned and mastered. By using your technique, it would definitely define the depth accurately. You would just need to be extra cautious when you get to the ends (put a few more layers of tape!)
Thanks!