David Piazzo is one of the active members at my online carving school. We frequently see comments from him on lessons at the school. He seems to be very engaged and enthusiastic. The following is from a recent email from David, describing how he safeguards his tools for convenient storage and travel. David agreed to this guest post to share the idea with other carvers. Thanks David and nice work!
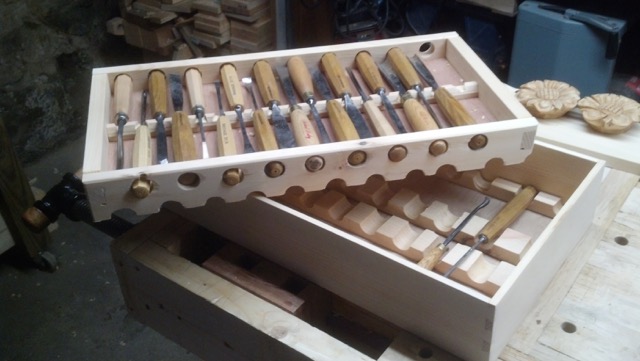
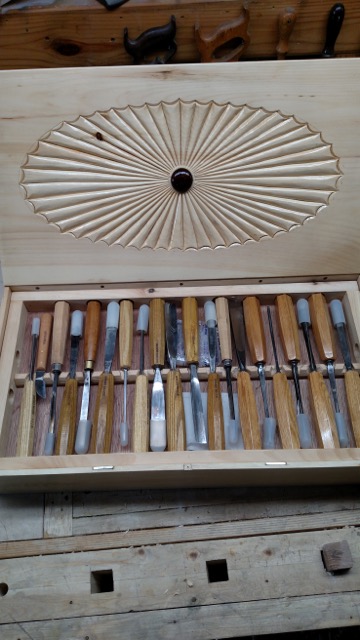
If you take a class from her, or join Mary May’s online school, one of many things you will learn is to love your tools. (“You can never have enough”) As my collection of quality tools has grown, I wanted a way to store and transport them safely, but still wanted to be able to get to all of them quickly when ready to carve. With this system, they are all secure in the case, but when the top comes off and you pull out the top tray, set it on the bench in front of the bottom box… you have easy access to 40 full size tools. Yes tool rolls are easy, but 12 or 18 tools is all you’re getting in, unless they become so big you worry about so many tools in a clump. Also if you have L series gouges or bent backs, they do not fit into nice straight spaces and they push and protrude into other spaces.
Mary has also taught how to get them SHARP so I wanted to make sure there were no metal hinges or clasps any place an accidental bump could dull a tool. So, the top has dowels along one side that fit into holes in the case and a couple rare earth magnets inlaid on the opposite side. They do not stick out and even then, NdFeB or Neodymium Iron Boron is softer than steel.
I started with 3/4 pine. But did not want the weight and bulk of 3/4 pine so I ripped it in half on the table saw to 5/16. I wanted the box small enough to carry under one arm so I worked out the dimensions by lining tools up on my bench. I dovetailed the 5/16 pine in the corners for strength and dadoed a groove around the inside for the bottom piece of 3/8 ply to hold down weight. I knew I would strengthen this bottom with the tool holder strips – see next picture.
First I made the main box with the bottom holder. After laying tools out on my bench I knew how far apart to space the half rounds for holding the handles in place. I made the frame for the top tray and strips for the bottom tool holders and clamped them together and drilled 1” holes for handles to fit into between the two strips. This gave me half rounds on both that lined up perfectly.
 After drilling those holes, I added another row of tool holder holes above for the top tray and dadoed a groove for the top tray’s bottom.
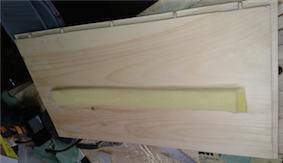
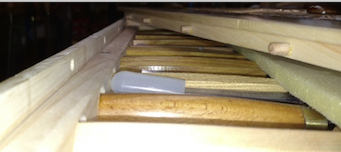
Here you can see that the top tray is also dovetailed for strength out of 3/4 pine. I drilled holes through sides rather than making the case 1-1/2” wider. So all tools fit in same footprint. Also the bottom of the top tray, and the inside of the cover both have a 3/8” x 2” x 18” strip of temper foam glued along the center line. When the tray and the lid are in place, the foam holds down the tools to keep them from shifting or rattling.
The center bar is floating. If I change tools it can move up or down to accommodate them, it moves easily. I also toss in a couple dessicant packs that come with electronics to control any moisture inside.
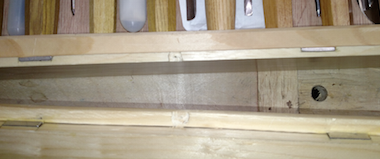
Next, the lid and how to attach it. The lid is rabbeted like a drawer front would be. Then 5 dowels inset into the lid, and matching holes in the case side.
Two rare earth magnets are inlaid into the lid and case side on the opposite side.
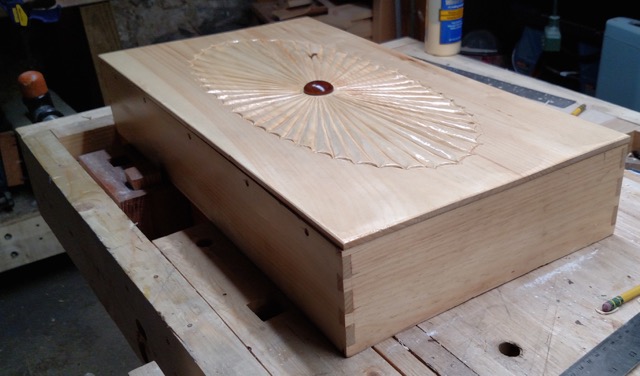
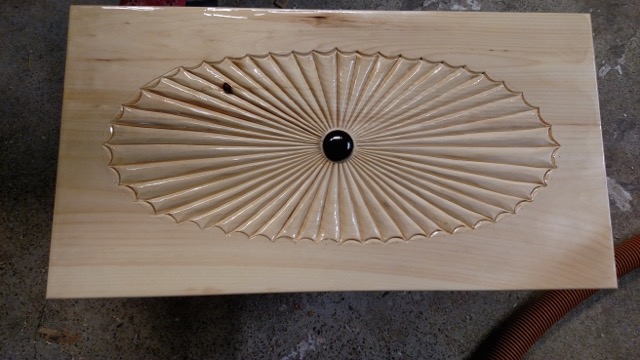 Finally, inspired by Mary’s fireplace Sunburst, I decided to carve that lesson into my lid. I used high gloss lacquer finish because sometimes when I sharpen, I have iron filings on my fingers and did not want that to dull the bright pine lid. With this finish, it cleans up with windex and paper towels. I turned a button for the center out of rosewood on the lathe. I do love my tools and want to take the best care of them. Now they are safely stored and easy to transport. I have an old Coleman stove nylon carrying case they fit into perfectly for taking to a class or friends shop.
I am very confused as to how the top attaches to the box. There appears to be no hinges which is fine but what purpose do the dowels exist for?
Richard
Take a close look at two particular pictures. The one at the very bottom of the article shows holes for the dowels. Two pictures up from that are a pair of small pictures. The one on the left shows the holes and the dowels, which extend from a rebate on the underside of the top.
Orient the top so the dowels slide into the holes. Then, the magnets on the opposite edge hold it in place.
In effect, the dowels replace hinges … and remove all chance of tools hitting metal.