I recently had a client who asked me to help complete 3 traditional flame finials that he had started for a reproduction of a 1760’s secretary.
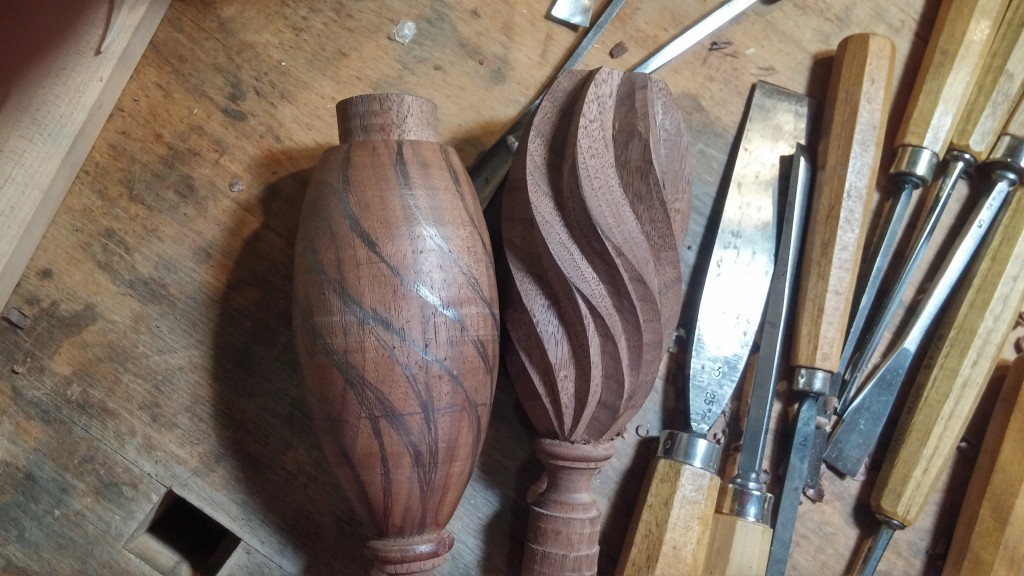
I received one finial that was laid out and partially carved, one that was just turned, and a block of wood to be turned into the third finial.
When I began looking at the finial that was partially carved, it took me over an hour of staring at it to try and figure out what the “formula” was of laying out the lines for the flames. I knew there was a pattern, but it was a real brain tease to figure it out. I even looked at several articles in books and magazines on how to lay out these lines, and that just tied my brain in more knots.
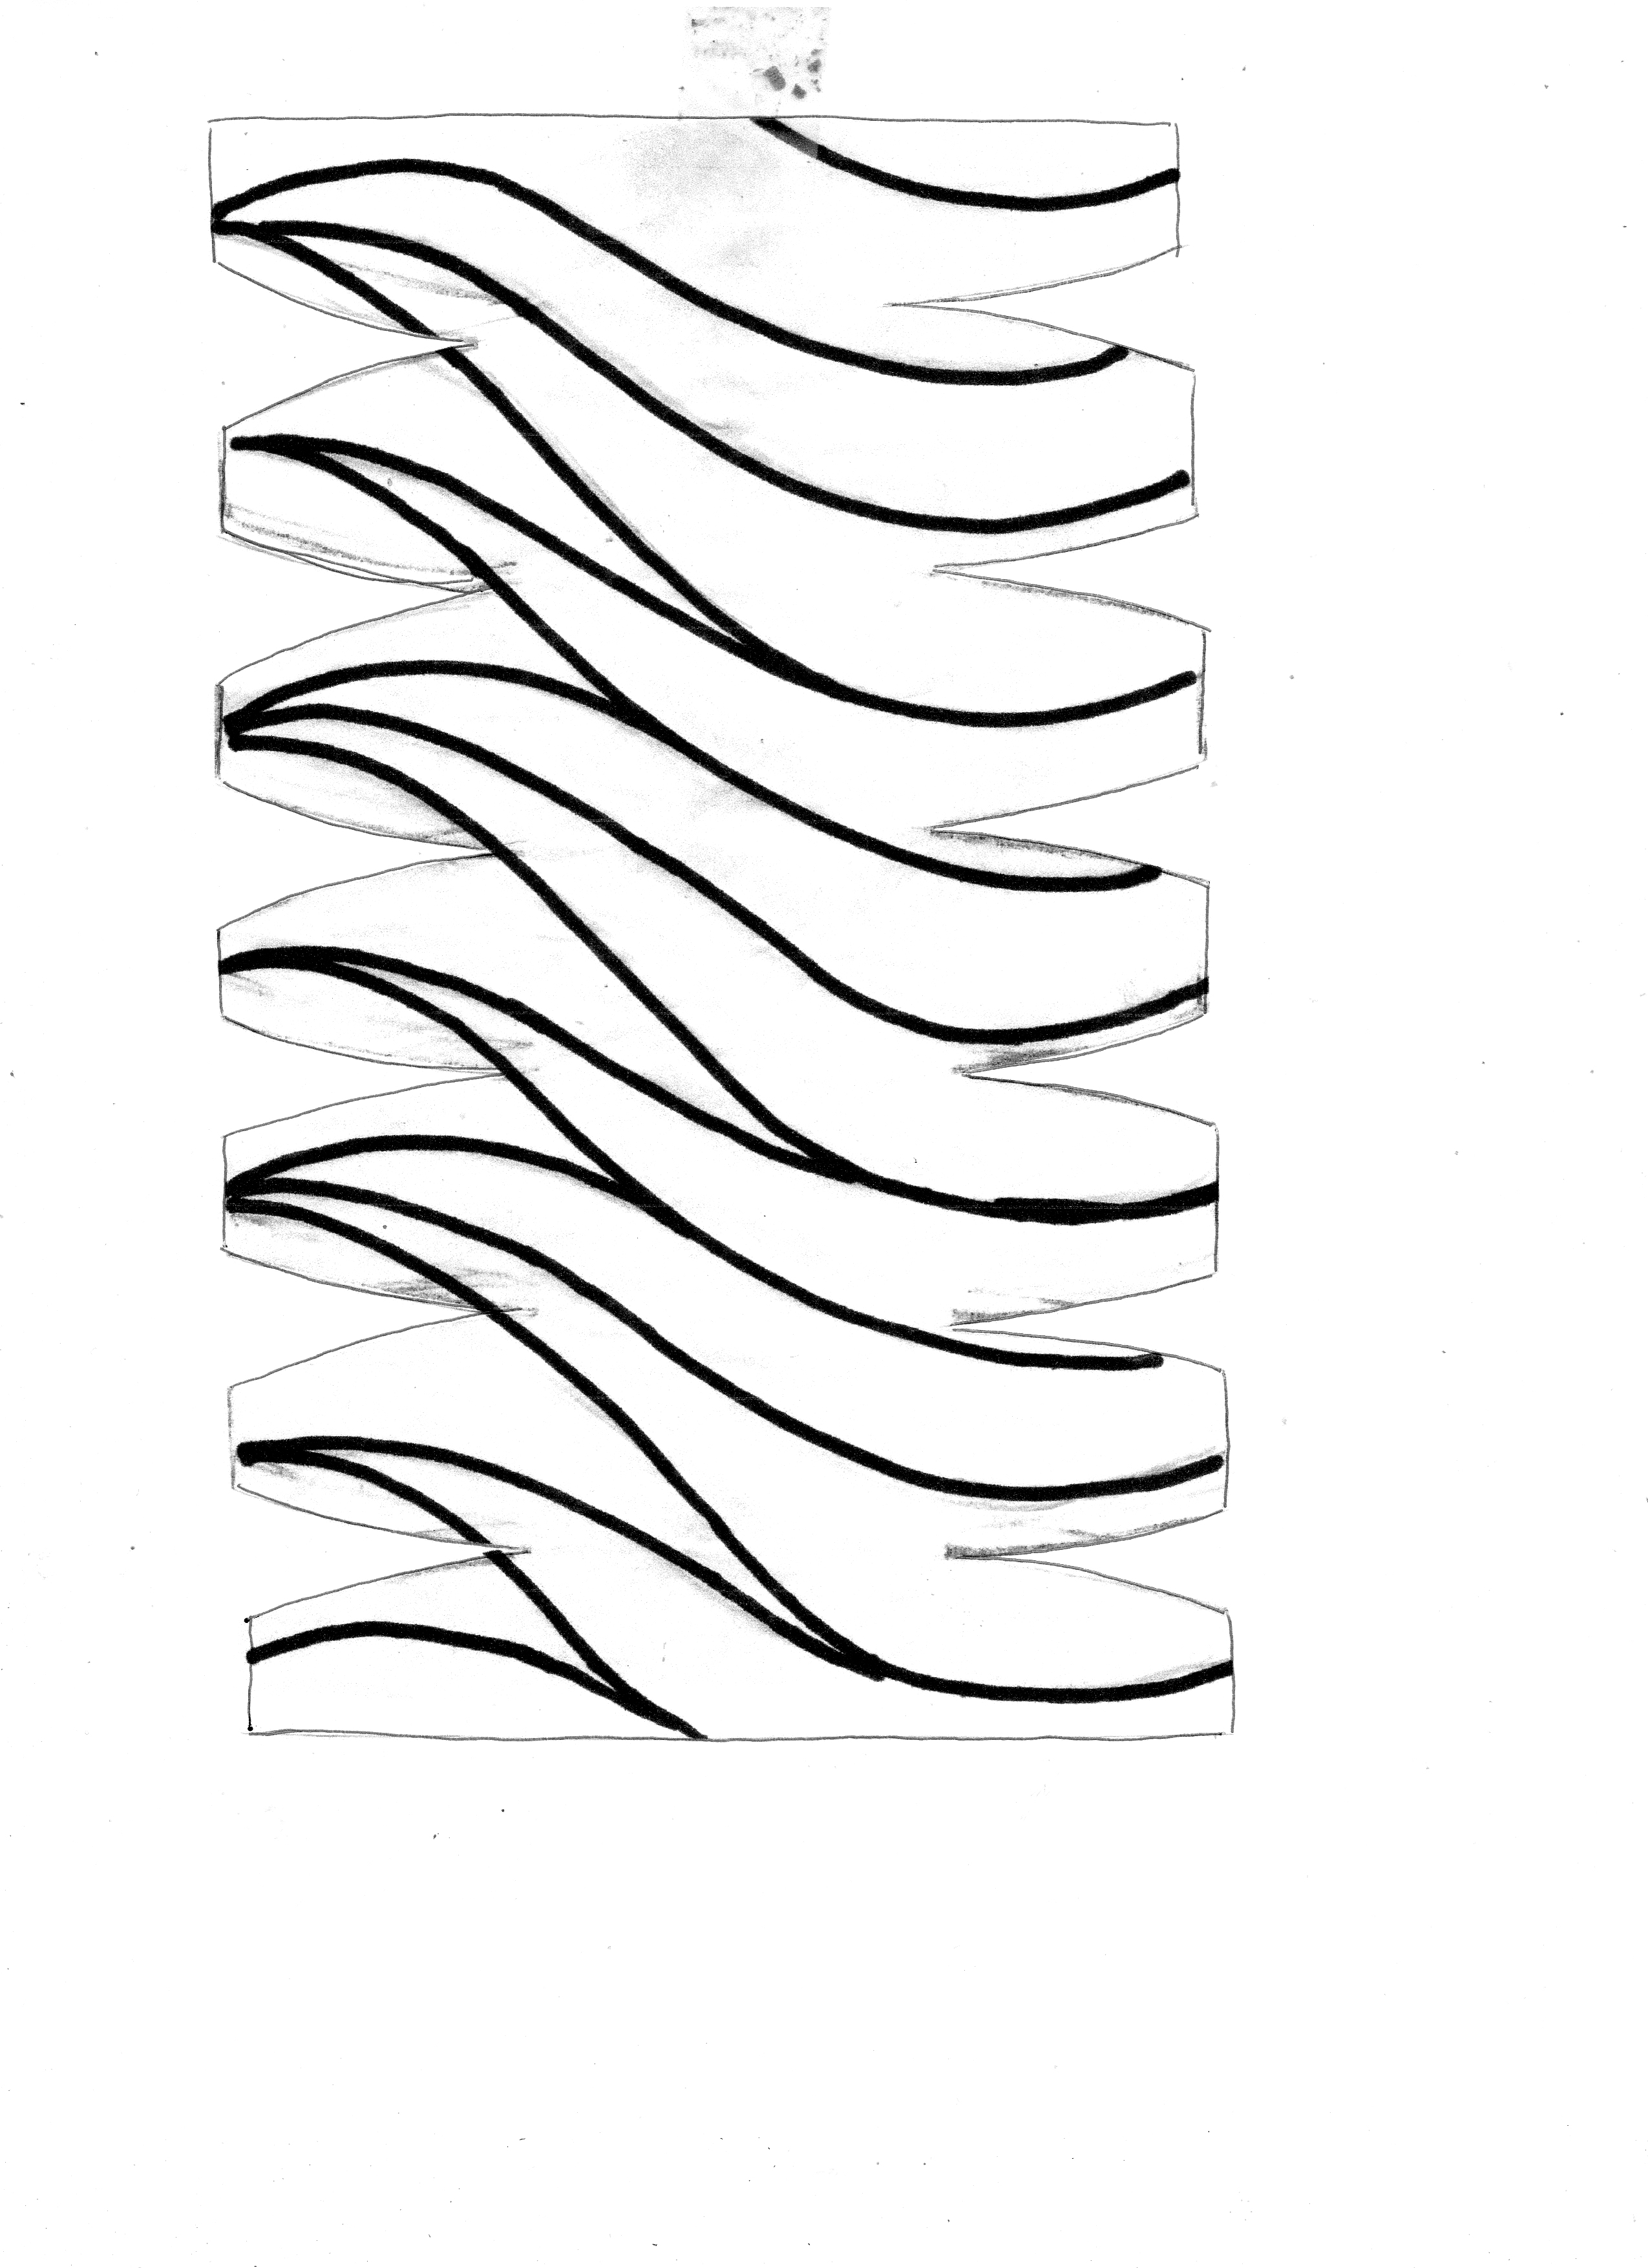
Template to lay out on turned finial that is transferred onto wood with carbon paper.
I finally figured it out – dividing the lower edge into 6 equal segments, and the upper edge into 9 equal segments. From there I think it is best to show a visual (see image to the right).
The best way I found to show to lay out the lines was to take a piece of paper, wrap it around a finished finial, and press it against the sharp edges of the flames. A wonderful impression of the sharp lines of the flames was pressed into the paper. Next, I took this paper and cut out sections of it so that it is sort of like a globe on a flat surface. After cutting out this template, it can then be taped around a turned finial with carbon paper under it and the lines transferred. The “globe” technique allows the paper to bend and shape along the curve of the finial. The left side of the template goes to the bottom of the finial and the right aligns with the top. It’s not a perfect technique, but it is a good start at getting the lines laid out.
Since this particular design was based on my client’s partially carved finial, it is “loosely based” on traditional flame finials. It is close, and has the same “feel” but I have not been able to find others that match this design exactly. And there are so many different styles out there – some very exact in their dimensions, curves and symmetry, some more free flowing, and some with completely wild flames.
But the most critical aspect of all flame finials seems to be that wonderful “S” curve. All lines, whether they go from the base all the way to the top, or only go a third of the way up, should have a gentle “S” curve. If this curve flattens, or if corners appear along the edge, the flame illusion is lost.
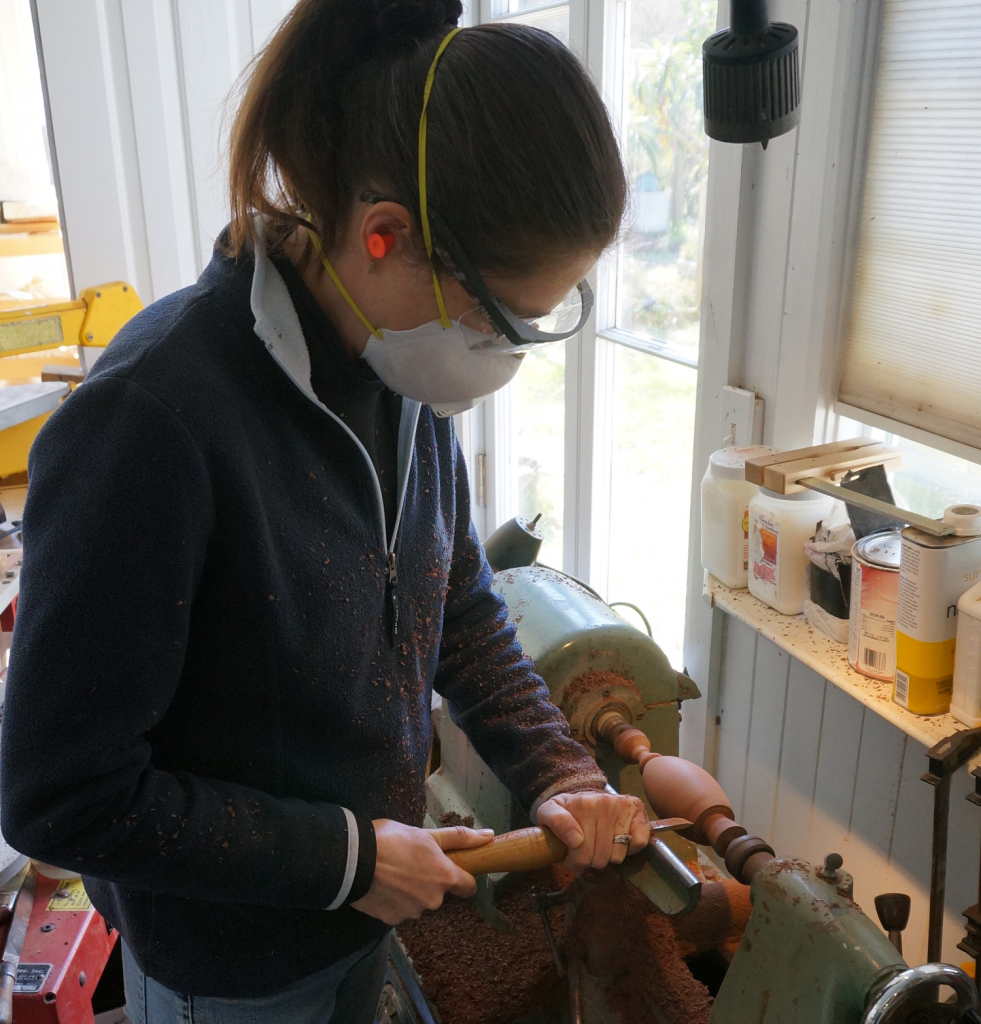
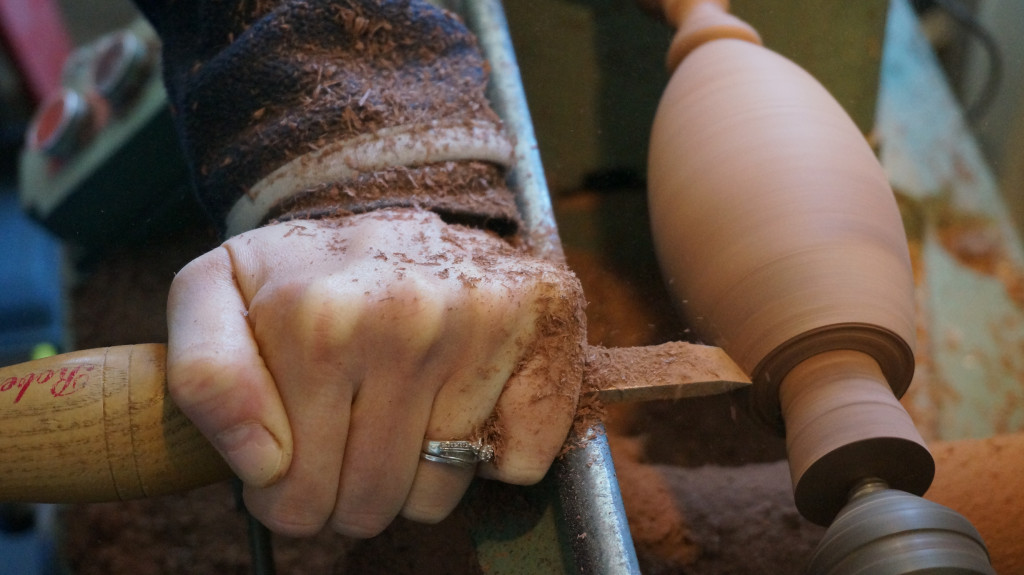
I had to turn the 3rd finial before carving it. It has been a long time since I have turned something this delicate, and I am definitely not an experienced wood turner. I resorted to using rasps to defining some of the base details (I am so ashamed).


I filmed this lesson and it is scheduled be be added in April to my online school and will also be available for individual purchase at that time also. You’ve got to try this. Especially for you engineers and those who love math!