Gothic Tracery Window Panel...
Quote from Michael Duncan on December 14, 2017, 9:40 amOuch !!! I HATE that when it happens. I had a muzzleloader gunstock, a $300. pcs of wood with over 200 hrs, of work into it do the same about a month after finnishing do the same.
As for glue, my recomendation would be HOT (140 f. ) hide glue, 315-gram strength. Do NOT use the premixed type ! Hot hide glue is thin and will penatrate deep into the cracks, does not creep after curing and is reversable if later repairs are needed. It also takes finnish well. It's the ONLY glue used in violin building and repairs. I would pre-clamp the pcs. to figure out clamping arangment and make sure the cracks draw up, then loosen, glue and reclamp, follow with butterflies on back after cruing.
If you not familiar with using hide glue, Guild of American Luthers (G.A.L.) and/or Violin Society of Am. (V.S.A.) have great info on hide glue. Possibly you-tube.
Woodcraft sells Hide glue, (251-gram strn.) would give a longer "open" time to work with, for a larger prjt.
good luck !
Ouch !!! I HATE that when it happens. I had a muzzleloader gunstock, a $300. pcs of wood with over 200 hrs, of work into it do the same about a month after finnishing do the same.
As for glue, my recomendation would be HOT (140 f. ) hide glue, 315-gram strength. Do NOT use the premixed type ! Hot hide glue is thin and will penatrate deep into the cracks, does not creep after curing and is reversable if later repairs are needed. It also takes finnish well. It's the ONLY glue used in violin building and repairs. I would pre-clamp the pcs. to figure out clamping arangment and make sure the cracks draw up, then loosen, glue and reclamp, follow with butterflies on back after cruing.
If you not familiar with using hide glue, Guild of American Luthers (G.A.L.) and/or Violin Society of Am. (V.S.A.) have great info on hide glue. Possibly you-tube.
Woodcraft sells Hide glue, (251-gram strn.) would give a longer "open" time to work with, for a larger prjt.
good luck !
Quote from Michael Duncan on December 14, 2017, 10:03 amAnother thought, I remember Mary teaches carving at a Historical Furniture group in N.C. I think, they should be a good source on repairs.
Another thought, I remember Mary teaches carving at a Historical Furniture group in N.C. I think, they should be a good source on repairs.
Quote from Matthew Mizner on December 14, 2017, 11:49 amThanks for the quick reply Michael. I have a small bag of hide glue...didn’t think about using that. I’ll have to check the strength on it, as I have no clue what it is.
Ill have to google the group in NC, unless Mary beats me to it with a reply
Thanks for the quick reply Michael. I have a small bag of hide glue...didn’t think about using that. I’ll have to check the strength on it, as I have no clue what it is.
Ill have to google the group in NC, unless Mary beats me to it with a reply
Quote from MaryMay on December 14, 2017, 9:50 pmMatthew, I'm so sorry to hear that. Oak can be pretty mysterious, as brittle wood can hide these cracks. More than likely it was always there, but was only discovered when a lot of wood was removed. Michael's suggestion is great, and since I have not come across this much, I'll stay out of suggesting any other repair method - simply because I have no better answer.
I'm assuming the NC group you are referring to is the Society of American Period Furniture Makers (www.sapfm.org). They are a national group with about 1200 members who focus on the building, history and repair of American period furniture (around 1750 to 1820). Go to their website and they may have some information on their forum. Other than that, I don't really know where to direct you. Maybe find a local antique furniture repair company and pick their brain. Or there's always google...
Good luck and would love to hear your success story and how it was accomplished!
Matthew, I'm so sorry to hear that. Oak can be pretty mysterious, as brittle wood can hide these cracks. More than likely it was always there, but was only discovered when a lot of wood was removed. Michael's suggestion is great, and since I have not come across this much, I'll stay out of suggesting any other repair method - simply because I have no better answer.
I'm assuming the NC group you are referring to is the Society of American Period Furniture Makers (www.sapfm.org). They are a national group with about 1200 members who focus on the building, history and repair of American period furniture (around 1750 to 1820). Go to their website and they may have some information on their forum. Other than that, I don't really know where to direct you. Maybe find a local antique furniture repair company and pick their brain. Or there's always google...
Good luck and would love to hear your success story and how it was accomplished!
Quote from Matthew Mizner on December 20, 2017, 9:02 amSaved the hardest part till last...the concave border around the entire window panel. If this doesn’t finish cracking the panel in half, I’ll be super stoked. Once the border is done, I’ll repair the crack and send this thing to the ammonia steam bath.
BTW, using a moulding plane on a carving isn’t cheating, is it?!
Saved the hardest part till last...the concave border around the entire window panel. If this doesn’t finish cracking the panel in half, I’ll be super stoked. Once the border is done, I’ll repair the crack and send this thing to the ammonia steam bath.
BTW, using a moulding plane on a carving isn’t cheating, is it?!
Uploaded files: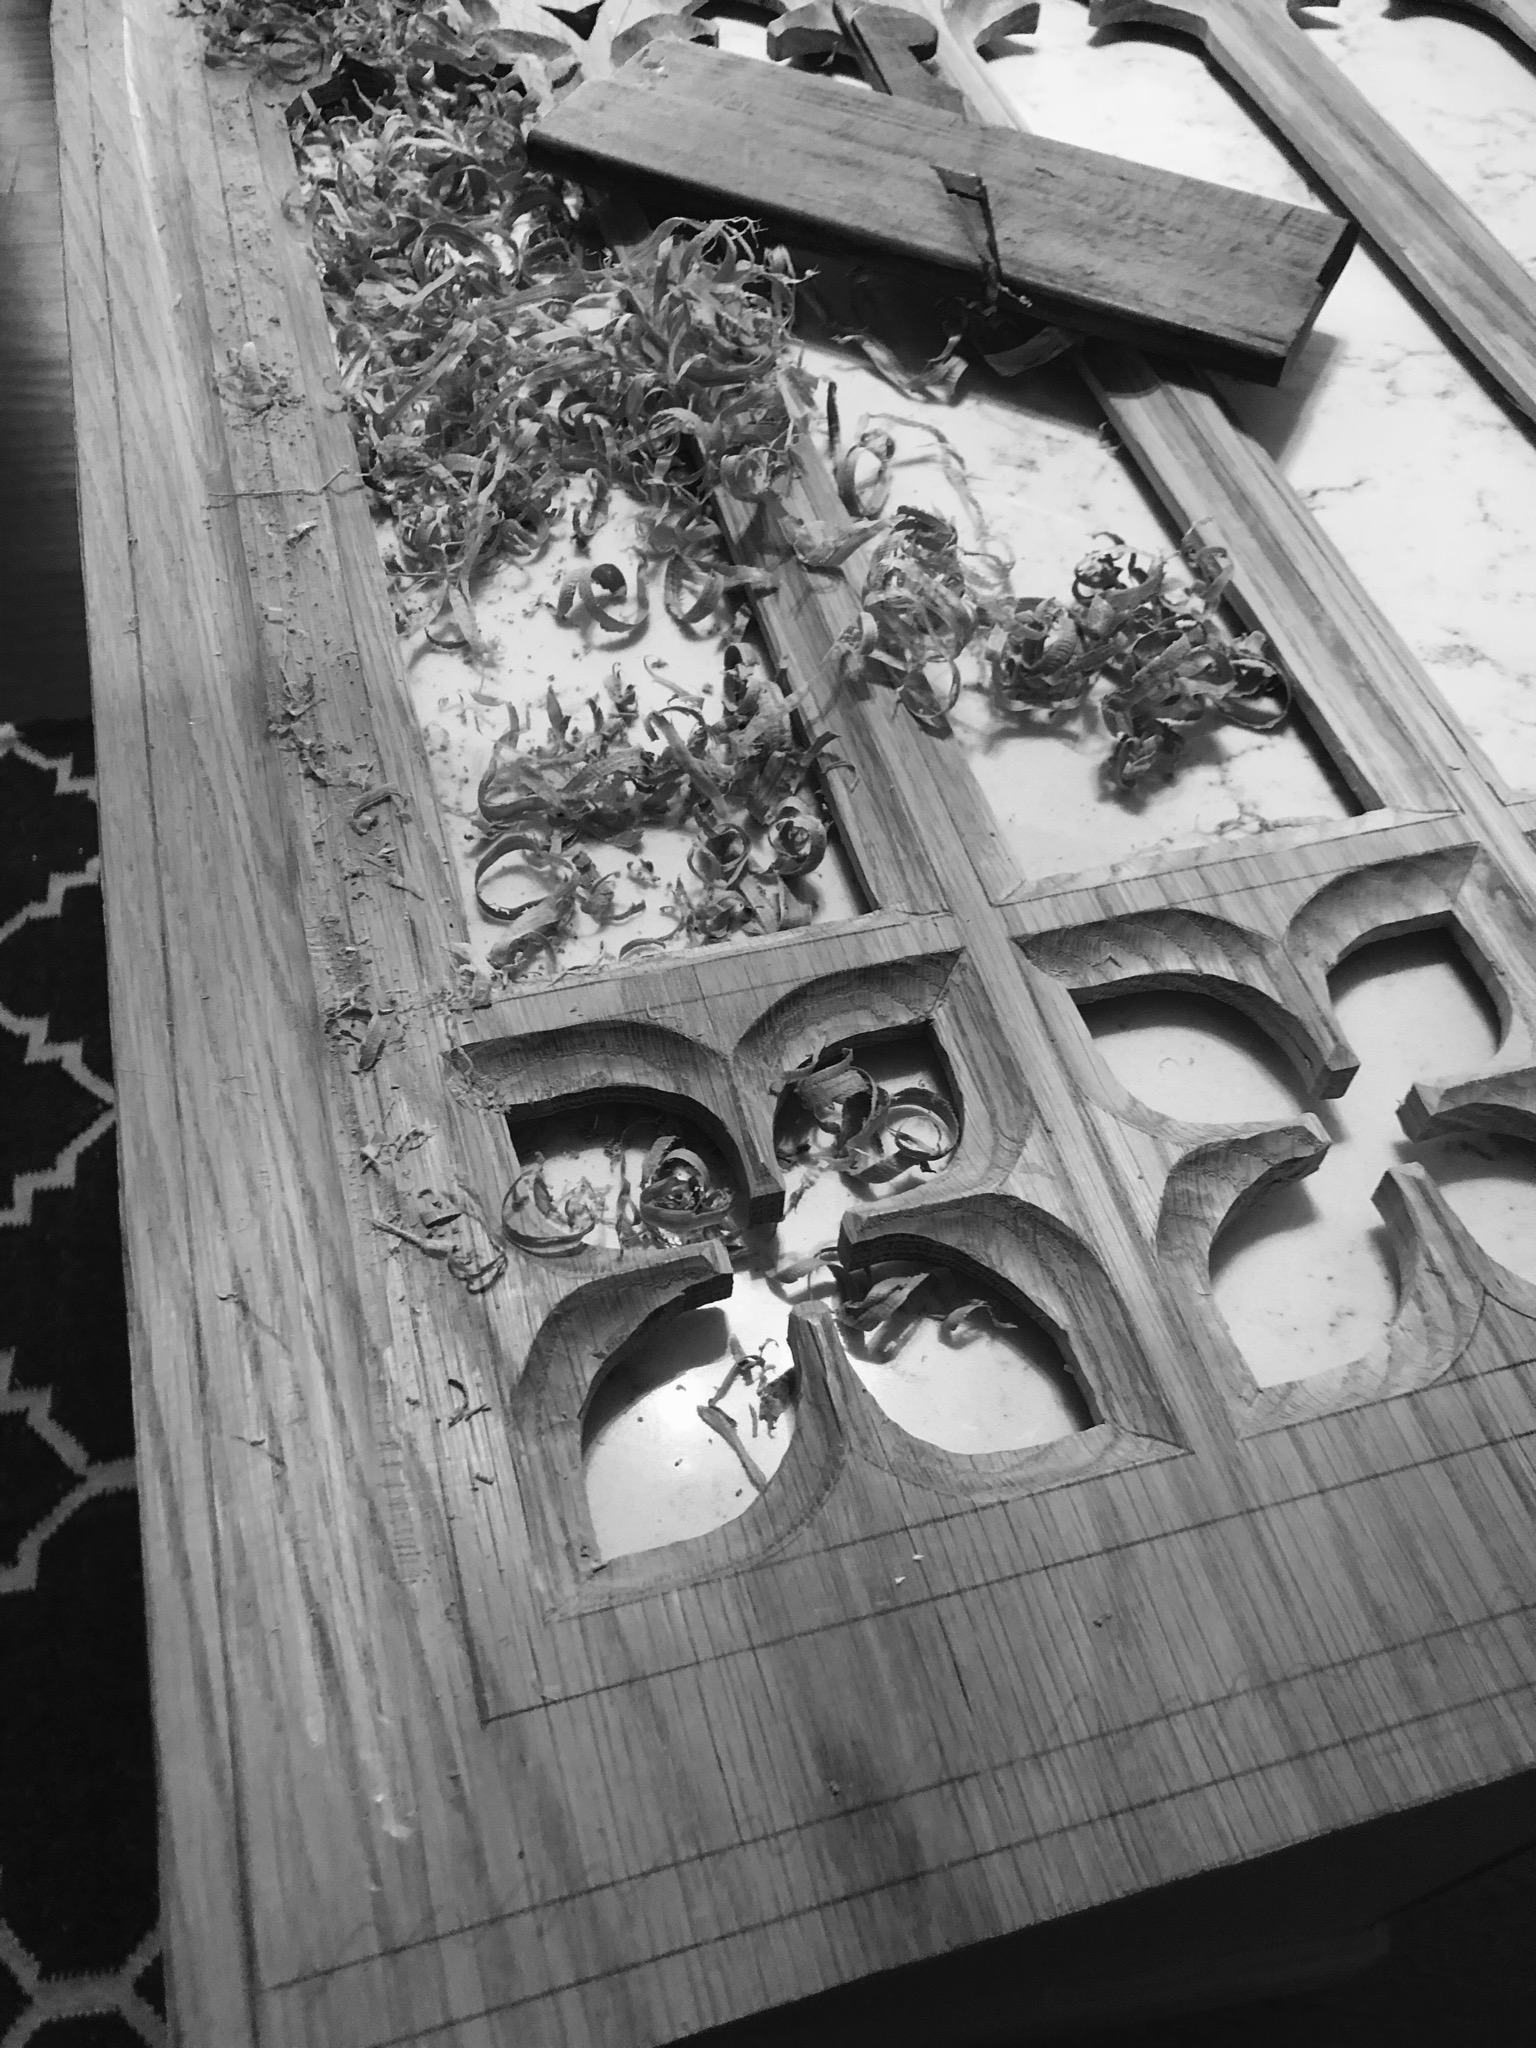
Quote from MaryMay on December 20, 2017, 9:51 pmThat's looking great! And no... you won't be kicked out of the "carving club" by using a moulding plane. It should work great for those longer areas. There is purist... and then there is realistic.
That's looking great! And no... you won't be kicked out of the "carving club" by using a moulding plane. It should work great for those longer areas. There is purist... and then there is realistic.
Quote from Matthew Mizner on December 22, 2017, 3:22 pmSo, here’s my Frankenstein fix...it’s pretty sad, but at least the crack shouldn’t open up ever again. I had to cut a small pair of brass hinges up to use as makeshift butterfly keys on the narrower areas. Where I was able to use actual keys at the very top and bottom, I used hard maple. A quarter inch thickness was all I was able to use...
So, here’s my Frankenstein fix...it’s pretty sad, but at least the crack shouldn’t open up ever again. I had to cut a small pair of brass hinges up to use as makeshift butterfly keys on the narrower areas. Where I was able to use actual keys at the very top and bottom, I used hard maple. A quarter inch thickness was all I was able to use...
Uploaded files:
Quote from Russell Wagner on August 12, 2019, 4:39 pmreally nice, I have been afraid to try oak I have around 12 2 x 10 x 8 ft. stored in my garage i guess it time to pull some down. thank you very much for sharing, its red oak well have to start somewhere.
thanks you
Rusty
really nice, I have been afraid to try oak I have around 12 2 x 10 x 8 ft. stored in my garage i guess it time to pull some down. thank you very much for sharing, its red oak well have to start somewhere.
thanks you
Rusty
Quote from Cornelius on November 11, 2021, 9:32 amHello,
The amazing work Matthew Mizner is presenting here is exactely the reason I want to learn to carve and subscribed to Mary May's online class.
By looking on Amazon's comment, I really struggle to identify a book that would teach me to trace this type of window. I would happily learn to do the first one on this topic.
Would anybody be kind enough to recommend a book explaning this?
Many thanks for your support and cheers from France
Hello,
The amazing work Matthew Mizner is presenting here is exactely the reason I want to learn to carve and subscribed to Mary May's online class.
By looking on Amazon's comment, I really struggle to identify a book that would teach me to trace this type of window. I would happily learn to do the first one on this topic.
Would anybody be kind enough to recommend a book explaning this?
Many thanks for your support and cheers from France