I recently added another video to the school website on how to carve a beautifully swirling rosette. I recently carved a pair of these (in reverse spin) for a repair of a Charleston Bookcase from around 1770.
They were fun little rosettes to carve, and I was kind of amazed that when I was finished editing the video, it ended up being 1 hour and 10 minutes long. This includes showing how to re-draw the design based on a photograph so that I could transfer it onto the wood. I felt it was important to show this process, as it is quite often a very important first step in the process. If you are able to draw the design before carving it, a lot of mysteries about the original are discovered. As a result, the process of duplicating it is much less confusing. It’s really the first step in helping to understand the design.

Drawing the rosette, based on a photograph of the original.
After drawing the design on the wood, cutting out the wood, and attaching it to a temporary board (with hot-melt glue, double sided tape, or glue and newspaper method) is to carve the basic rosette shape without carving any details or overlapping petals. You could also complete this step by turning it on a lathe. I, however, am not a wood turner. I am a wood carver. I think it would take me a lot longer for me to turn it on a lathe than for me to carve it. I would have probably gone through 4 or 5 wood blanks before I get it right. So… I stick with what I know and understand – carving.

This is the basic shape of the rosette before carving the details. This can also be turned to this point.
Based on the drawing, I re-drew the design on the curved surface of the rosette. This is difficult to transfer in any other way than to just free-hand it because of the curved surface. This is another reason why drawing it first is important – you’ve already done it once – now it’s just a repeat of that drawing on the wood. I used a white wax pencil so the lines show up better on mahogany.

Re-draw the rosette design on the curved surface of the wood with white wax pencil.
The next step is to locate the overlapping petals and carve them to appear 3-dimensional.

The layering of each of the separate petals
And then it is on to detailing the flowing vein lines with a #11, 3mm veiner and defining the leaf notches at the edge (a very important final step). After that, define the center as one twisting leaf – sort of like a fern before it opens.

Carving the vein lines with a #11, 3mm veiner.
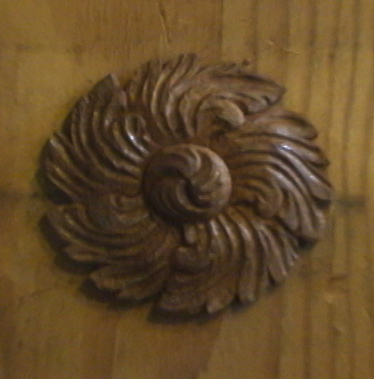
And that is it! Here is the finished rosette. Then the difficulty is carving this same rosette, only in reverse. One trick using wonderful modern technology is taking the drawing or photograph and making a mirror image on a photo copier – or scan it in and print it as a mirror image. It makes it a lot easier than having to turn my head inside out to visualize all cuts going in the opposite spinning direction. Been there – done that – it hurts.