Mary May - Woodcarver
  • Blog Home
  • Mary’s Carving School

Reproduction of an American Rococo Fireplace

April 26, 2017 / Mary May / Acanthus Leaves, Antique furniture reproduction, Wood Carving Tips

Every once in a while a project comes along that cannot easily be explained with words. So I am going to let the photographs explain better than any feeble attempt at words to share this amazing reproduction fireplace experience.

Several months ago, Moby Marks of Richard Marks Restorations here in Charleston, South Carolina, invited me to join them on a project to re-carve a 1770’s American Rococo fireplace for a beautiful home in historic downtown Charleston. What an honor!

The home originally had a beautifully carved fireplace and overmantel that had been removed, sold and vanished around 1900. Wouldn’t it be amazing if that showed up somewhere – maybe tucked away in some attic to appear on Antique’s Road Show?

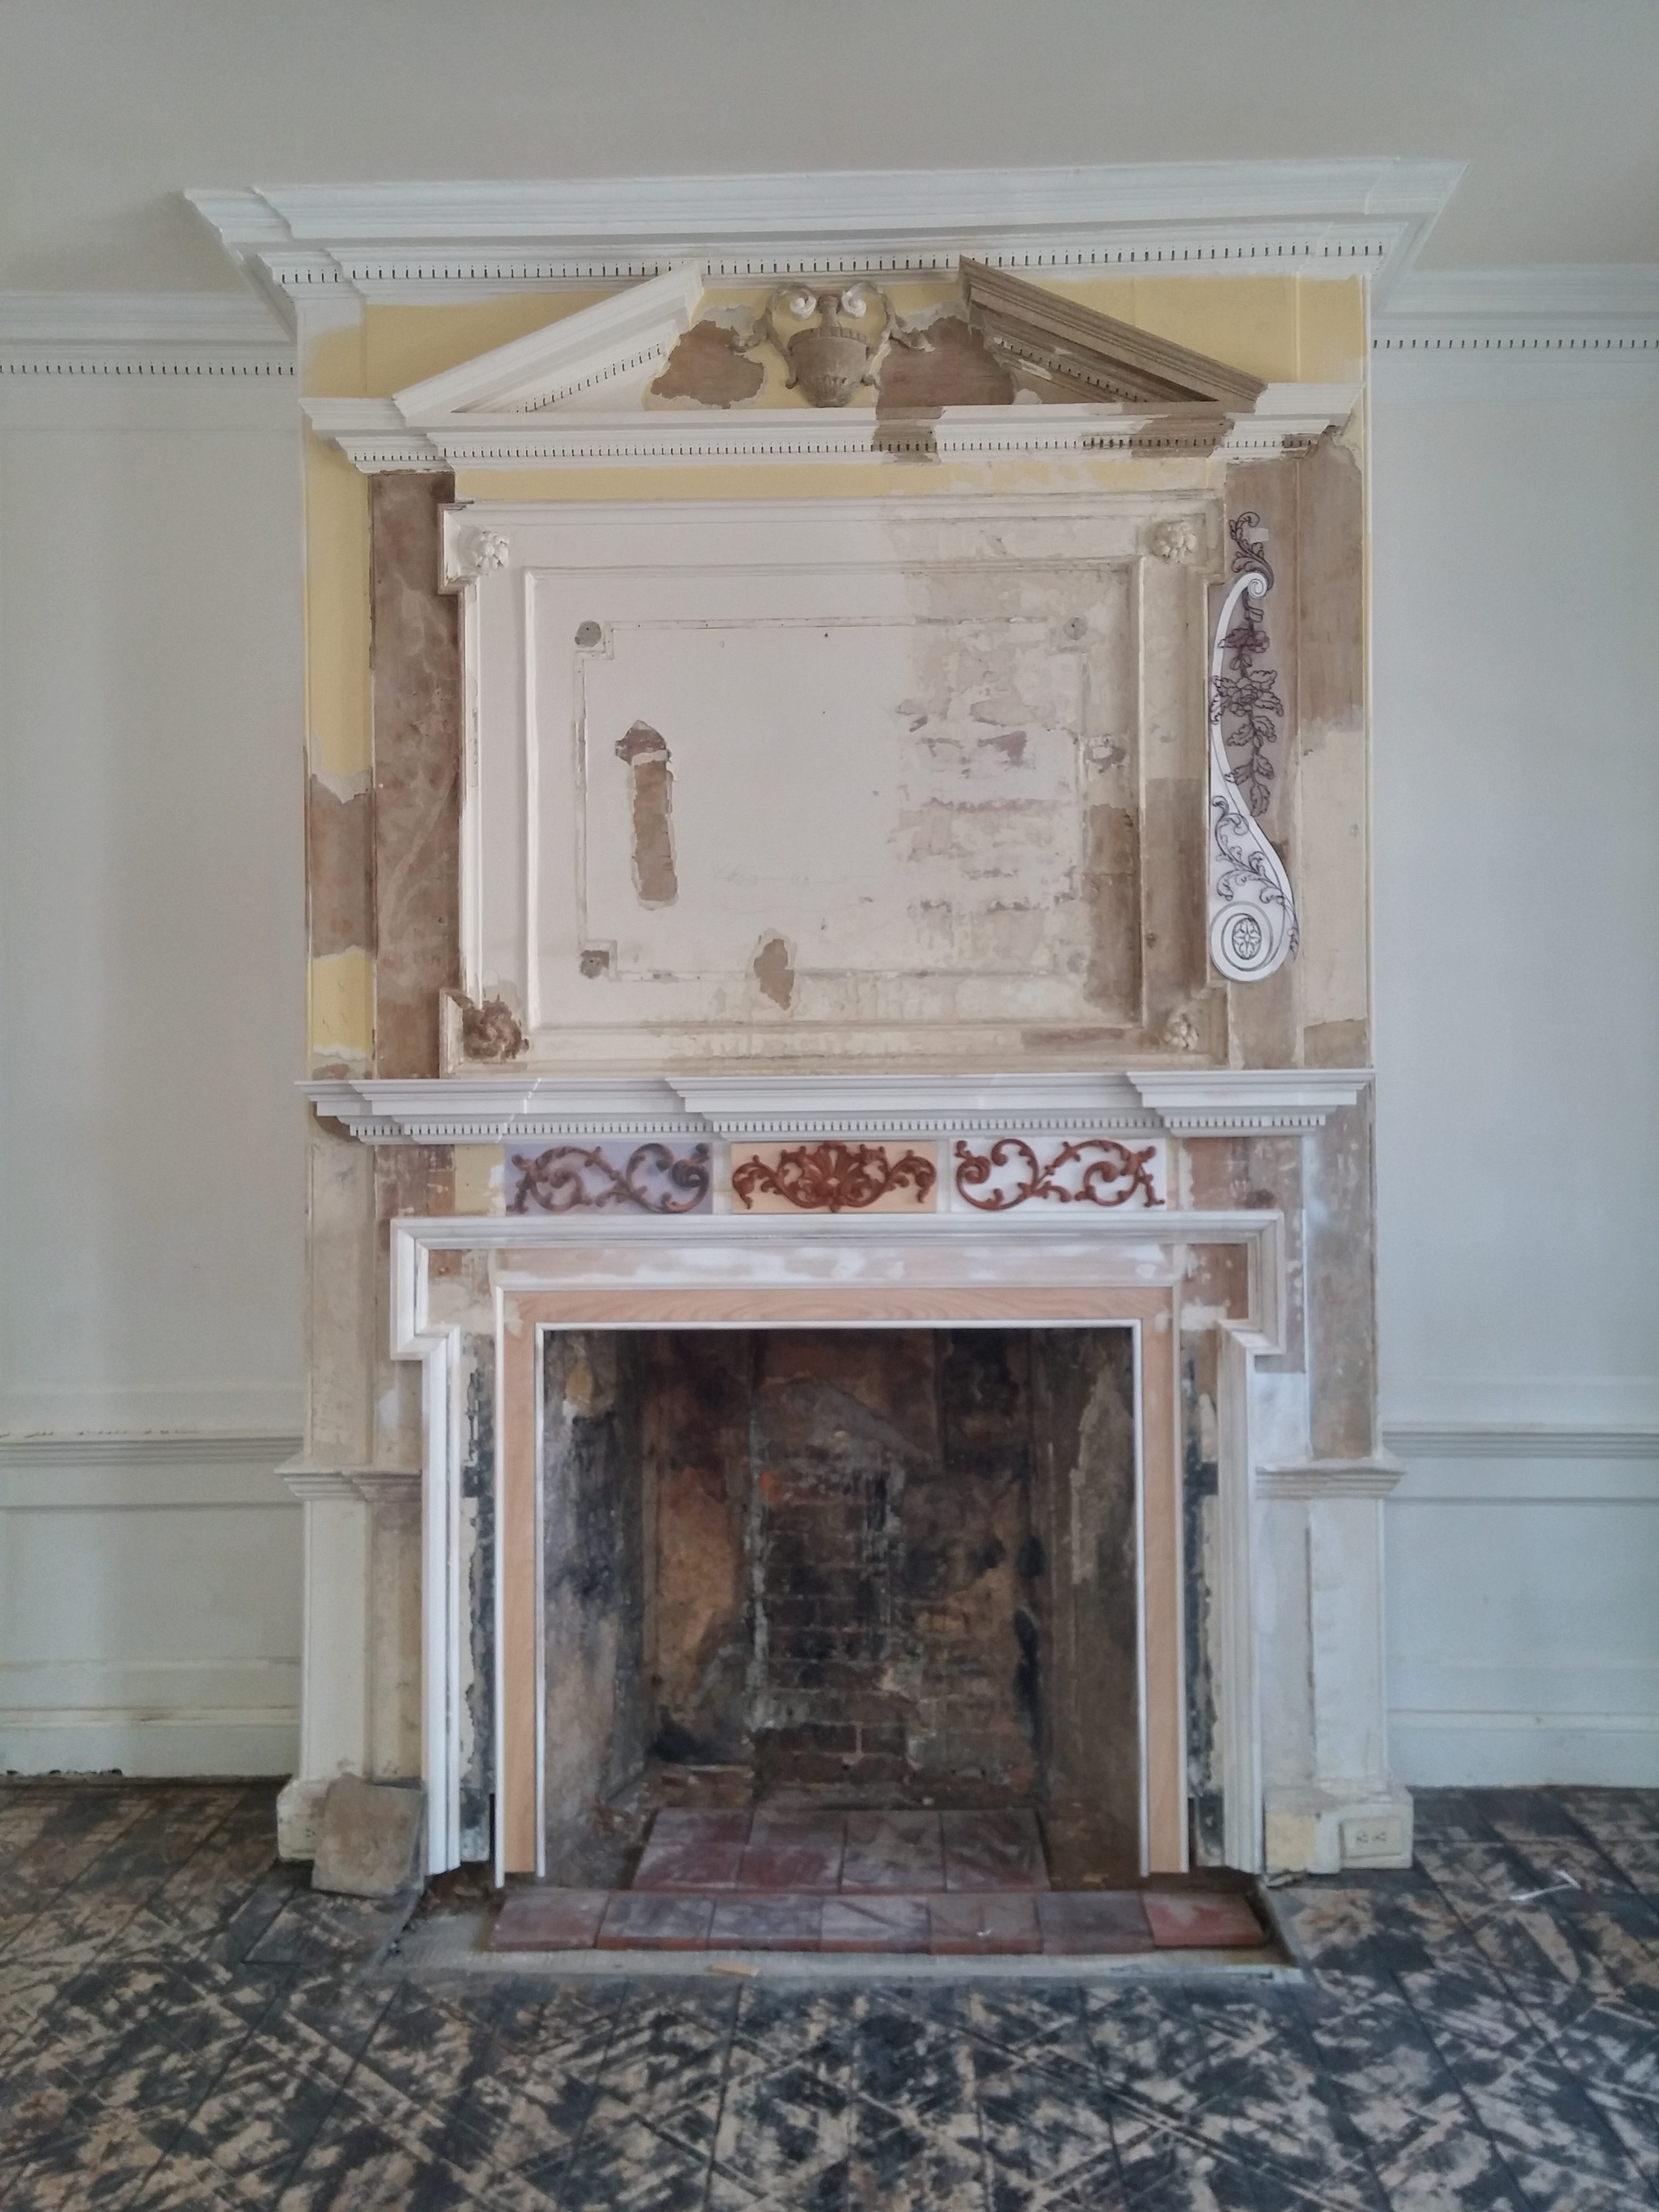
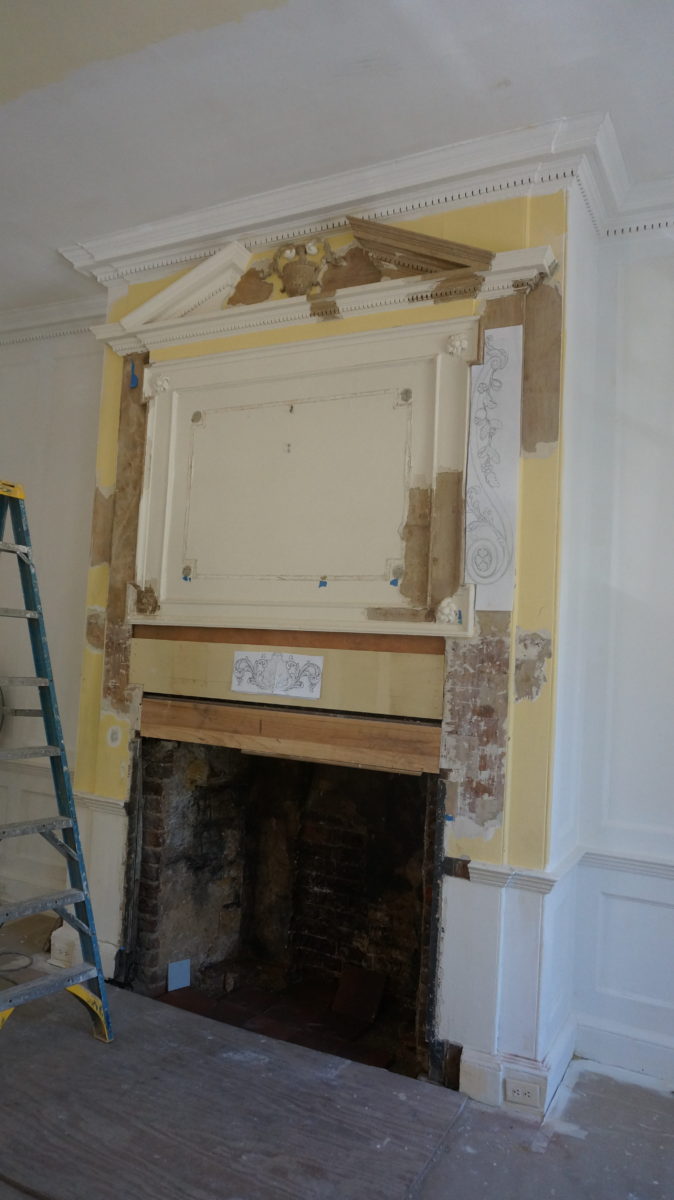
The restoration experts of Richard Marks Restoration delicately removed paint one layer at at time to discover if there was any evidence of glue or a pattern of the original carving. They found a very clear and obvious shadow on the left side of the overmantel.

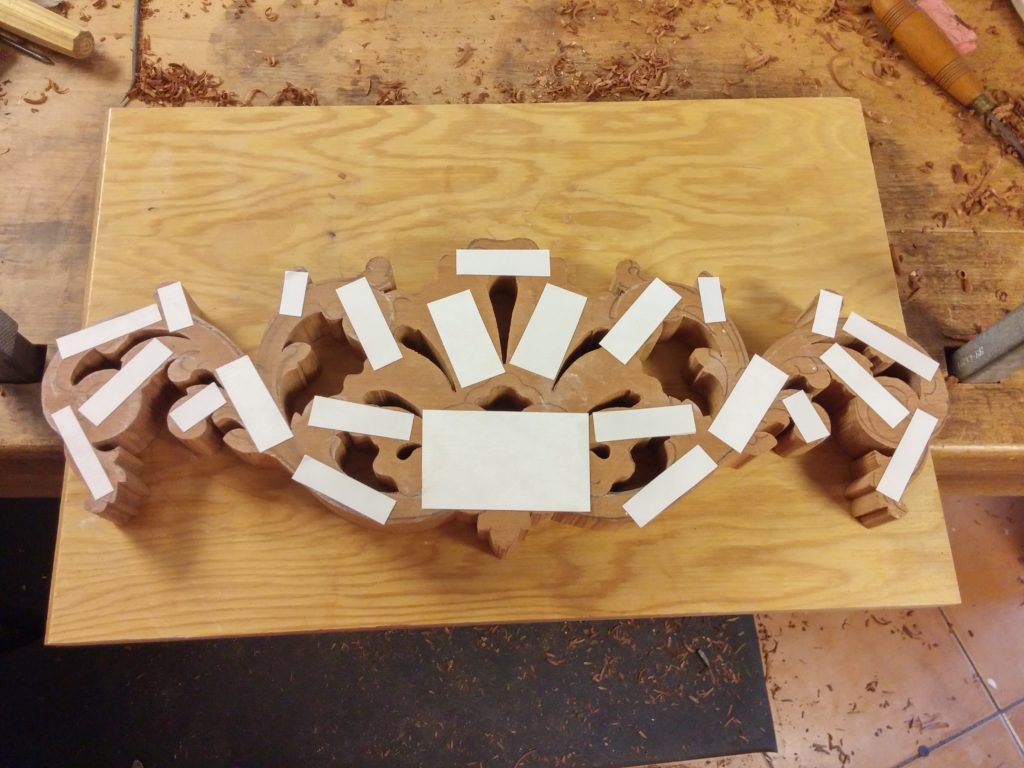
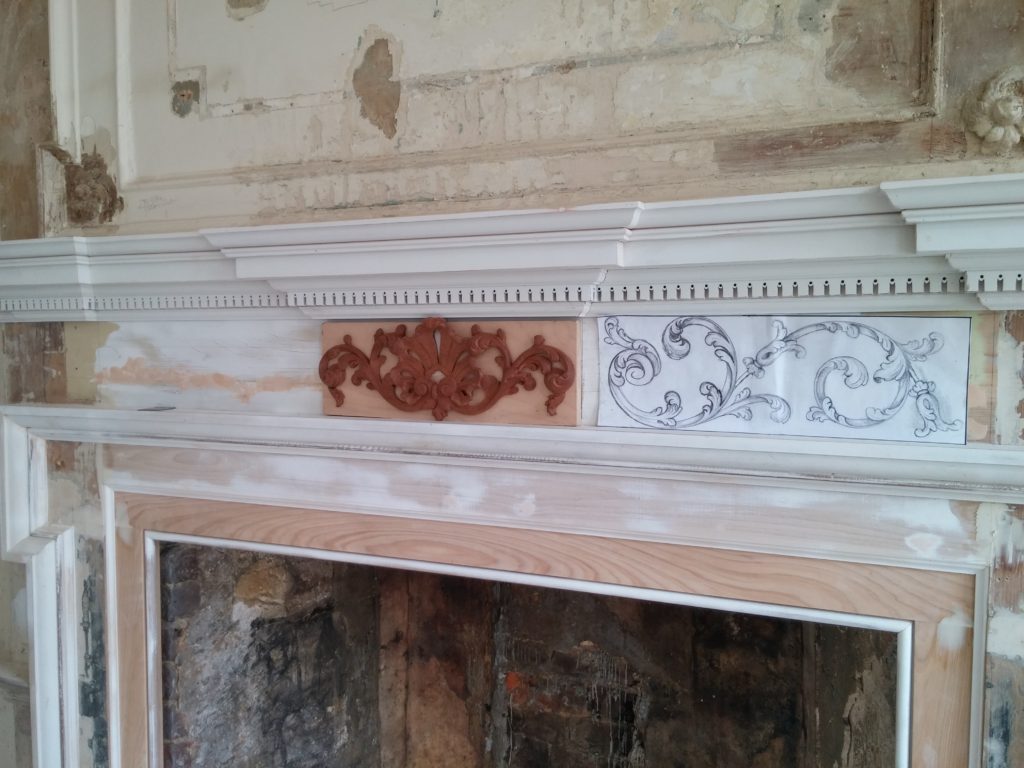
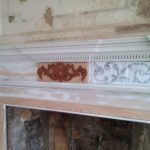
Here is a photo of the blank fireplace with some ideas of what may have been there originally. Notice the shadow of a long scroll shape on the left side of the overmantel (the white paper with drawings is my interpretation of what will be re-carved). The undermantel itself had no evidence of the original carving, as it was thought to have been rebuilt within the last century.

Discussions and debates with designers and architect.

It took several months of back and forth discussions between myself, the architect, Ralph Harvard, Moby Marks and a variety of others to finalize the design to keep it as historically correct to Charleston as possible. We all concluded that the mantel design needed to be similar to existing fireplaces still in existence in Charleston today. So I enjoyed exploring and discovering many of the older Charleston homes with some amazing original fireplace mantels. We chose to take pieces from various historical homes and brought them into a cohesive historically correct Rococo style fireplace from the style that was common around 1770 to 1780s.

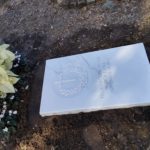
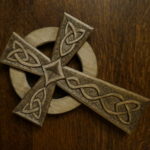
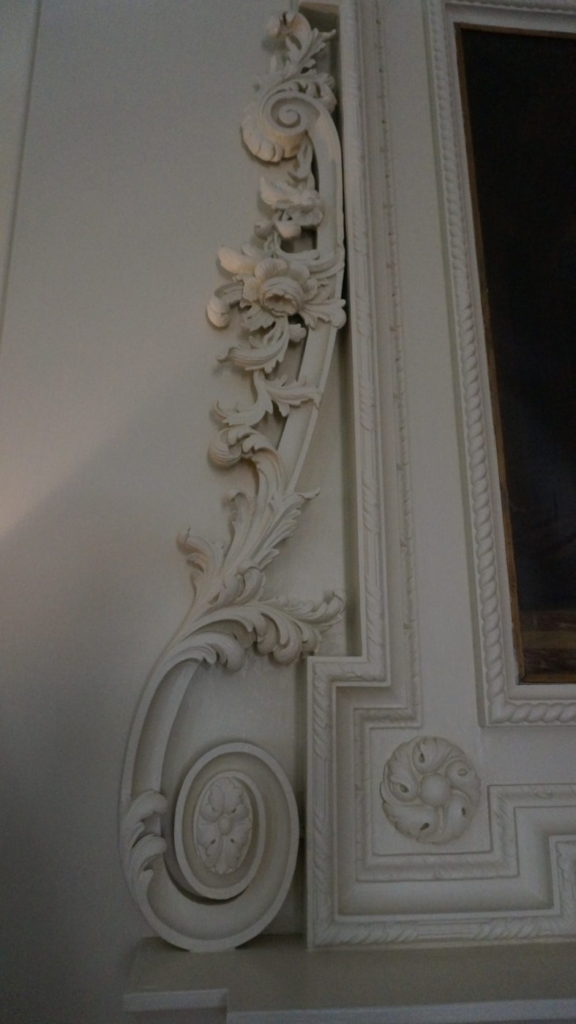
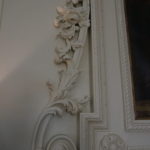
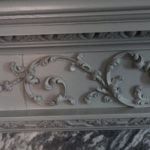
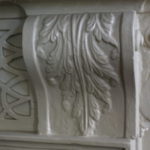
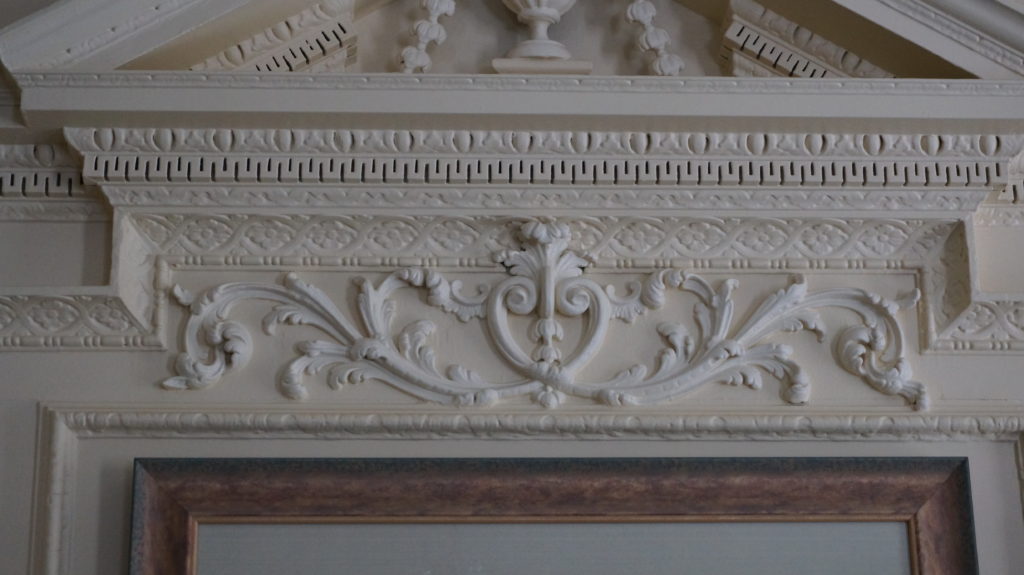
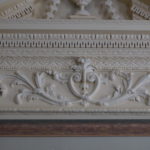
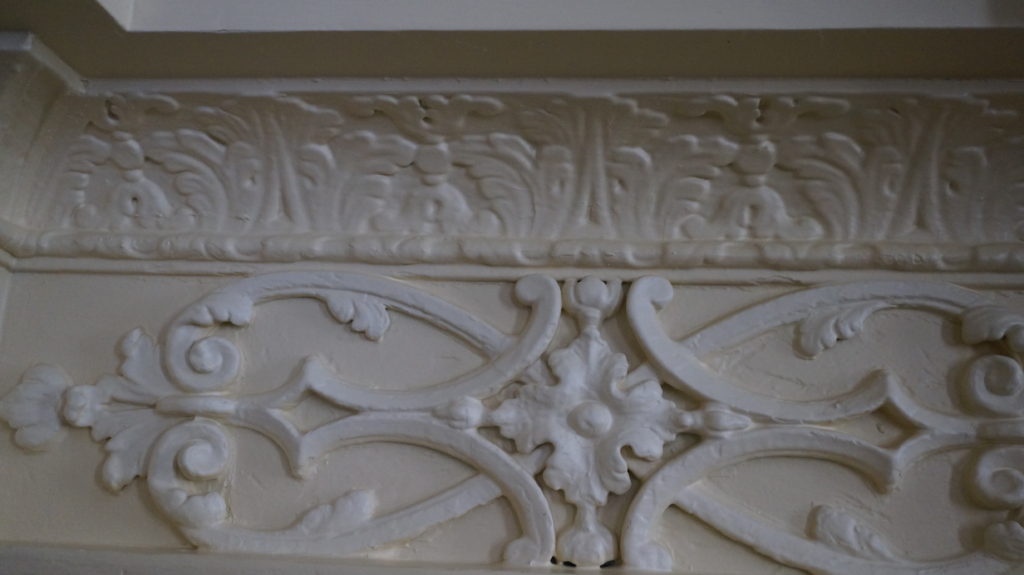
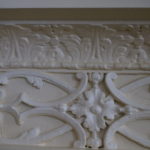
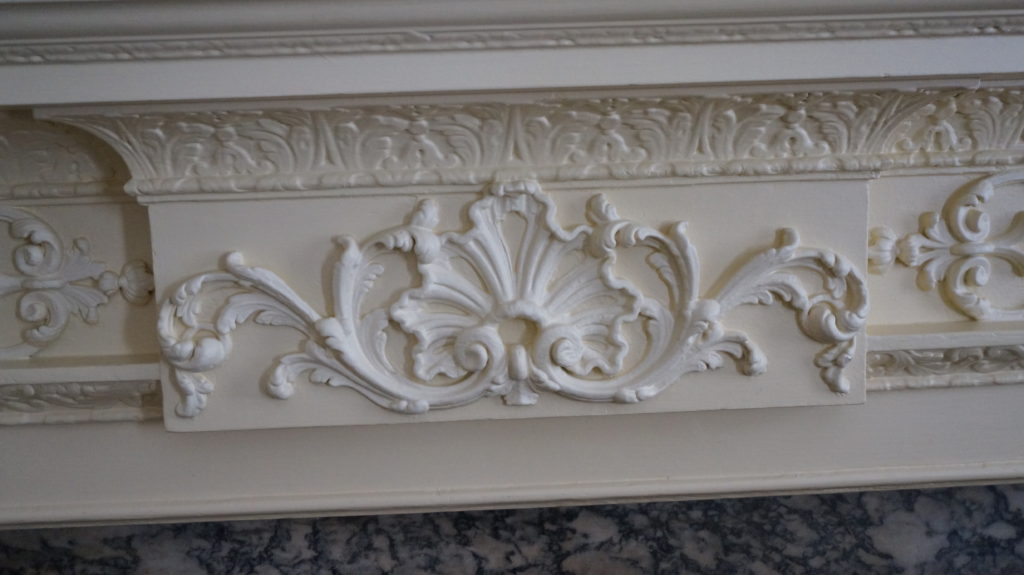
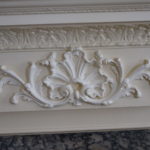
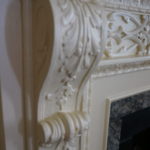
Here are photos of original carved fireplace details around Charleston where we based many of these designs. Notice they are all painted white, so… yes, mine will also be painted.

Overmantel detail of Stuart House, Original is at Minneapolis Institute of Arts
Bocquet House undermantel design
Bocquet house overmantel design
Fullerton House bracket
Humphrey Sommers House overmantel detail
Humphrey Sommers House undermanetl detail
Stuart House overmantel scroll detail
Humphrey Sommers House center panel in undermantel
Humphrey Sommers chimneypiece
Humphrey Sommers Bracket

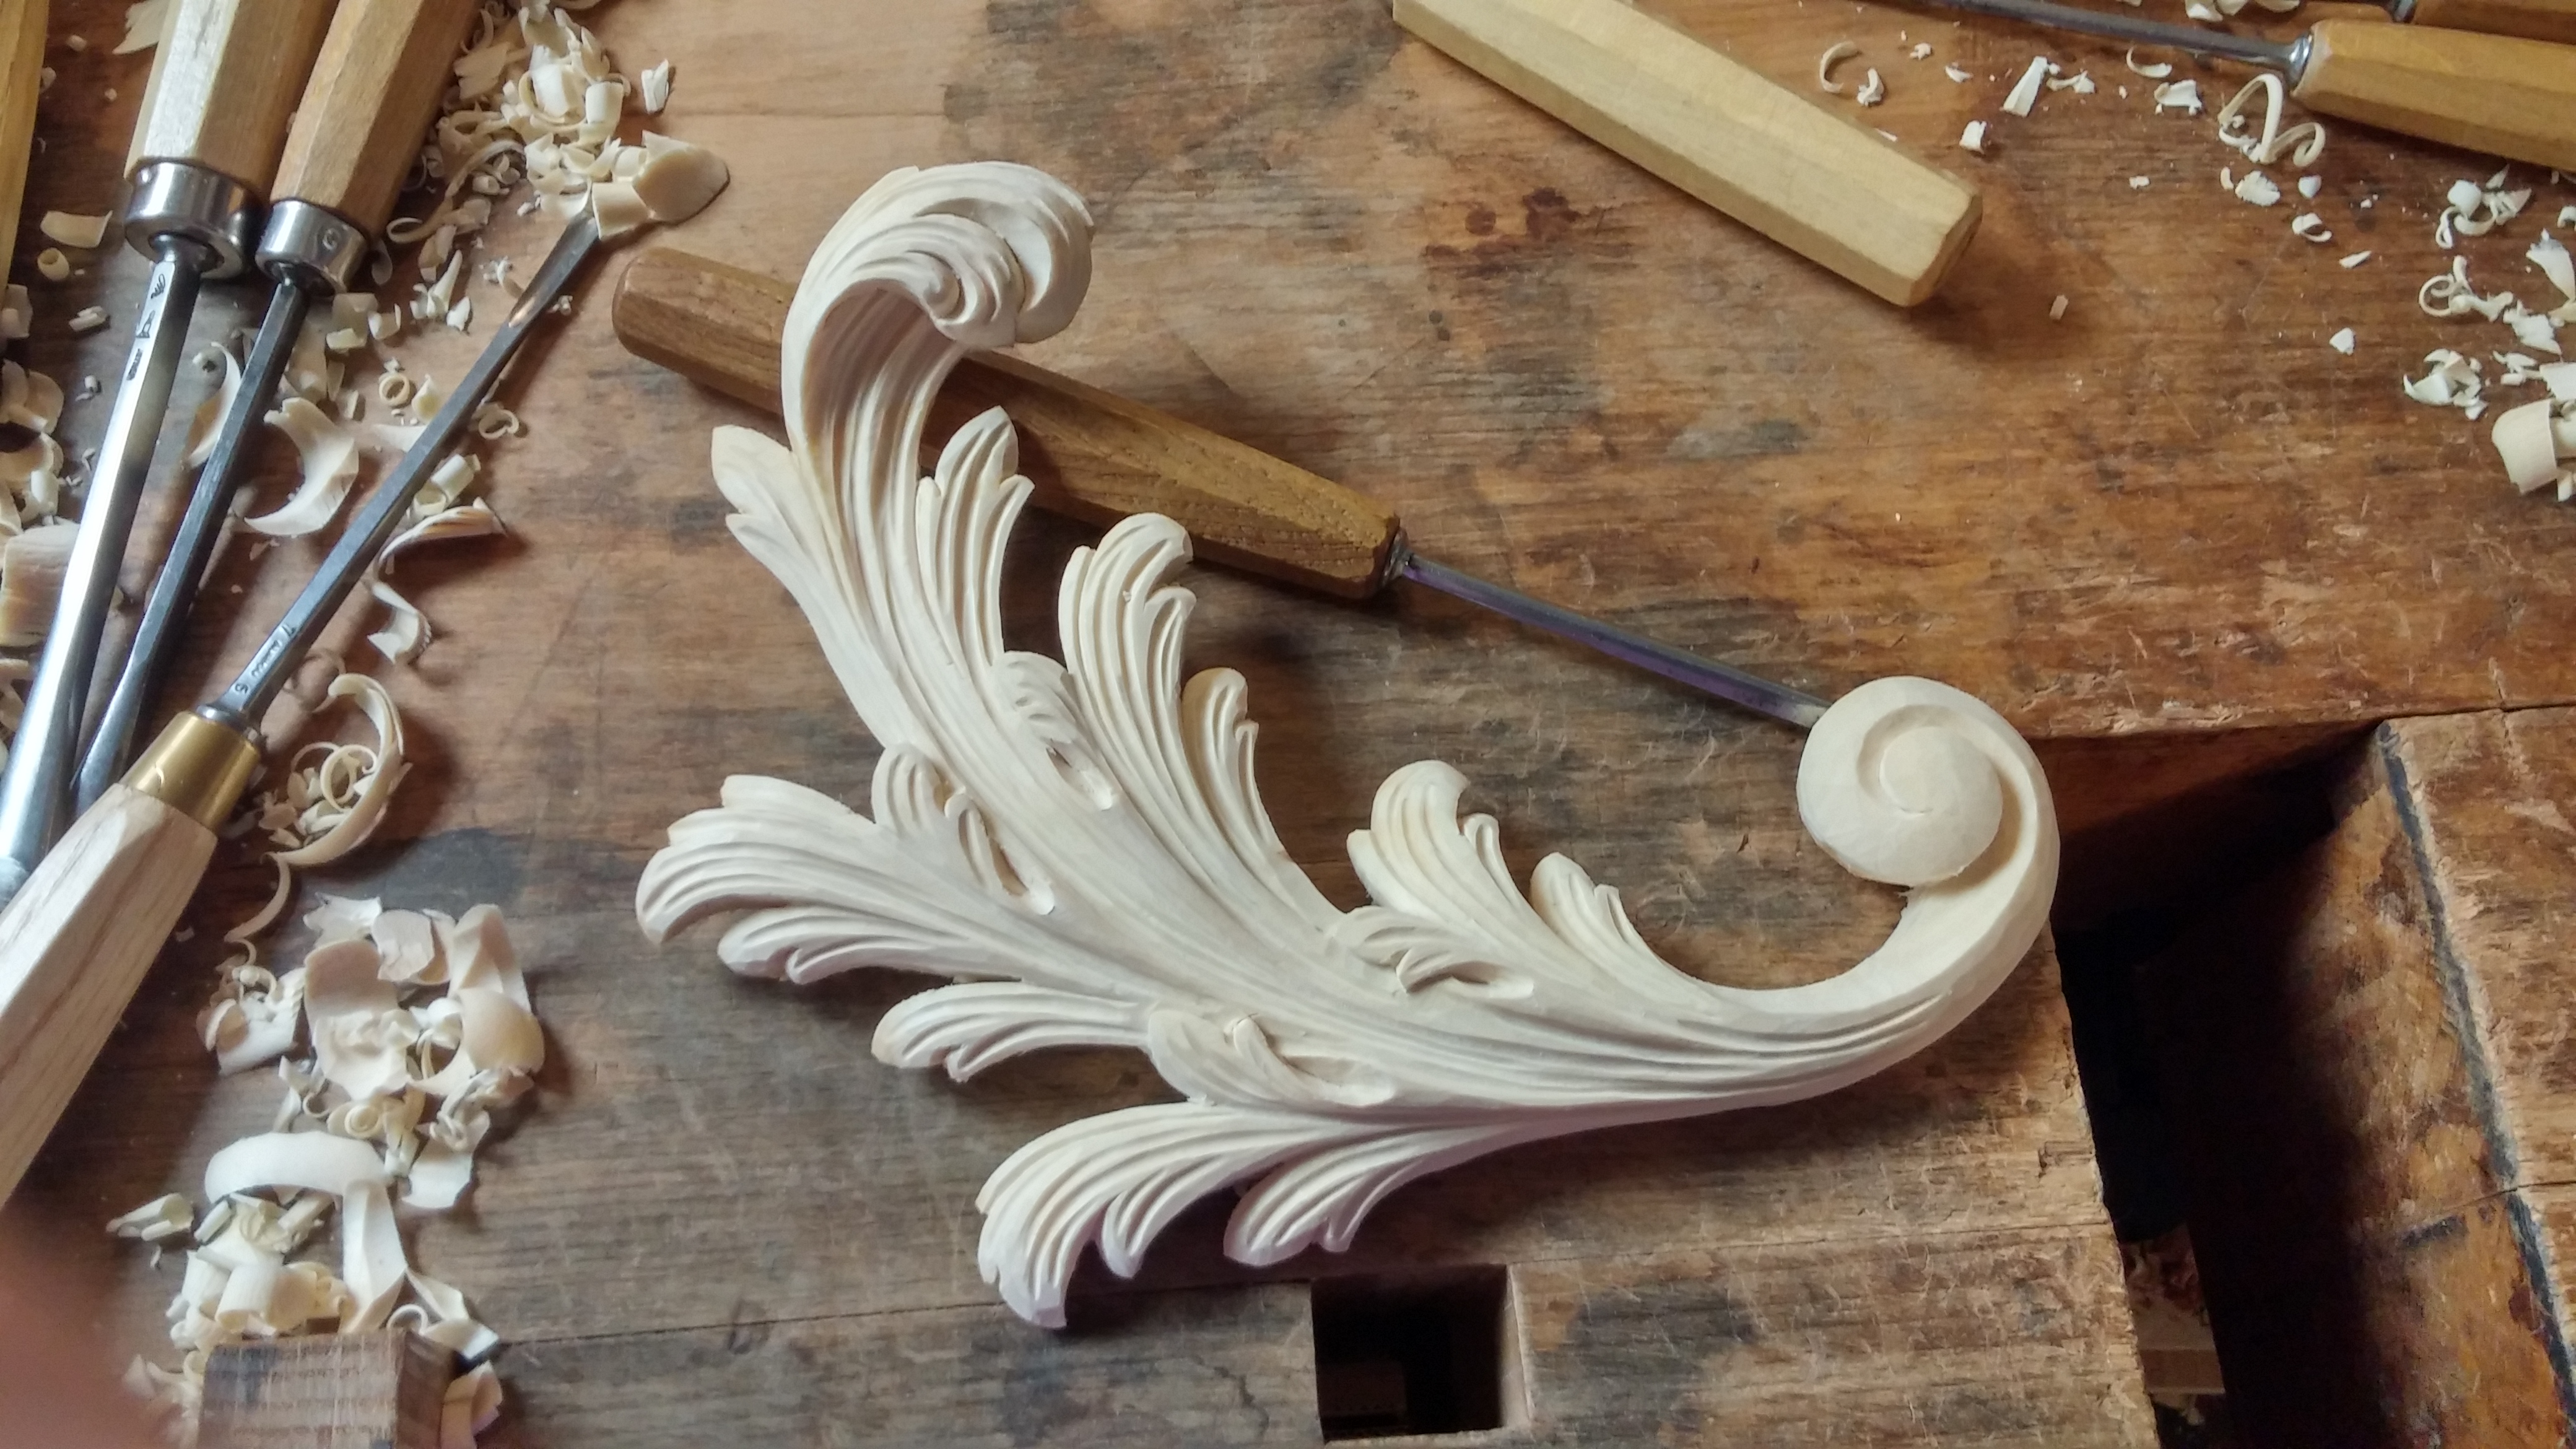
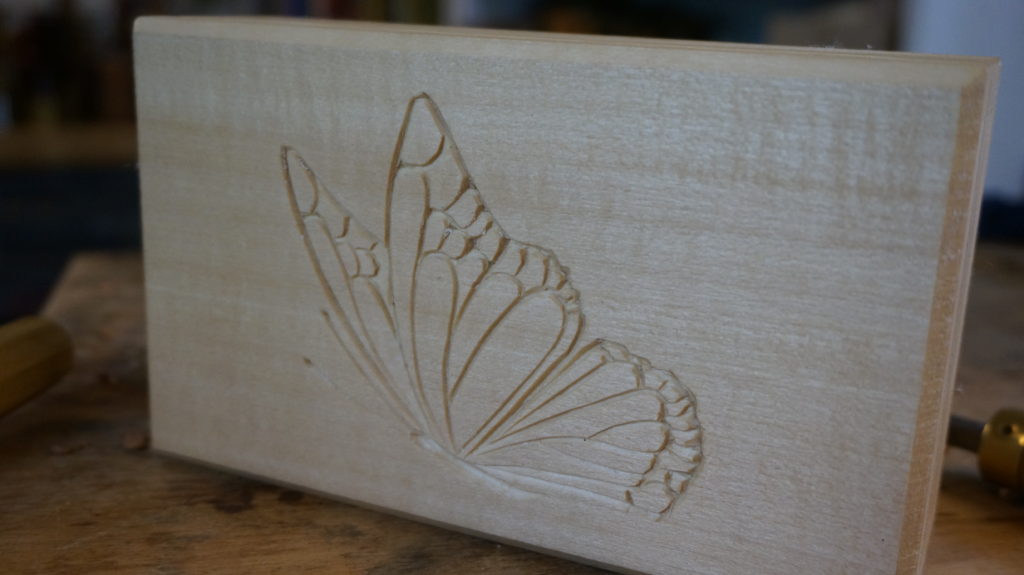
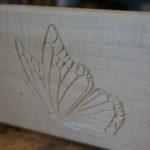
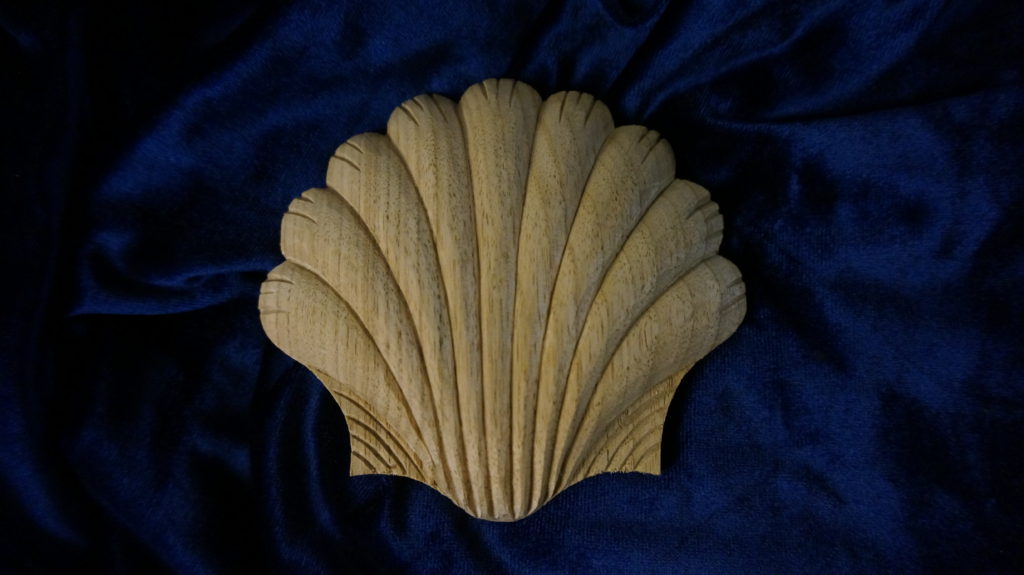
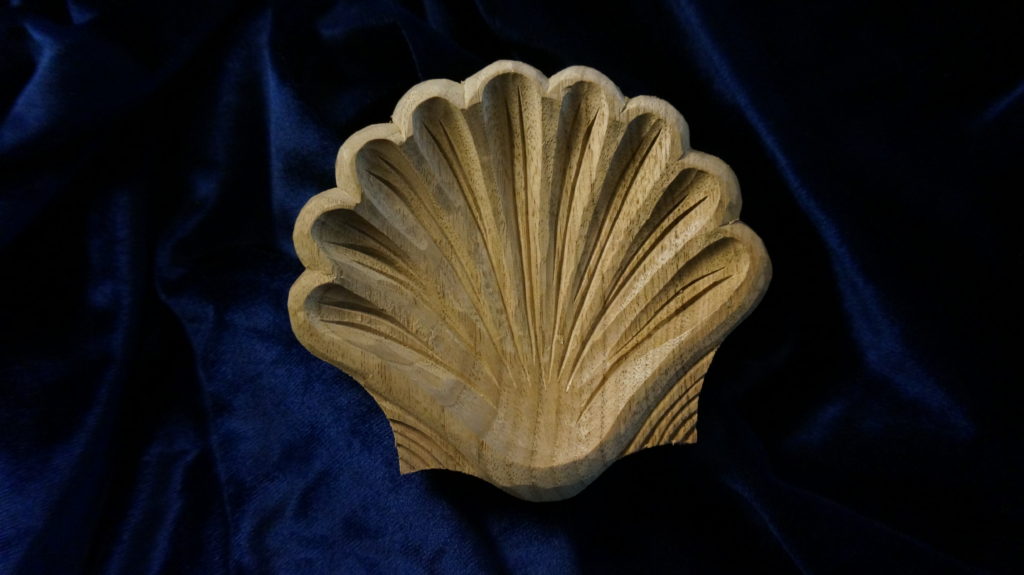
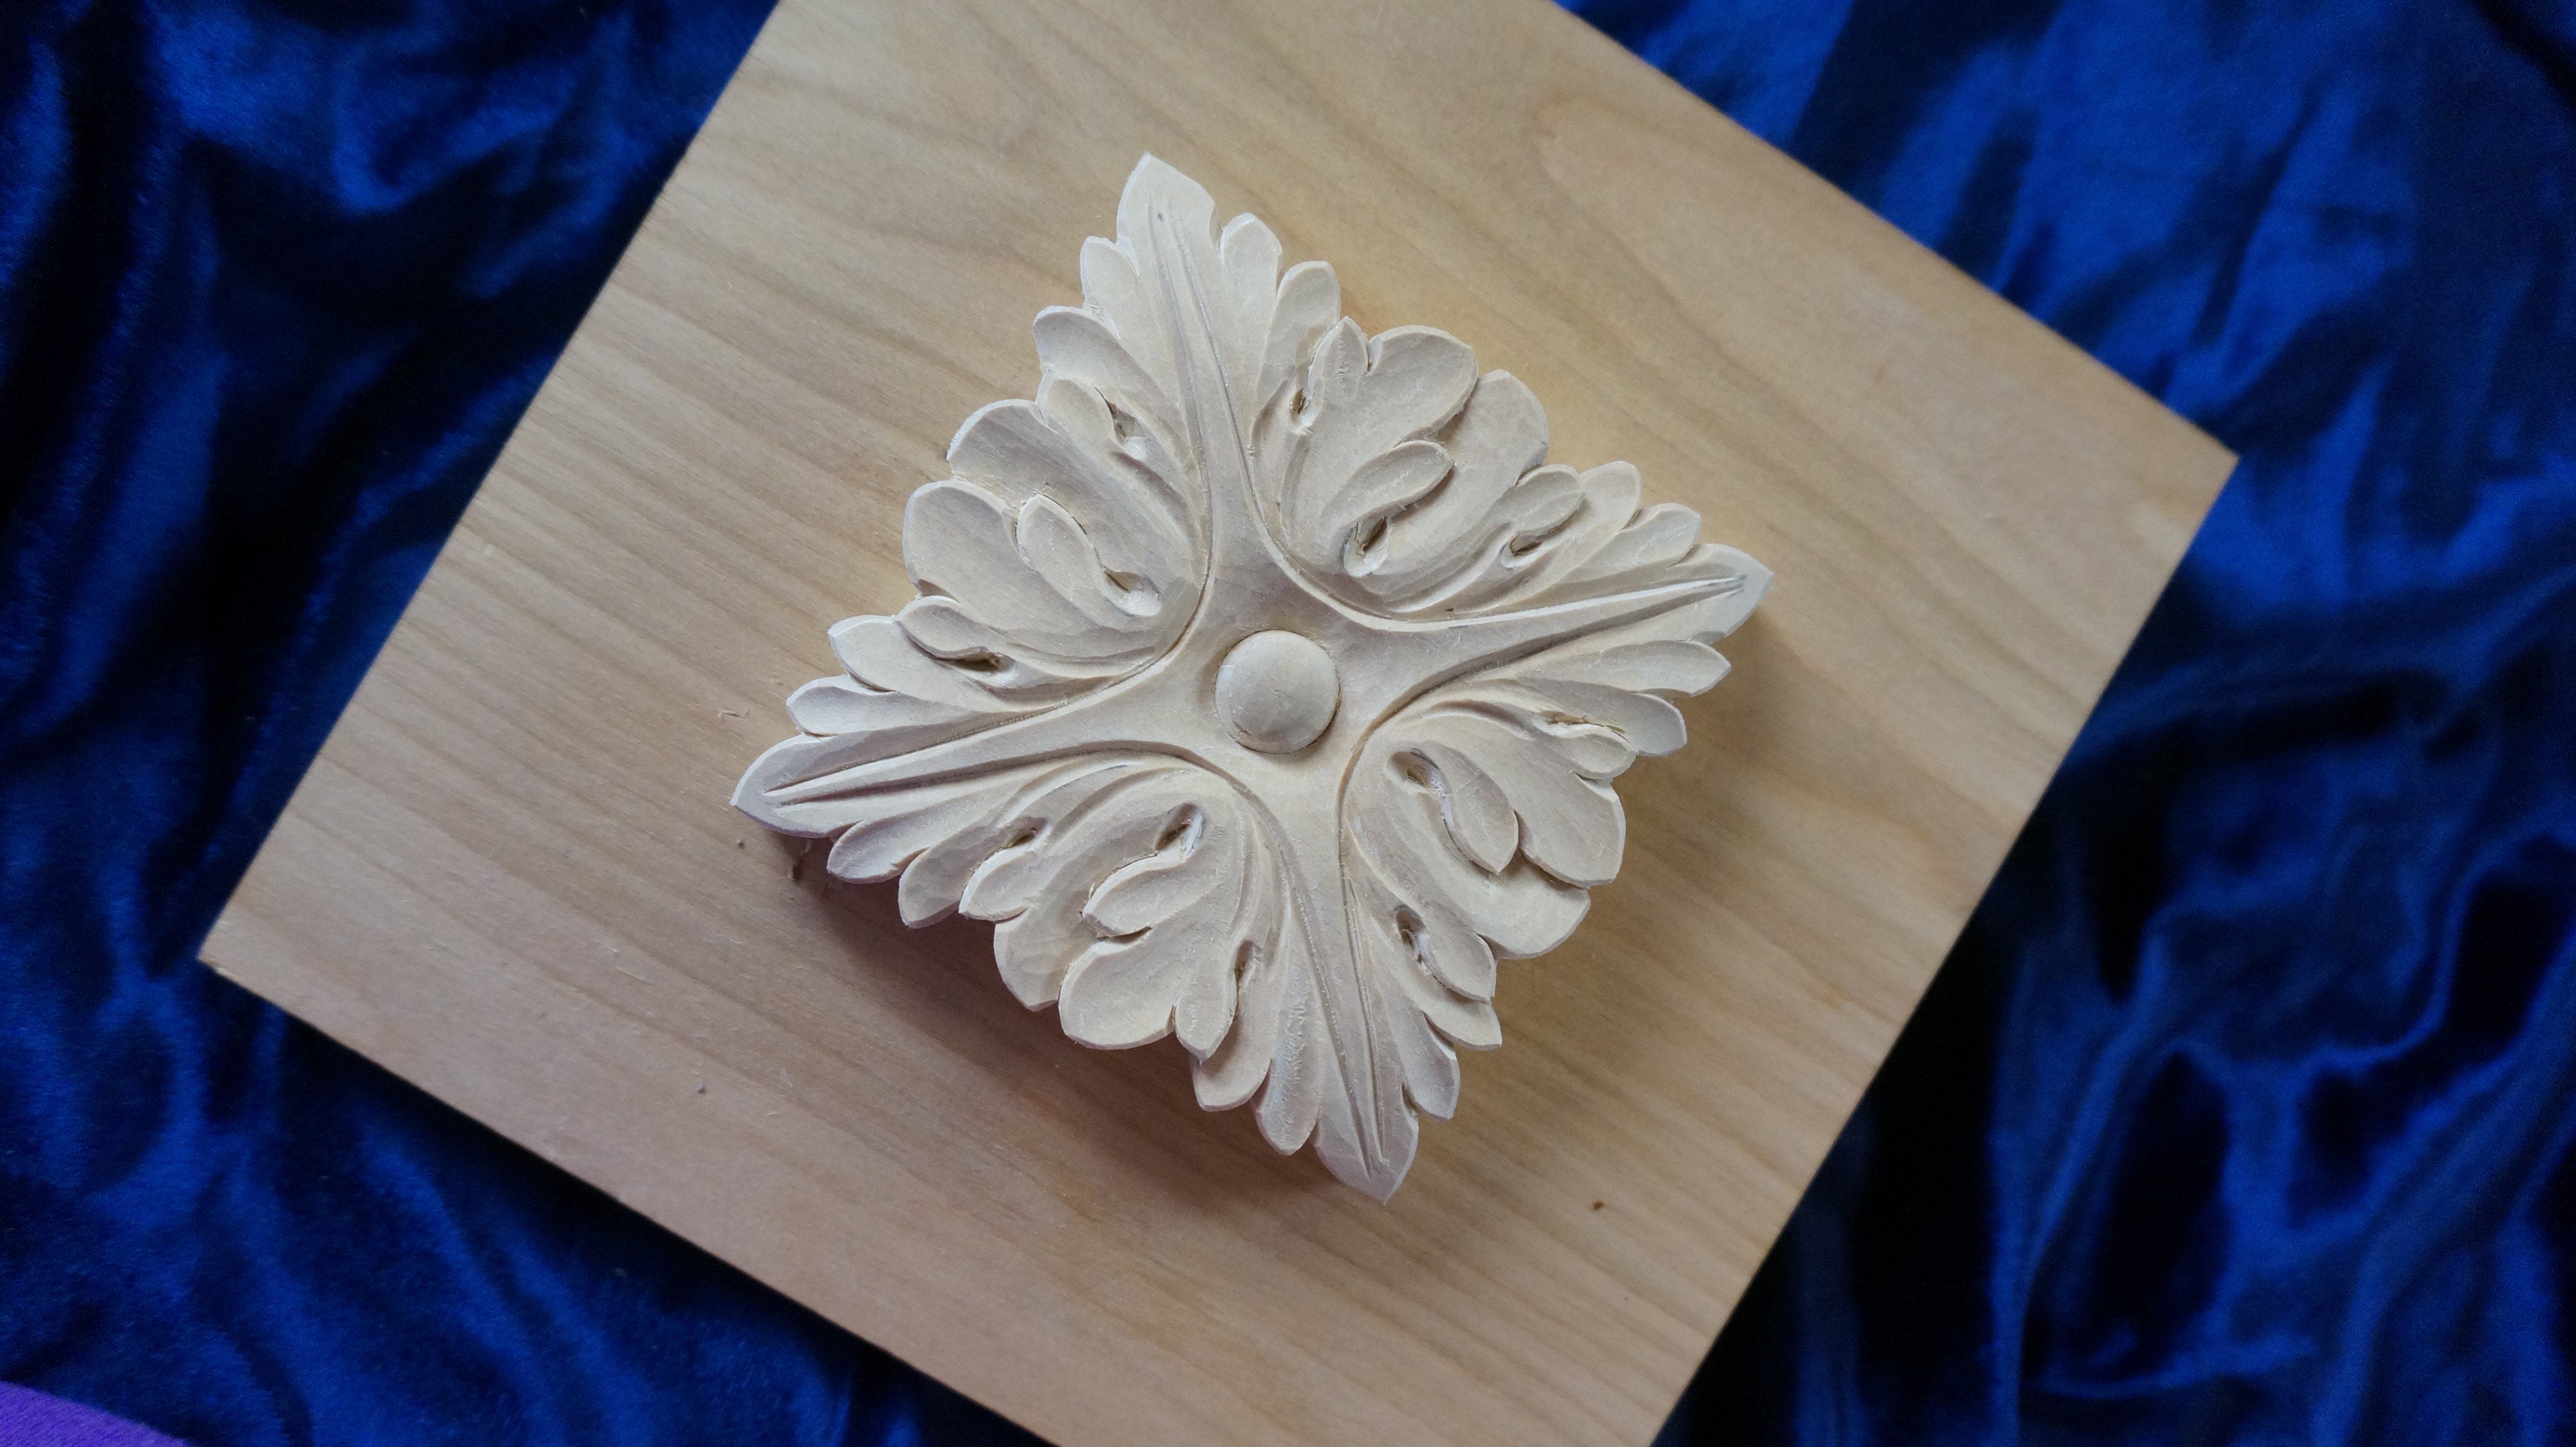
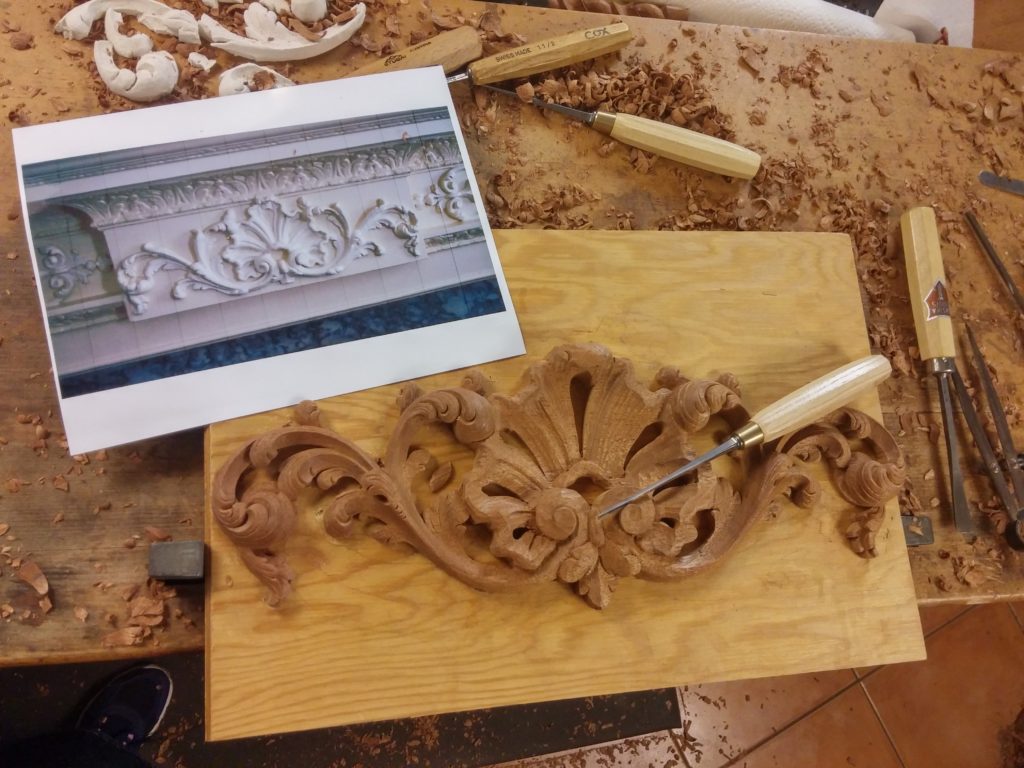
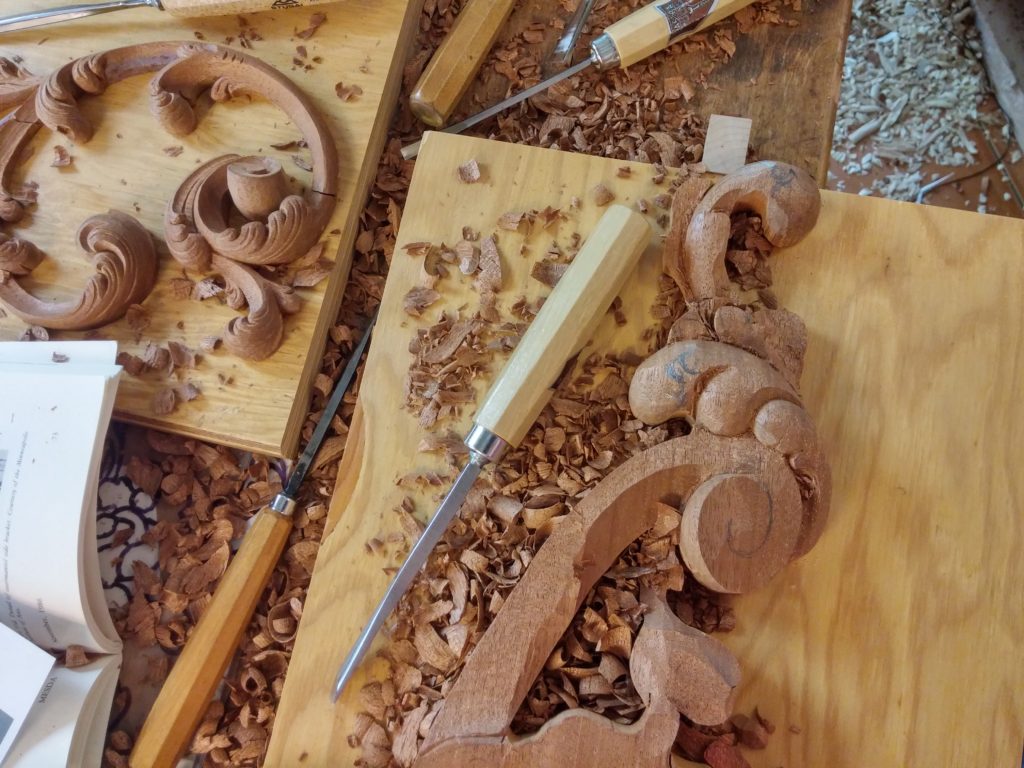
Here is the start of the carving of a Rococo shell and acanthus design. This is the center panel for the undermantel and is carved in 1-1/8″ thick mahogany. I have a video lesson on how to carve this on my online school. You can see a short introduction video to the lessons here – Acanthus Leaf and Shell.

Design of center panel
Clay model of rococo acanthus design
Getting prepared to carve
Double-sided tape to attach carving to a temporary backer board
Working through the acanthus leaf details
One side finished
Carving the shell
Nearly finished!
Temporarily attached to mantel.

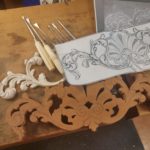
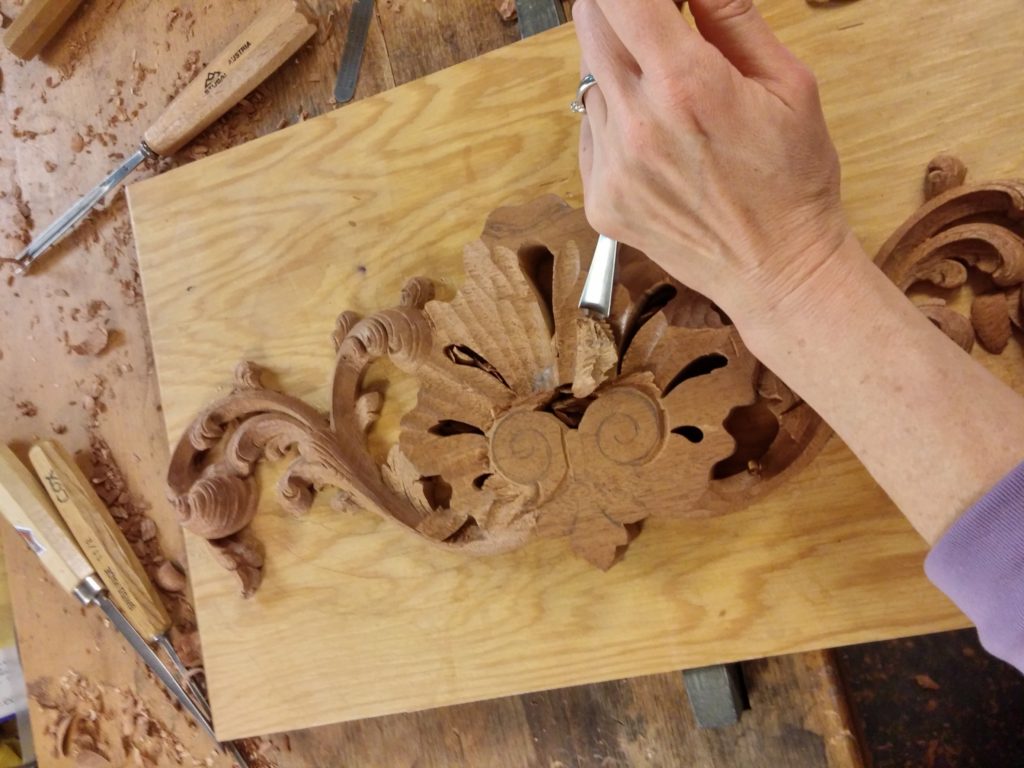
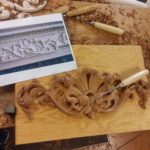
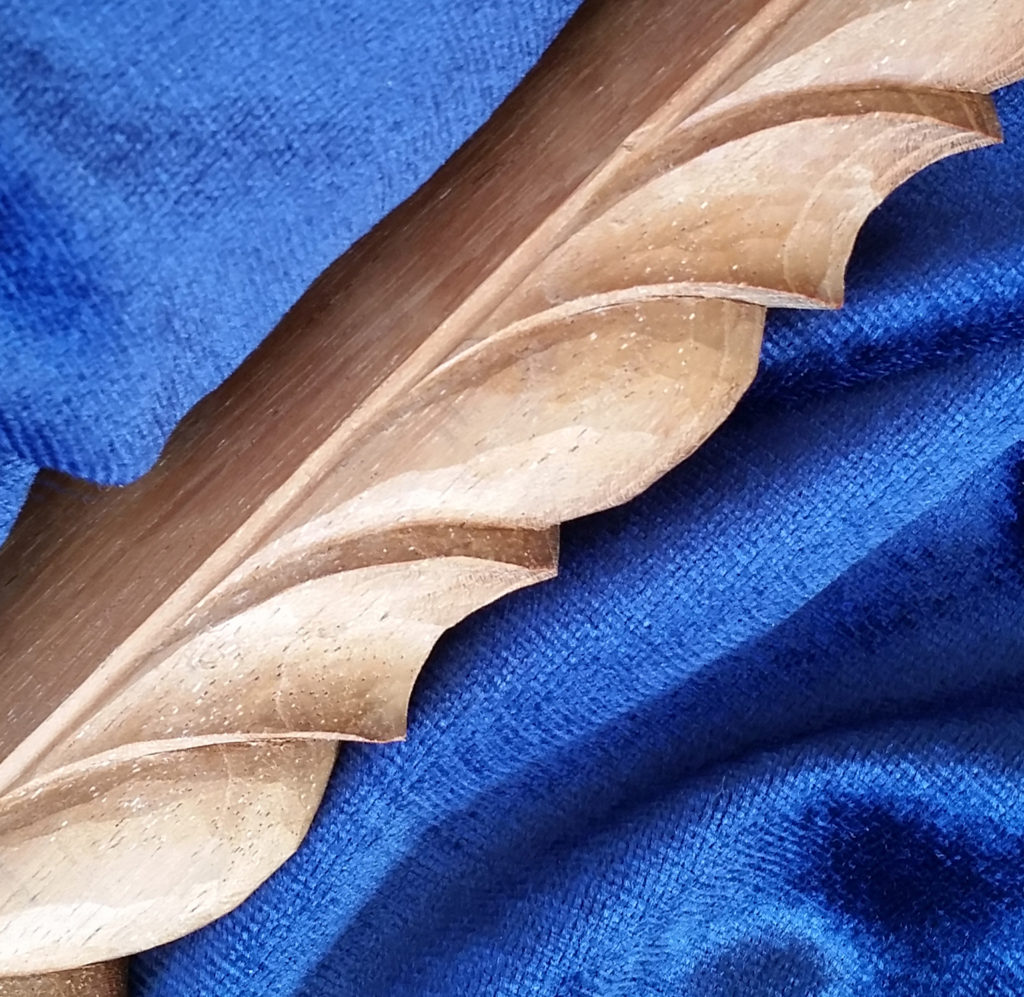
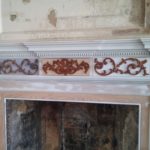
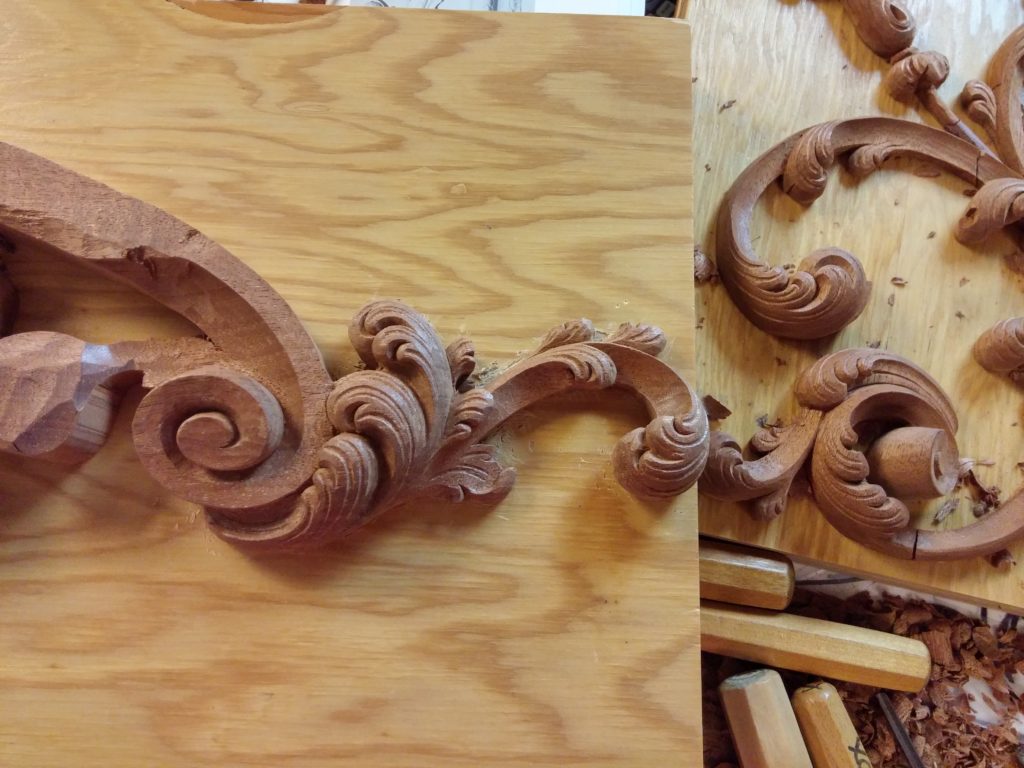
The following detail is the delicate Rococo design on the frieze to the right and left of the shell and acanthus design in the undermantel. This is also carved in 1-1/8″ thick mahogany.

Rococo scroll on frieze
Another angle of scroll
Rococo leaves of frieze
Continuing rococo acanthus leaves to complete one side of frieze
Getting ready to duplicate one size of frieze in reverse
How it appears applied to undermantel

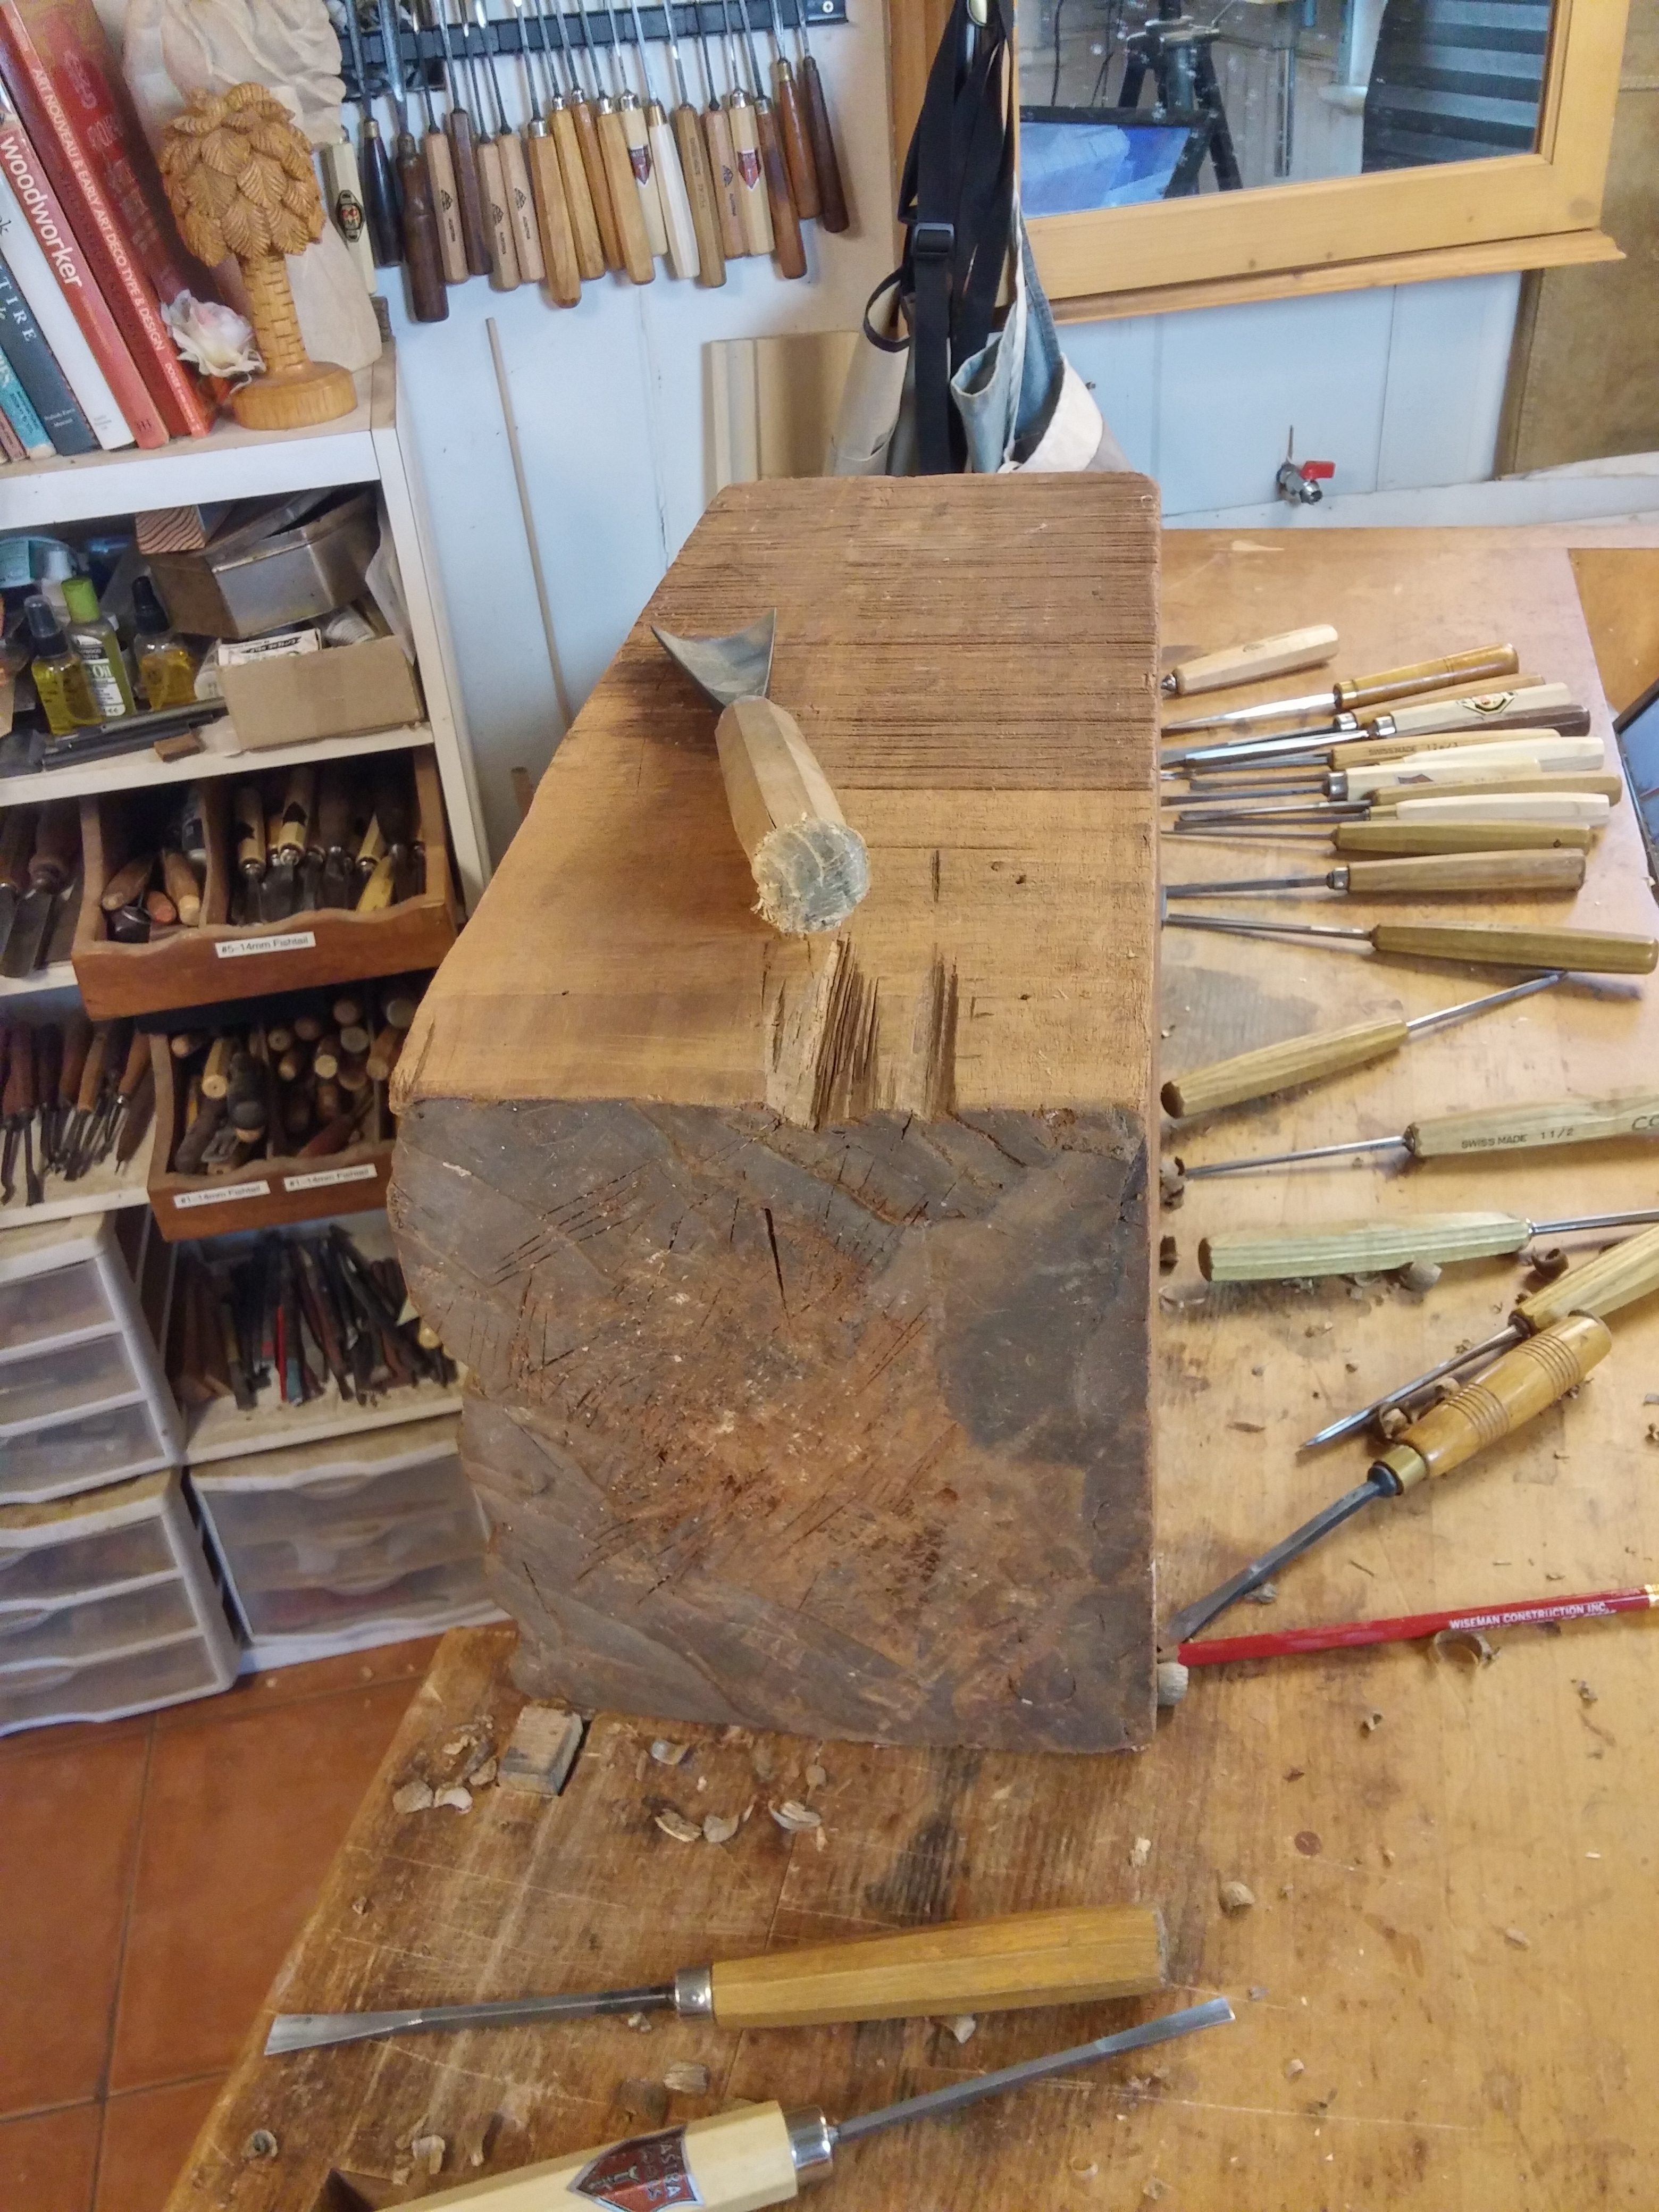
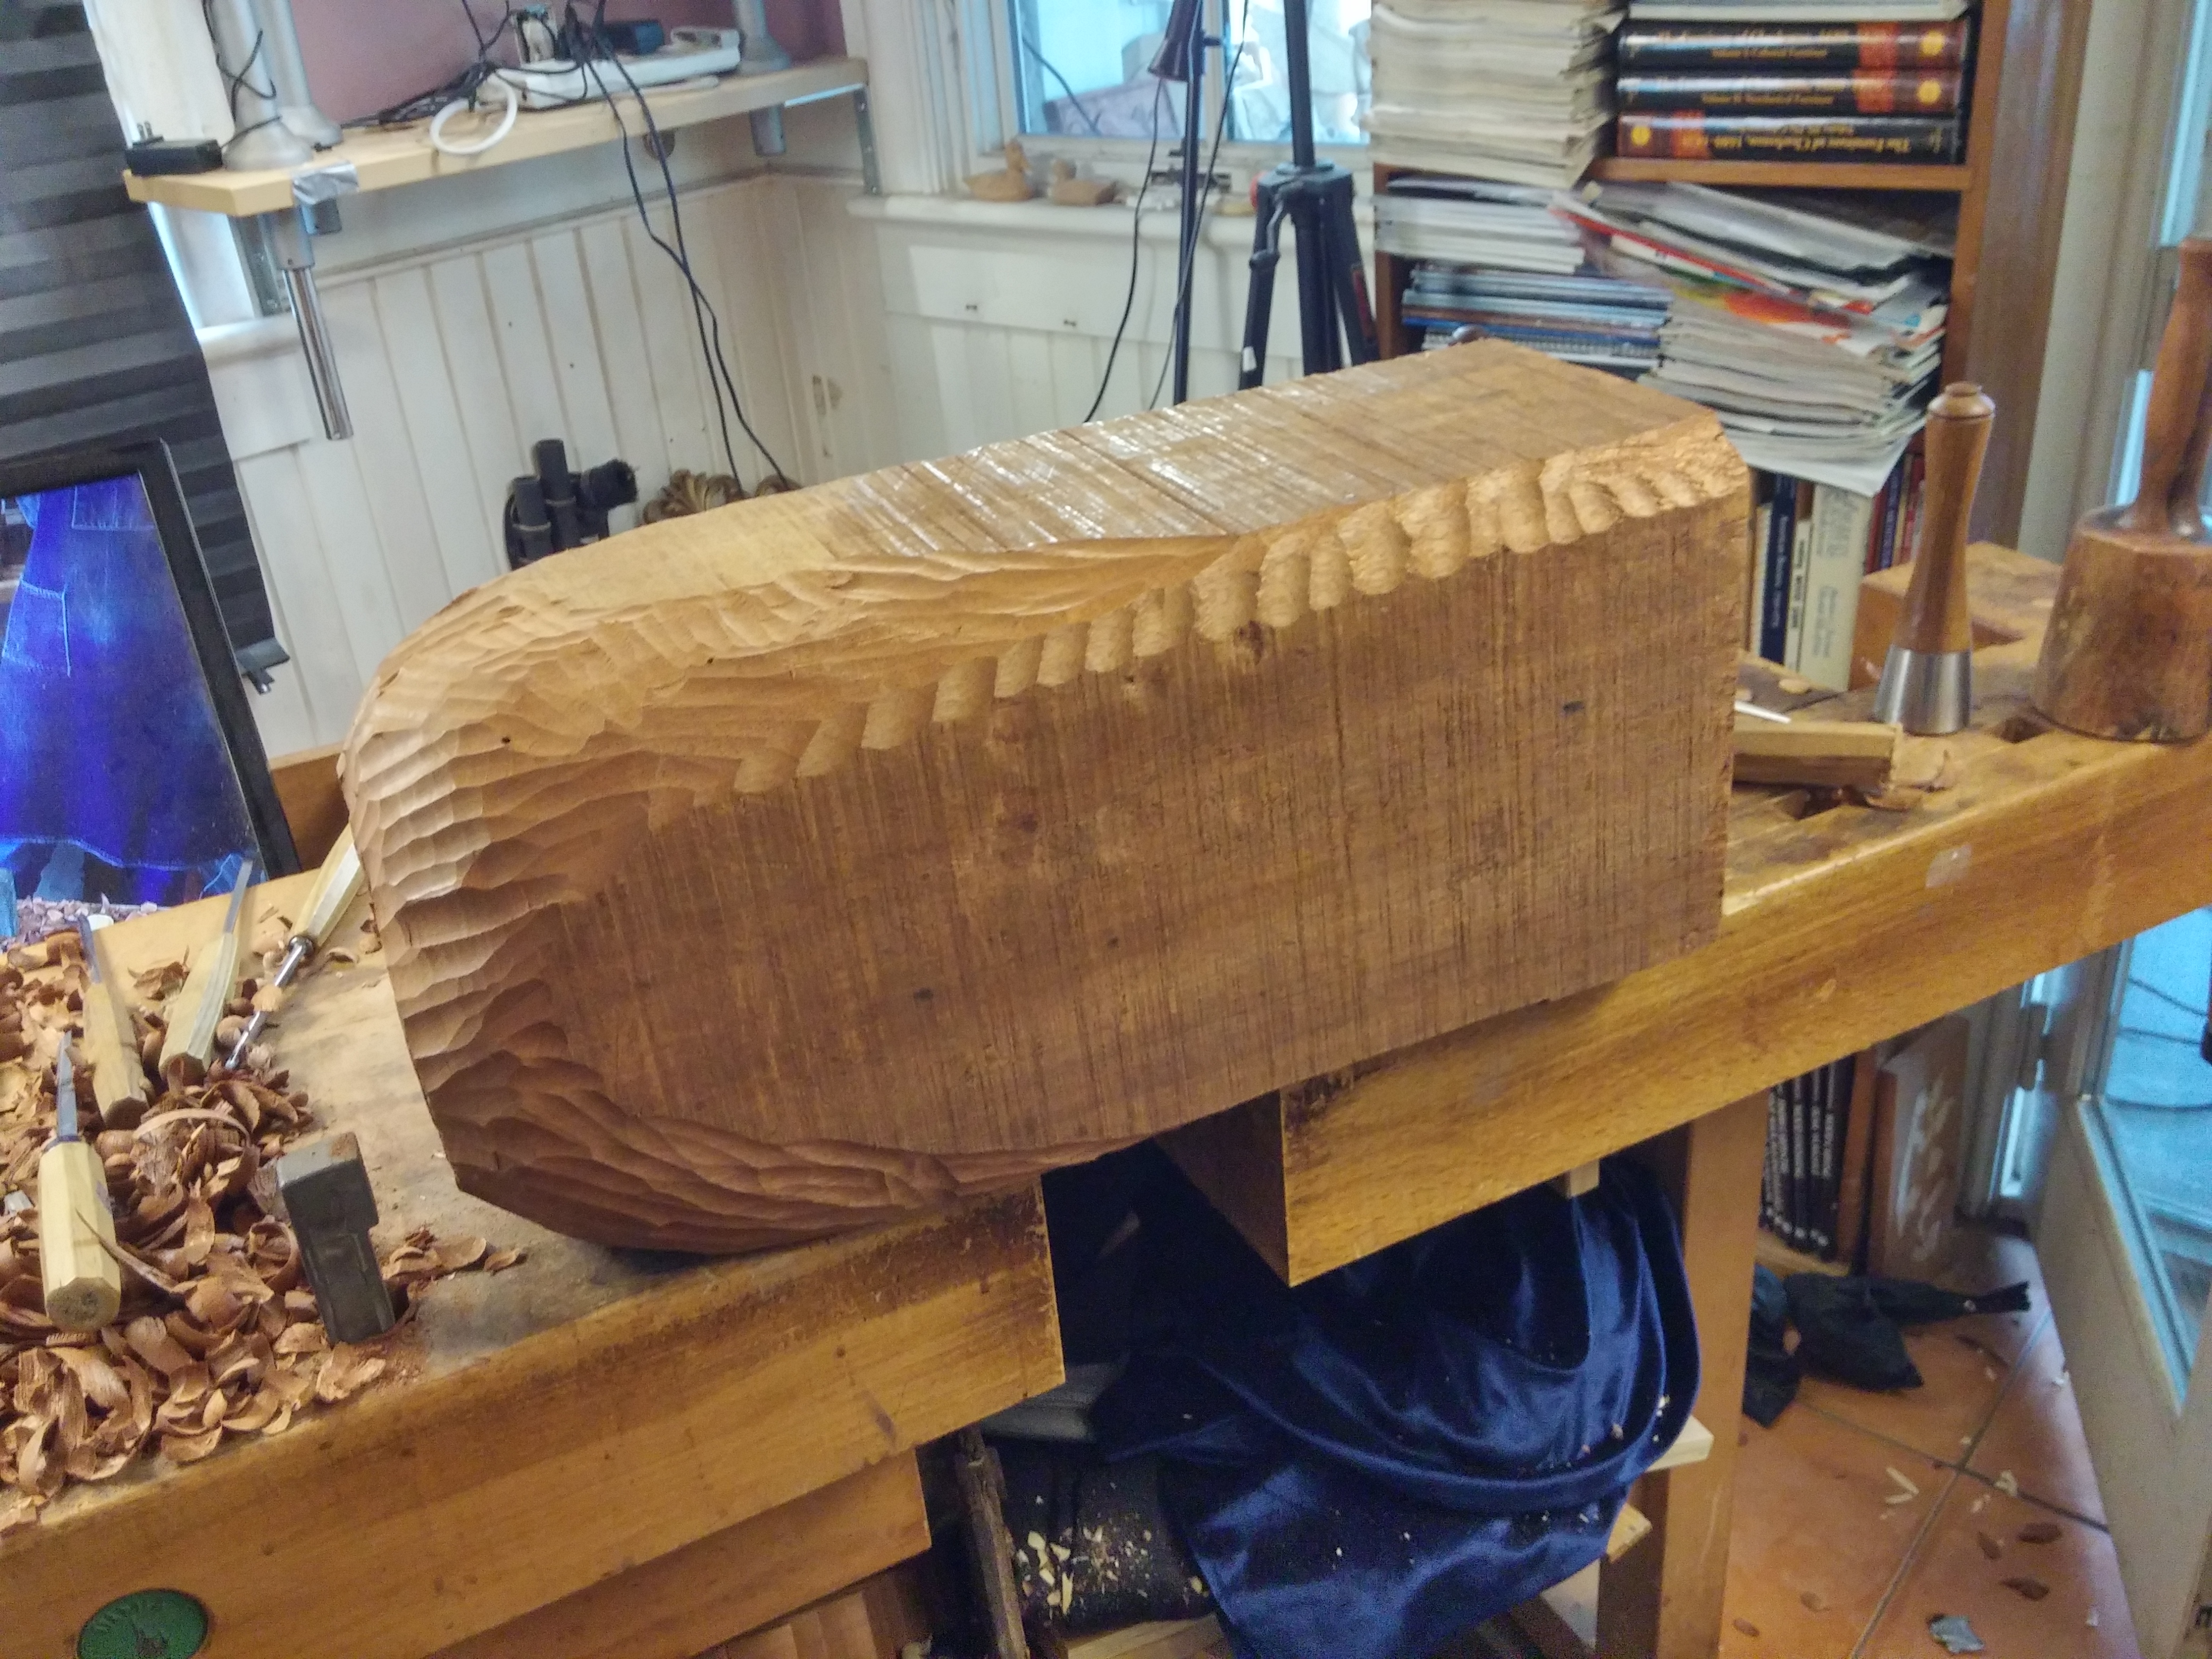
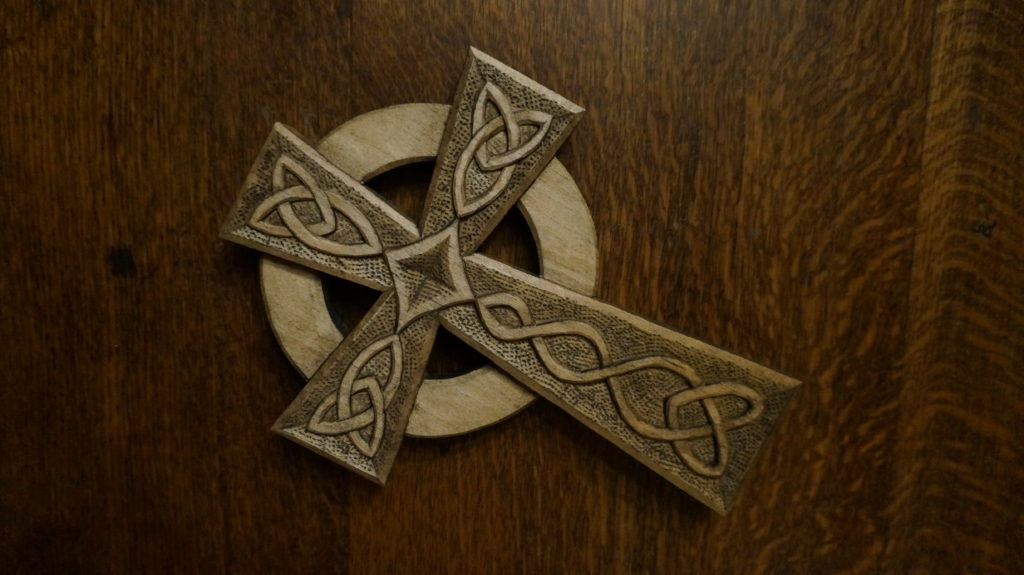
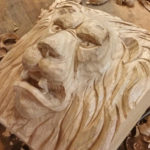
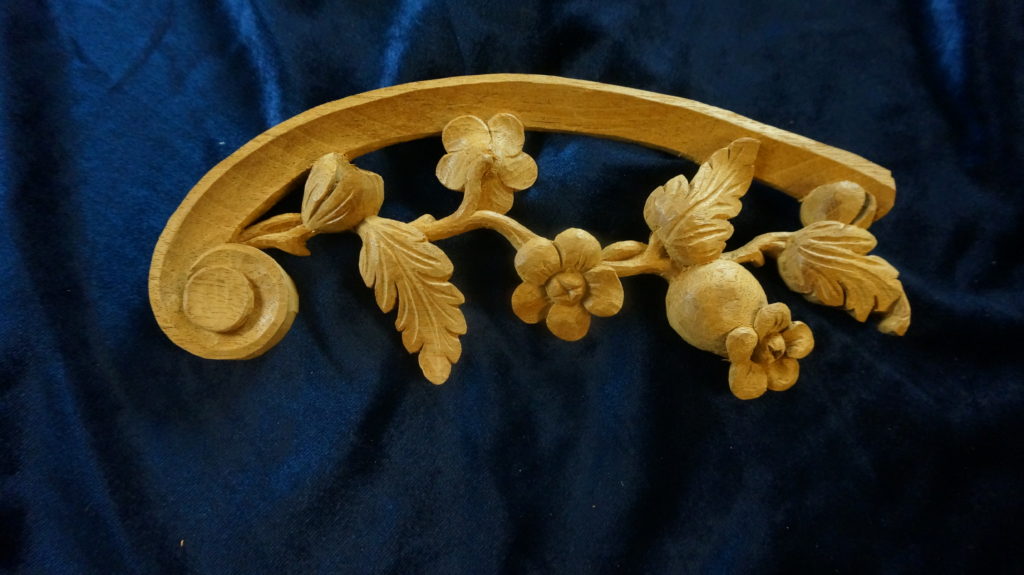
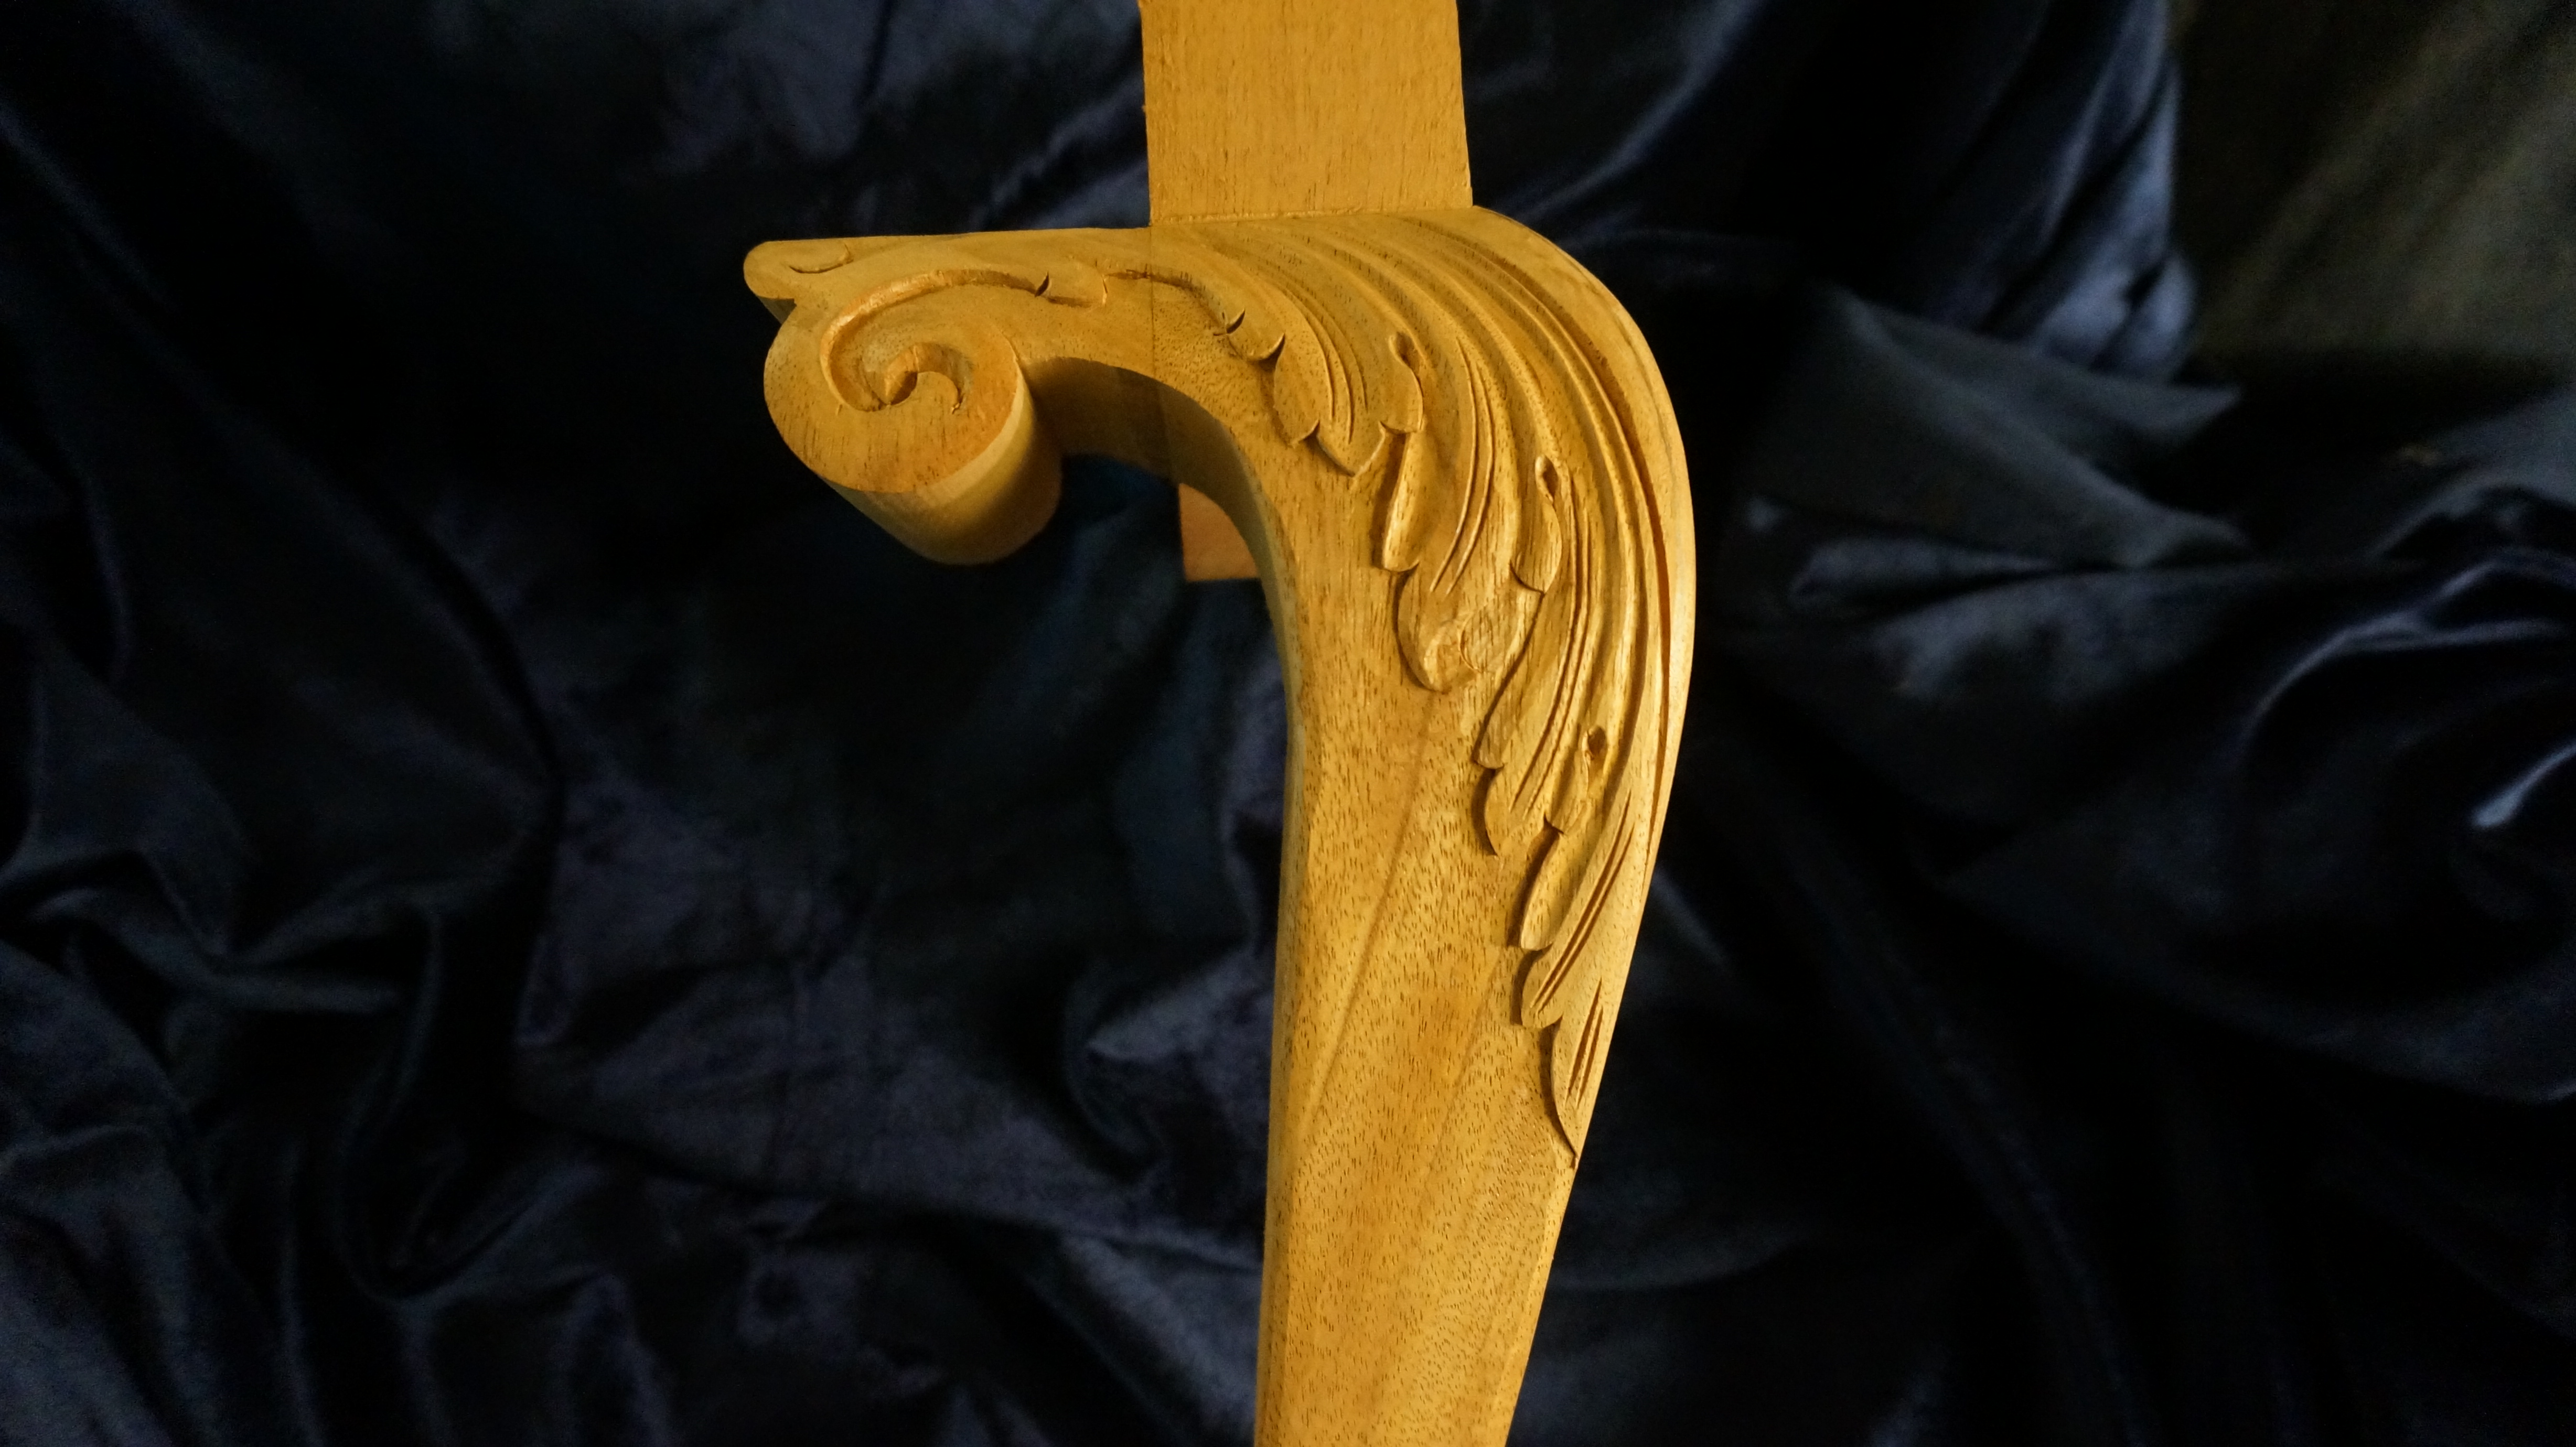
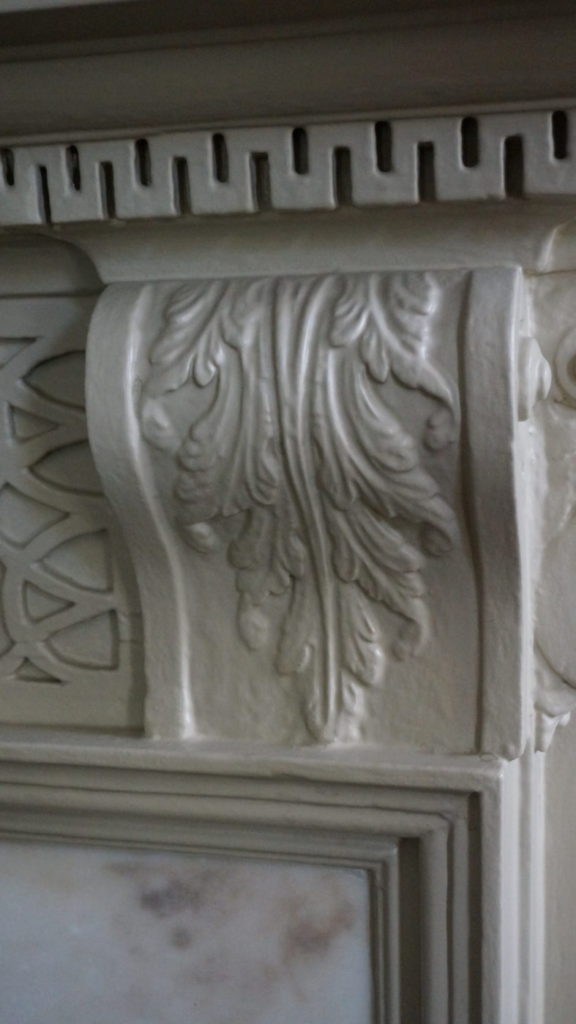
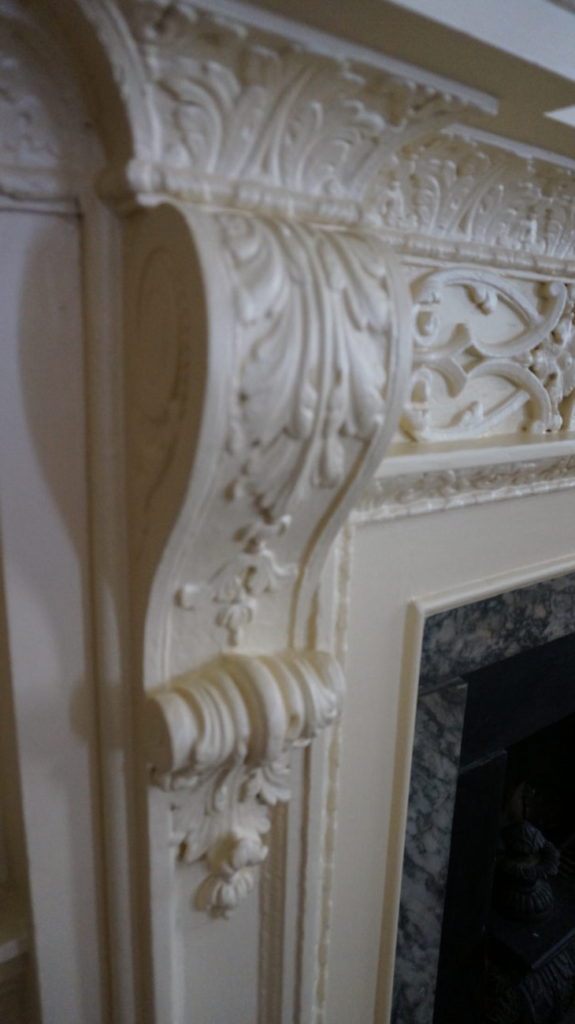
Here is the bracket: 

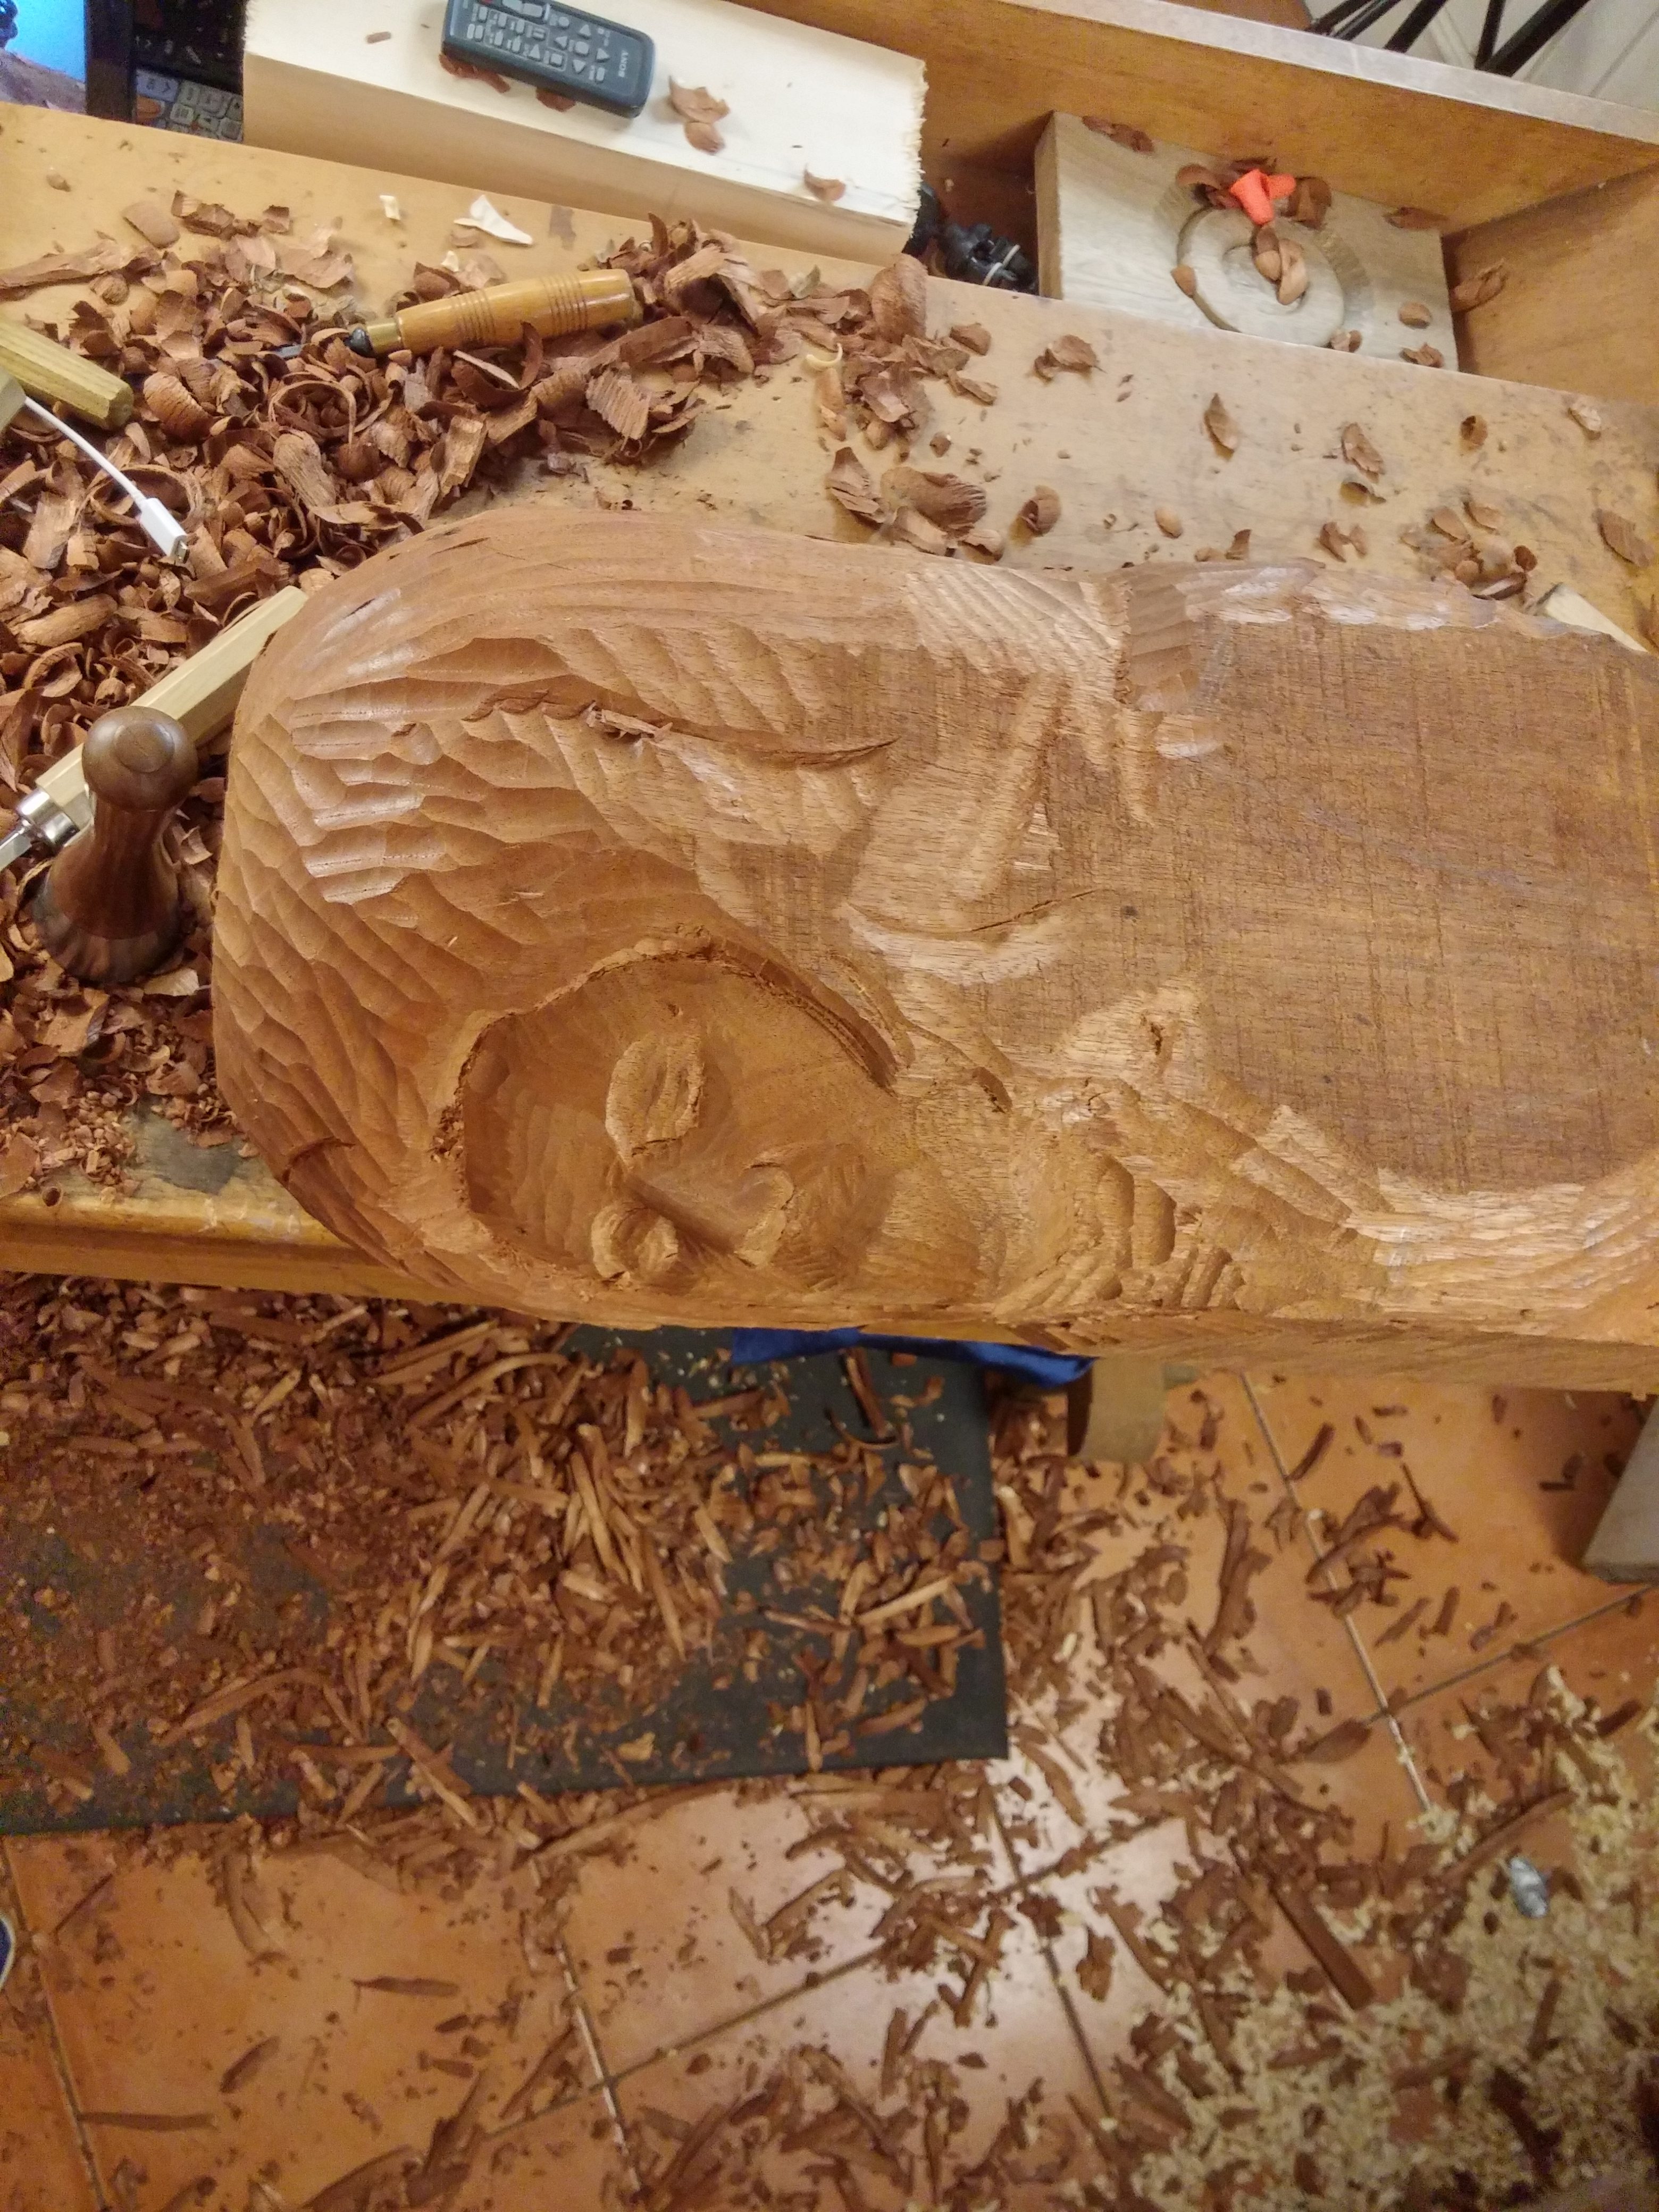
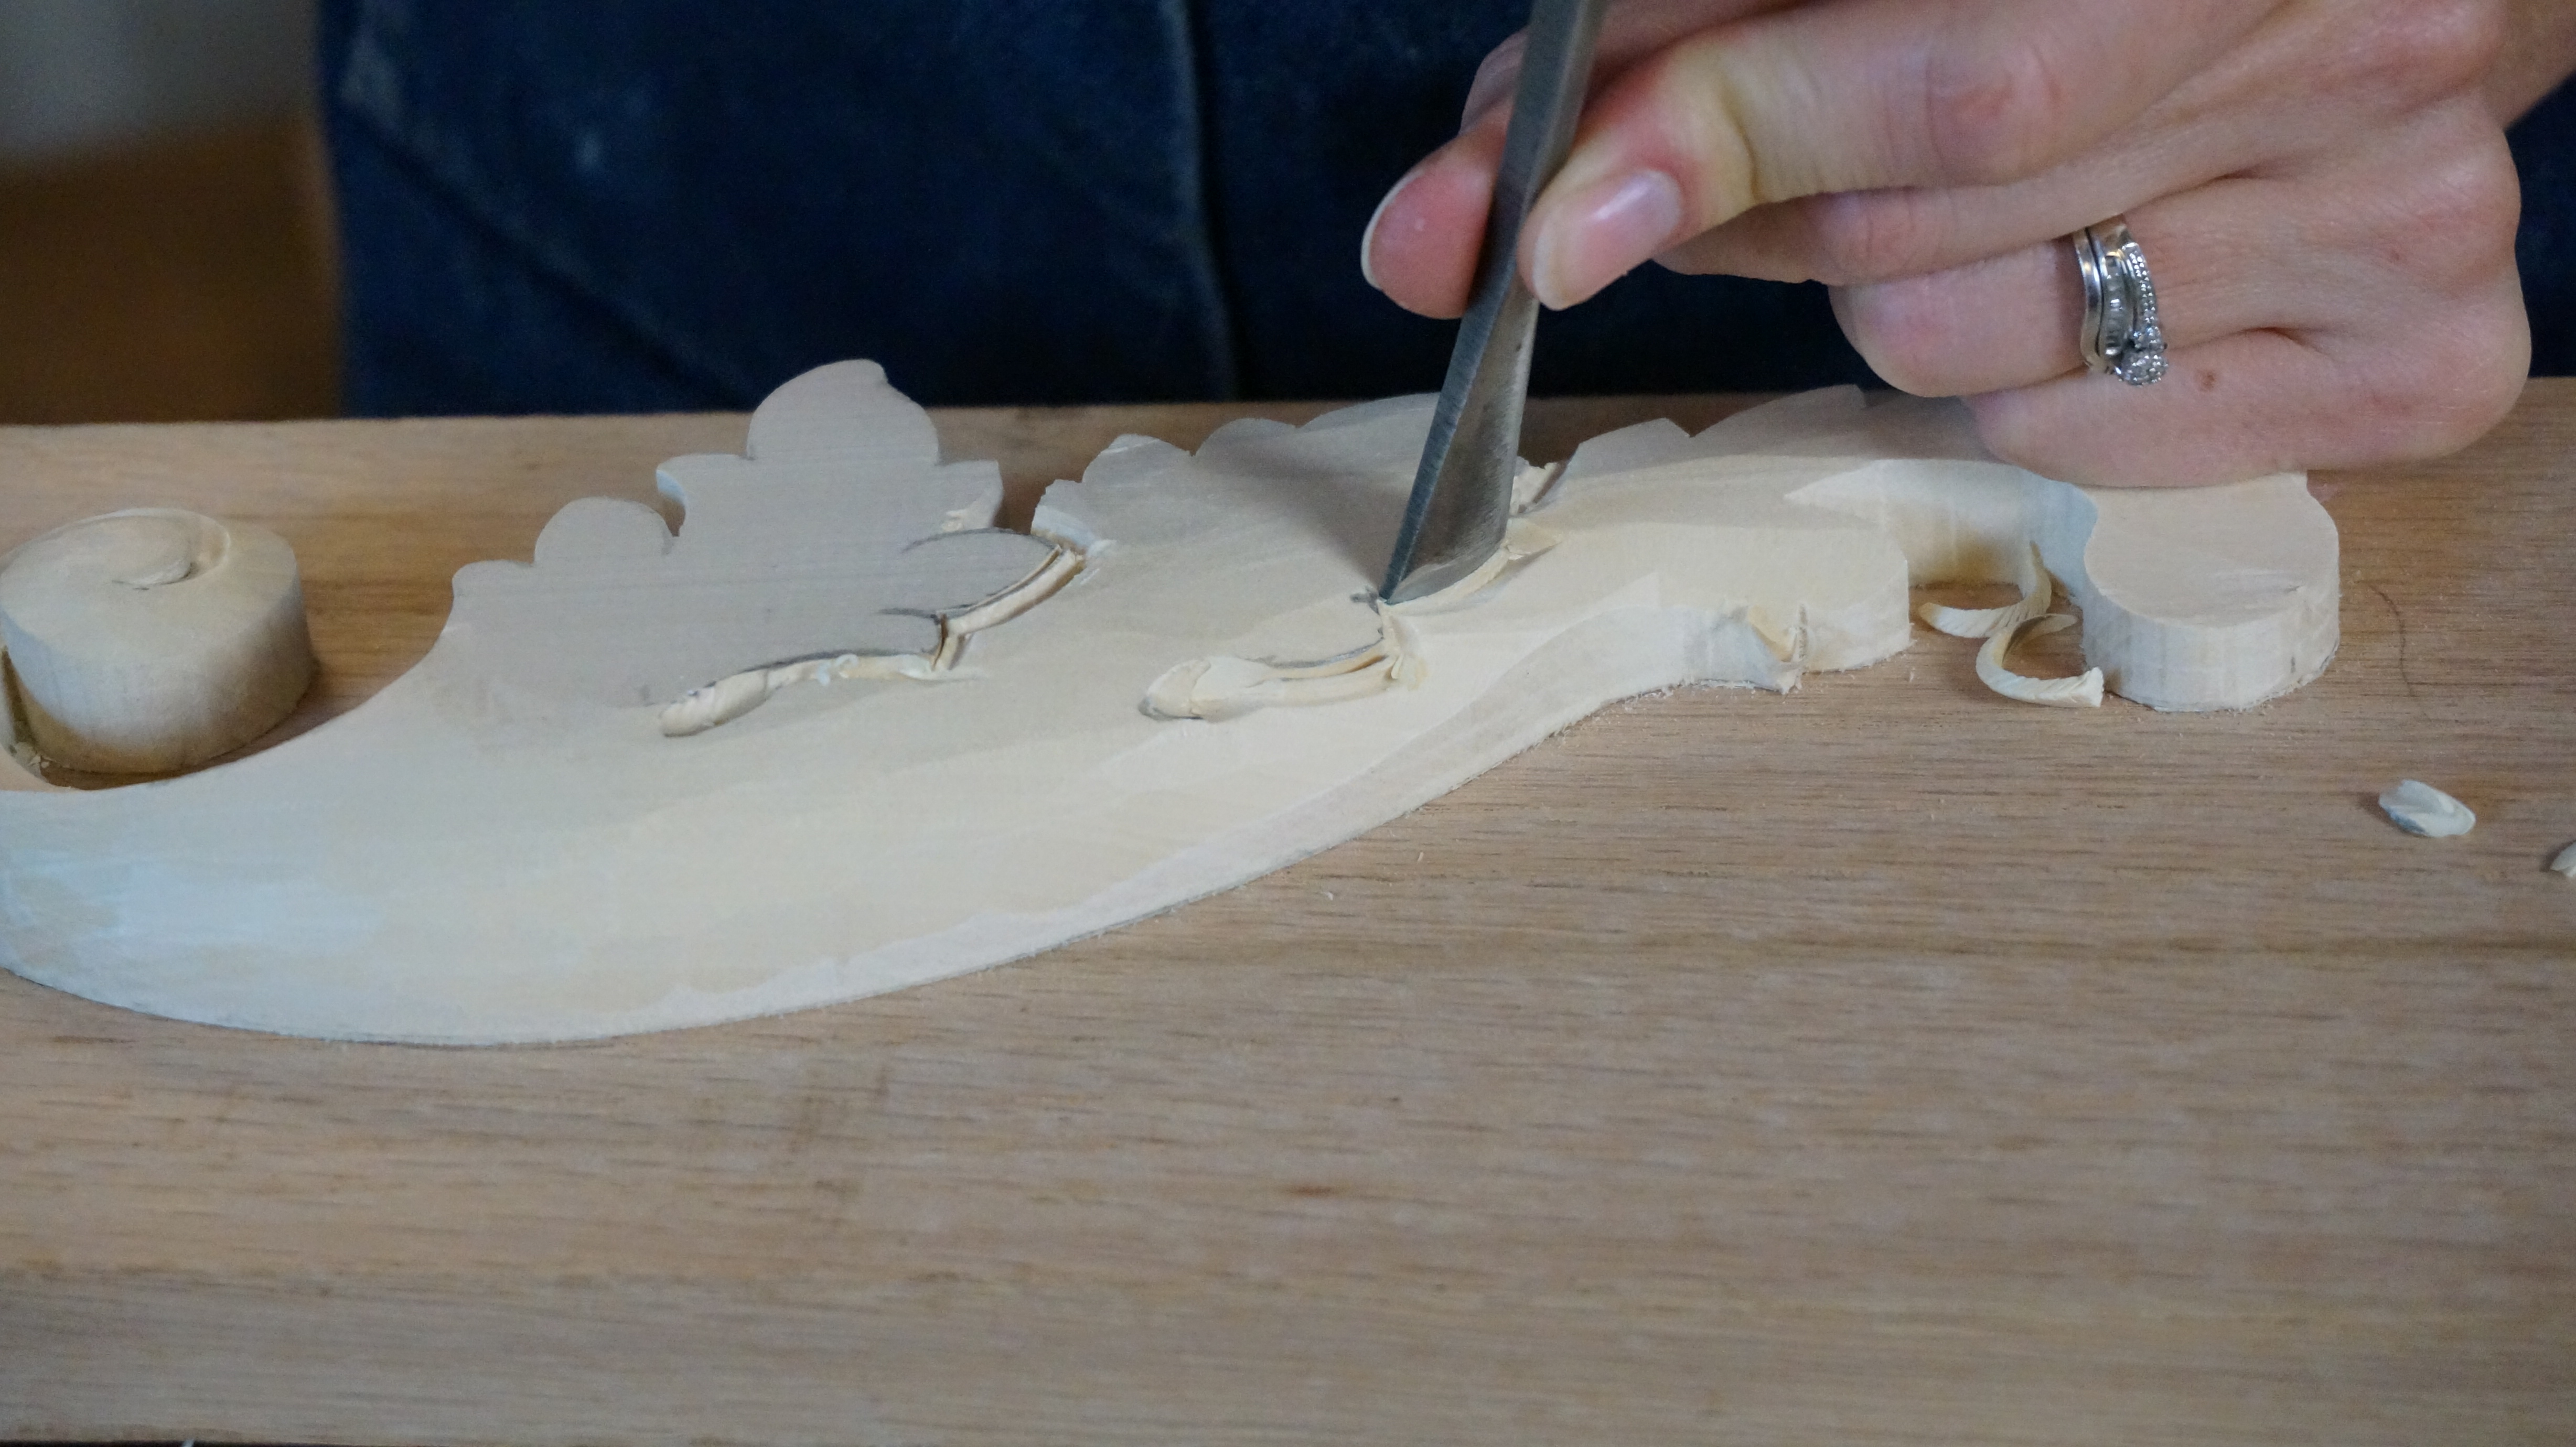
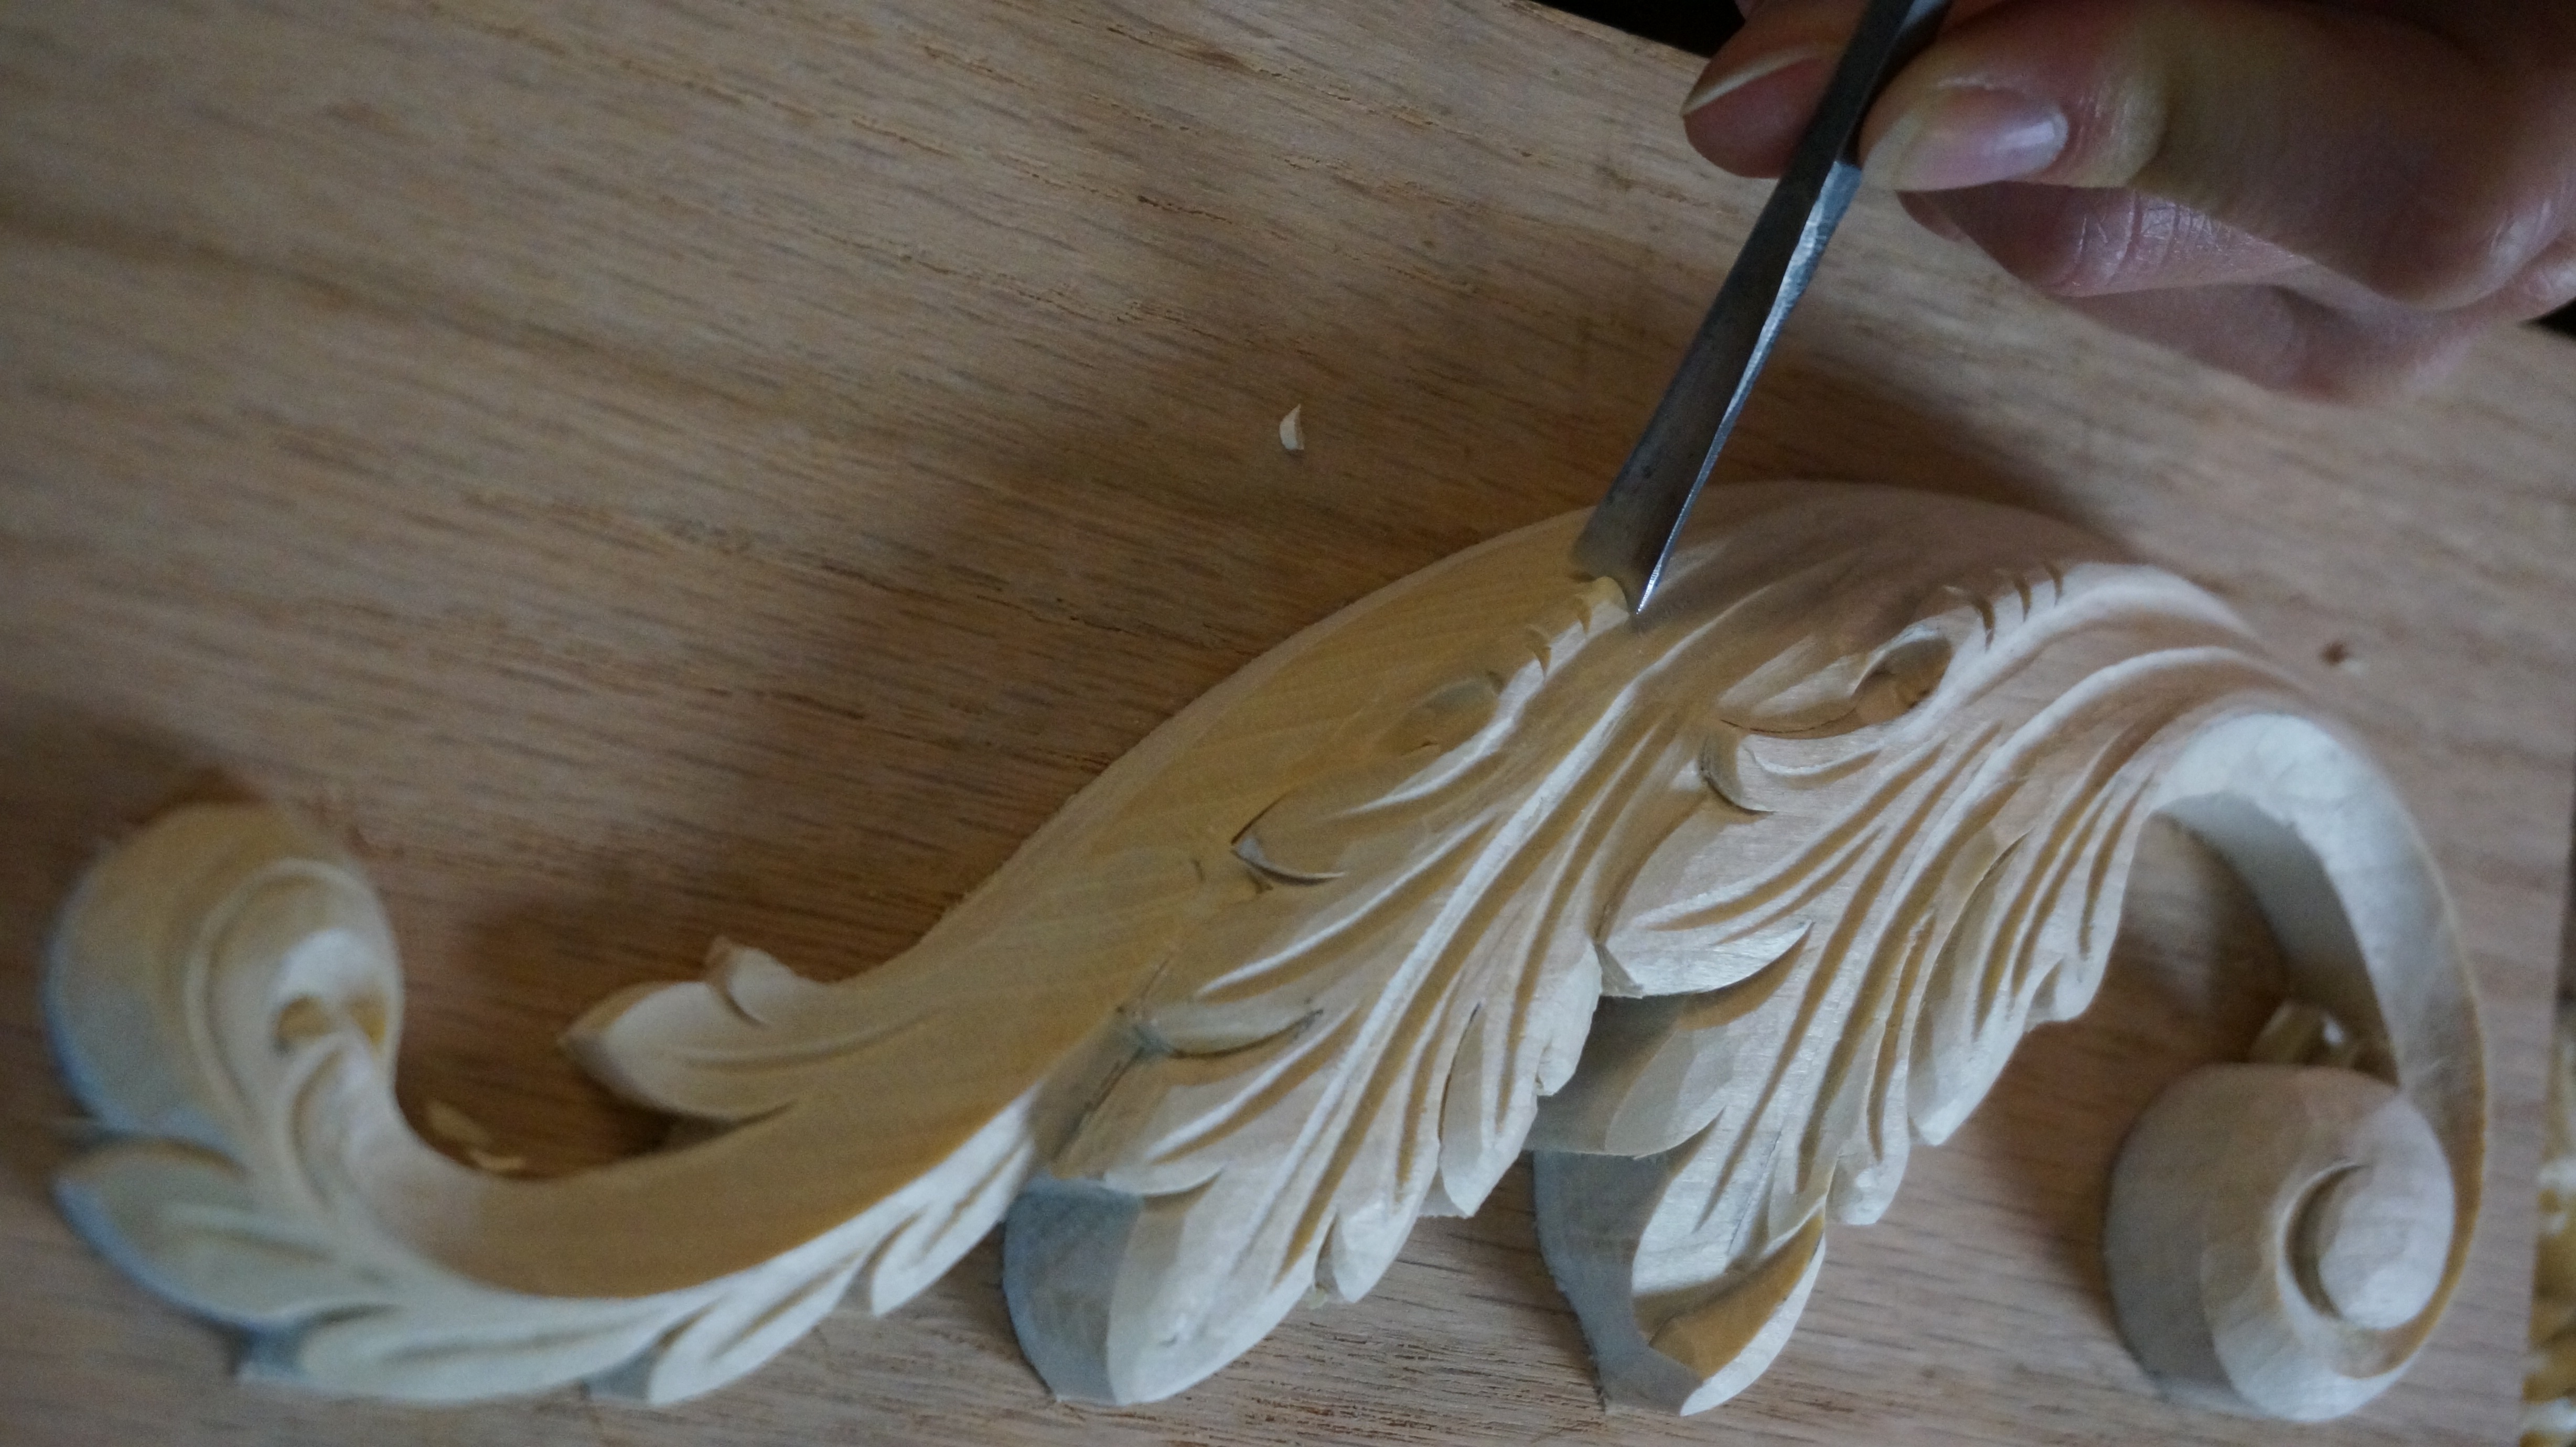
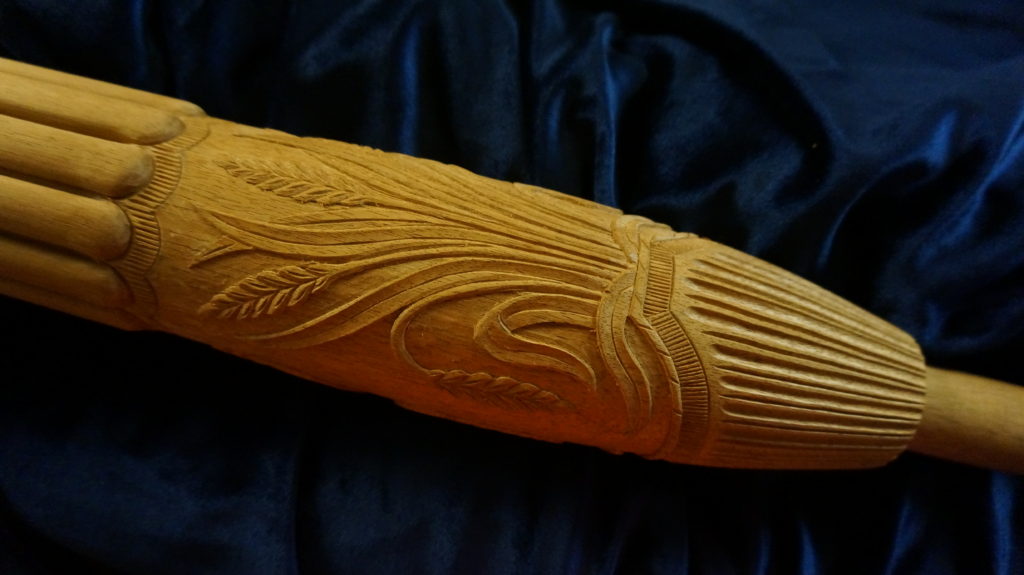
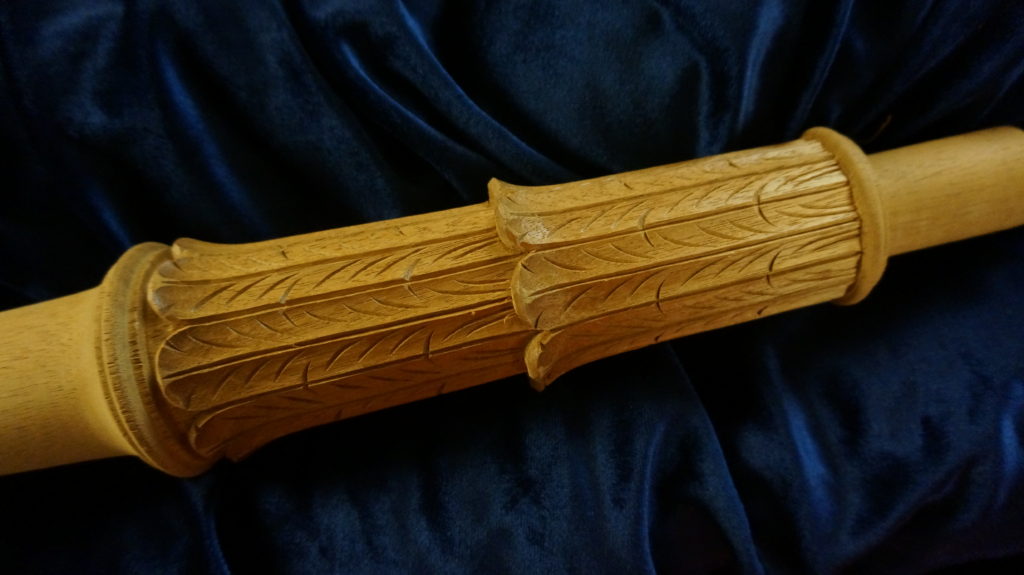
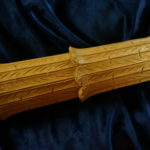
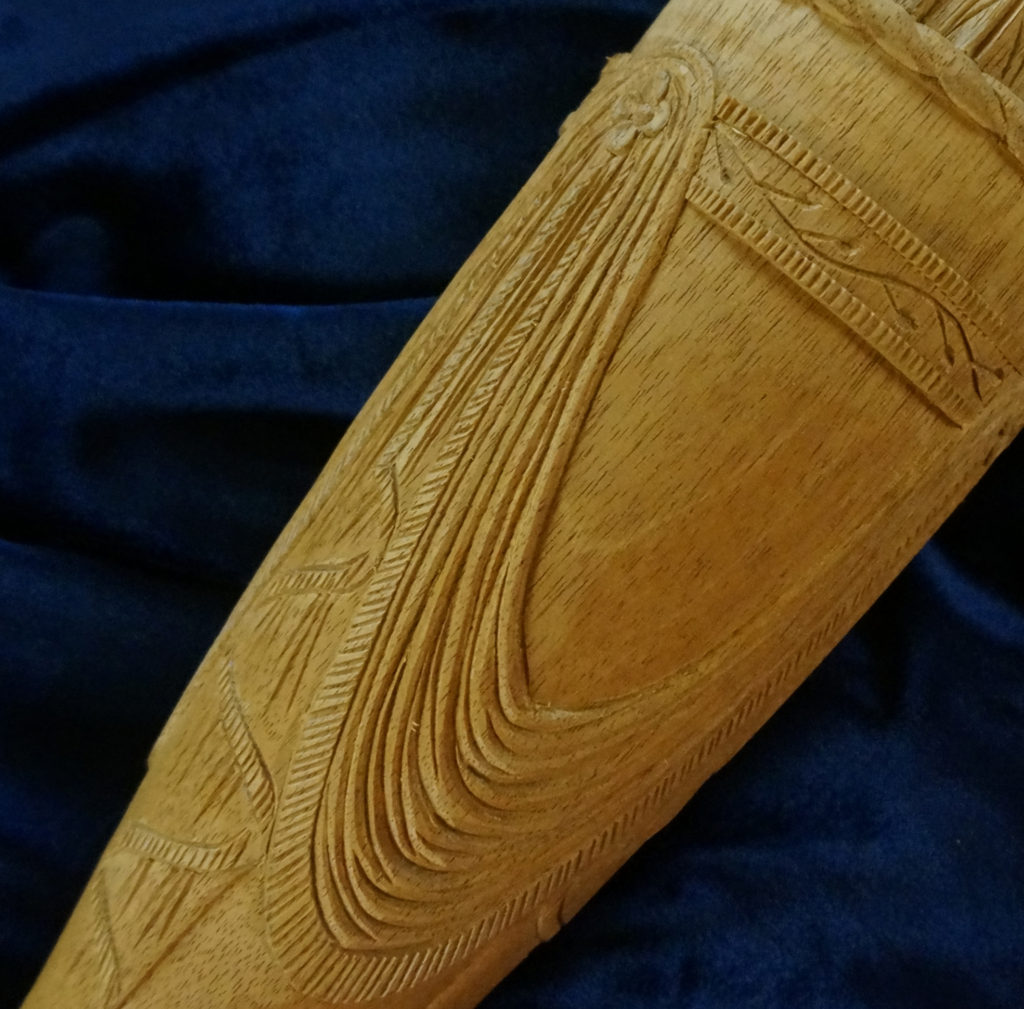
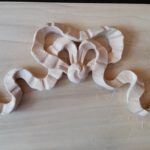
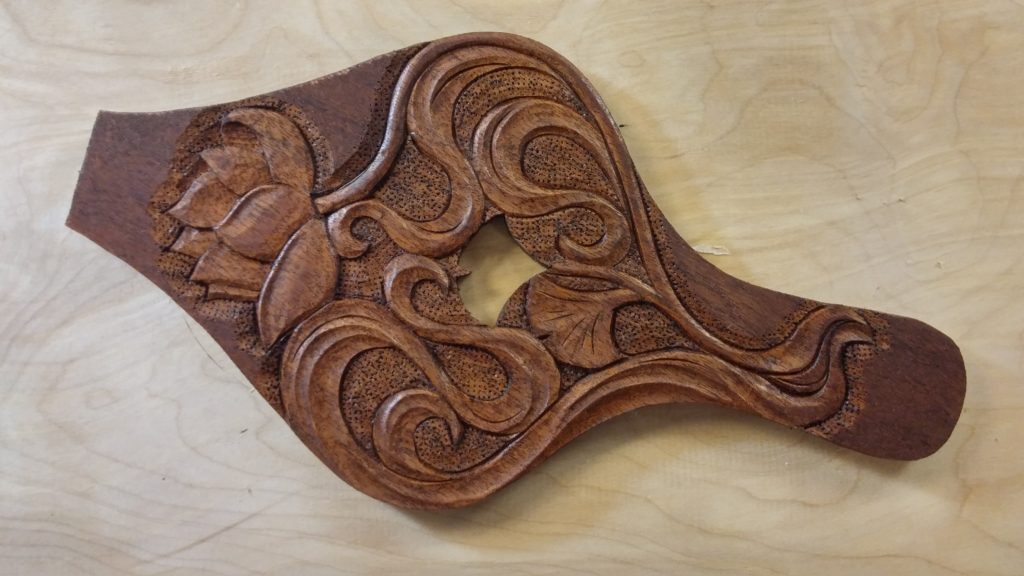
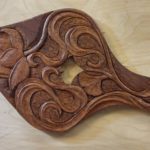
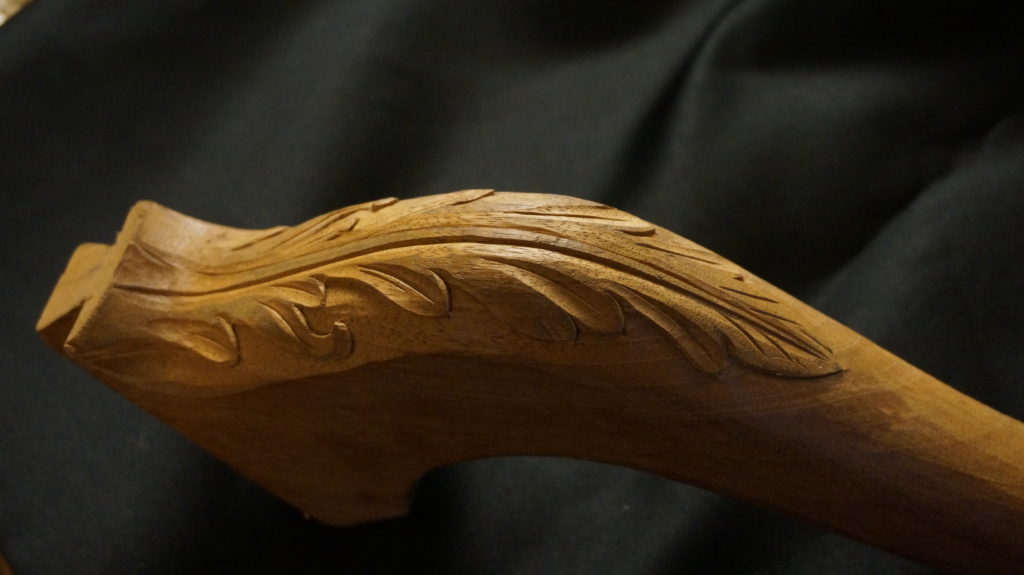
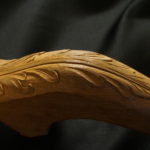
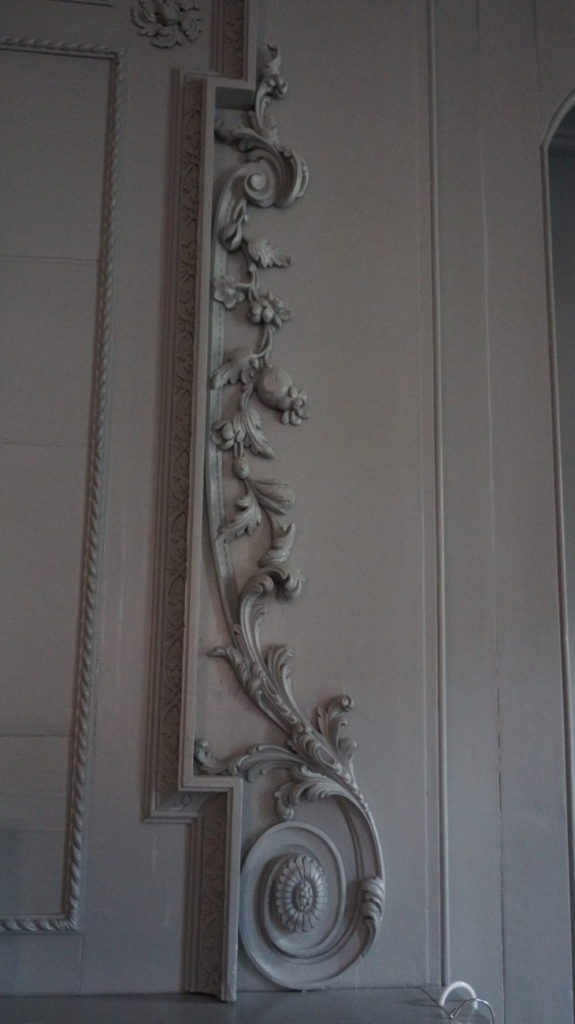
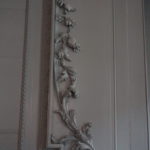
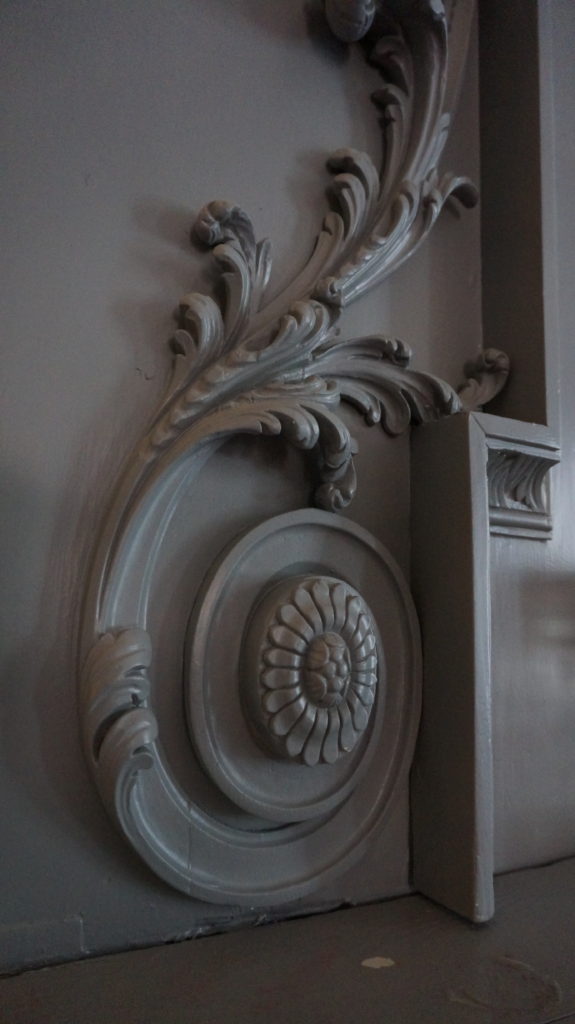
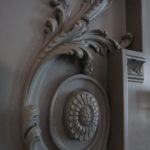
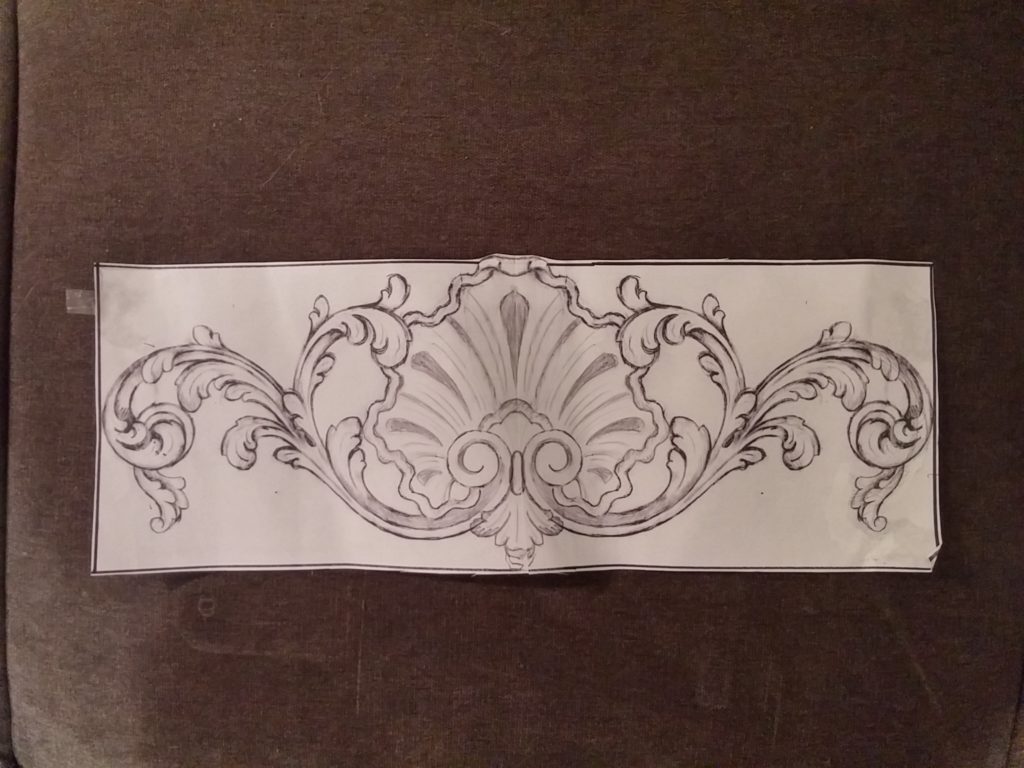
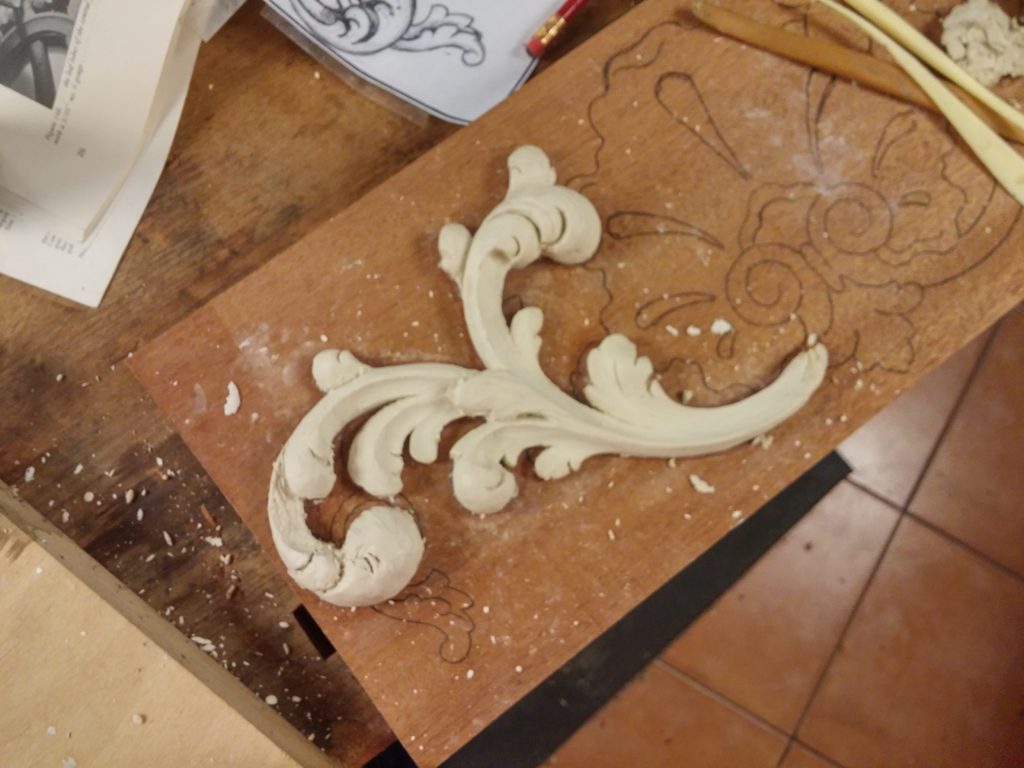
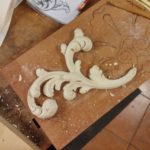
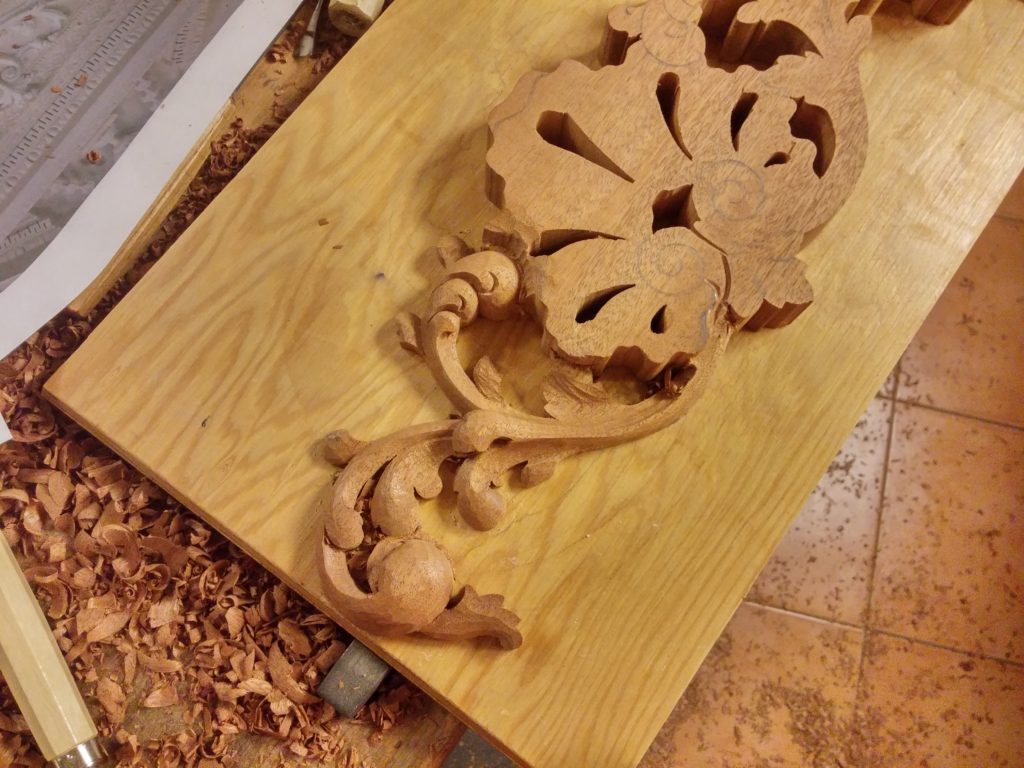
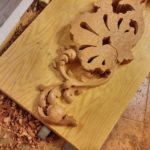
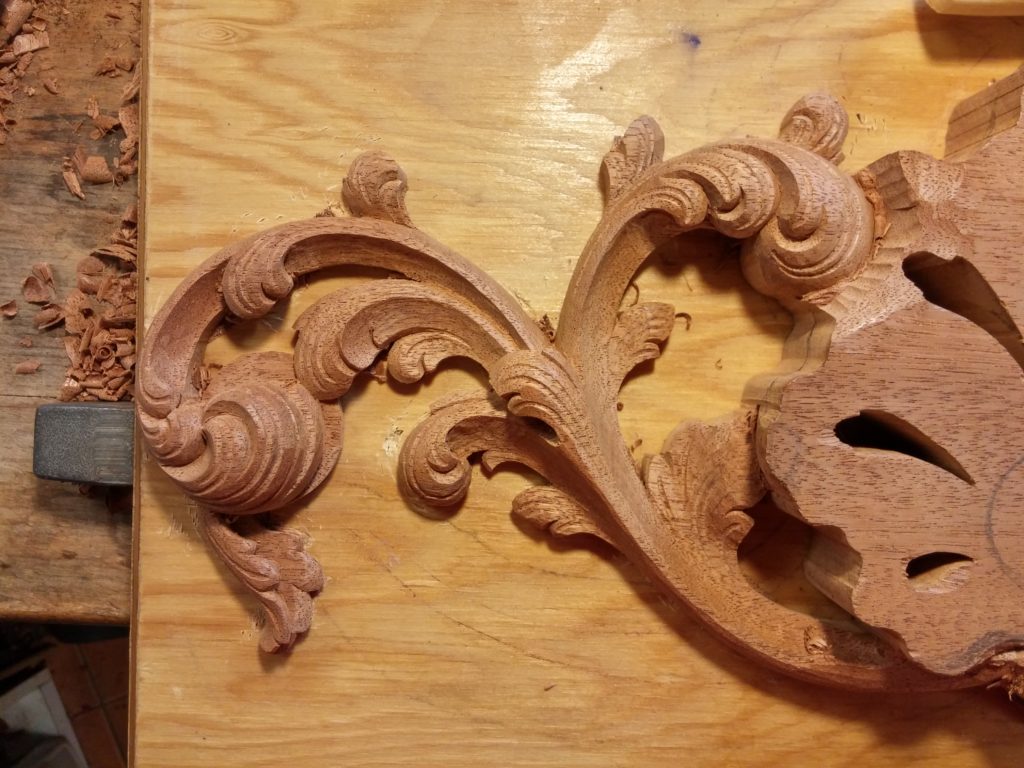
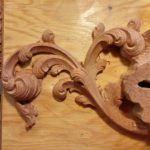
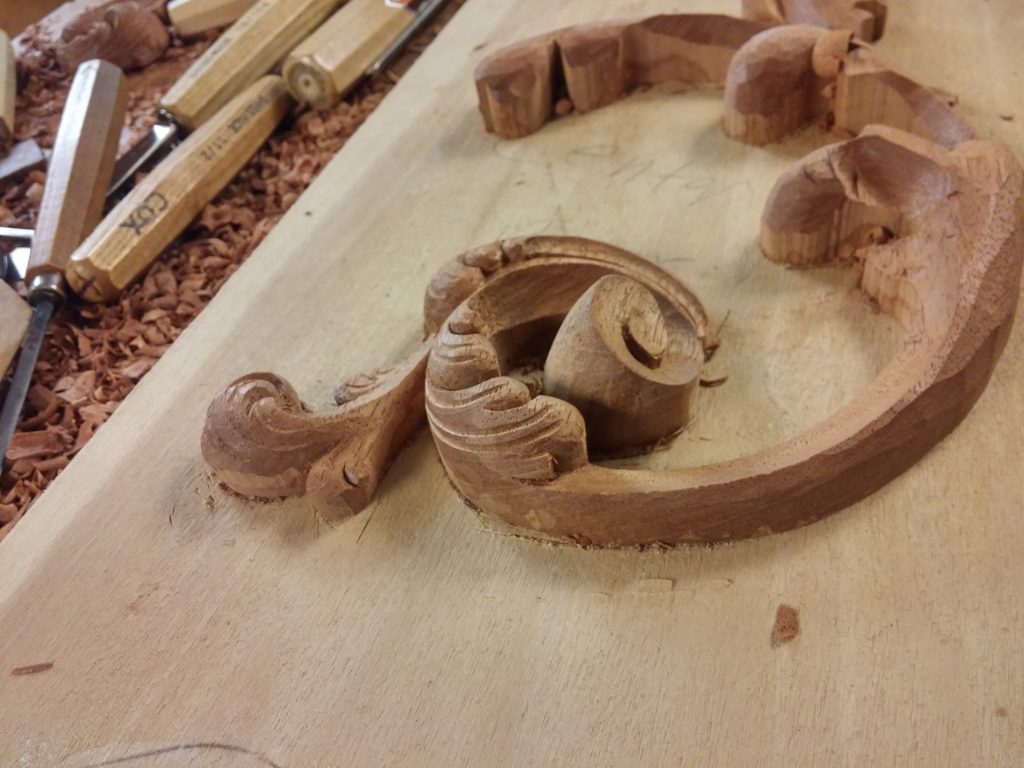
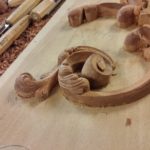
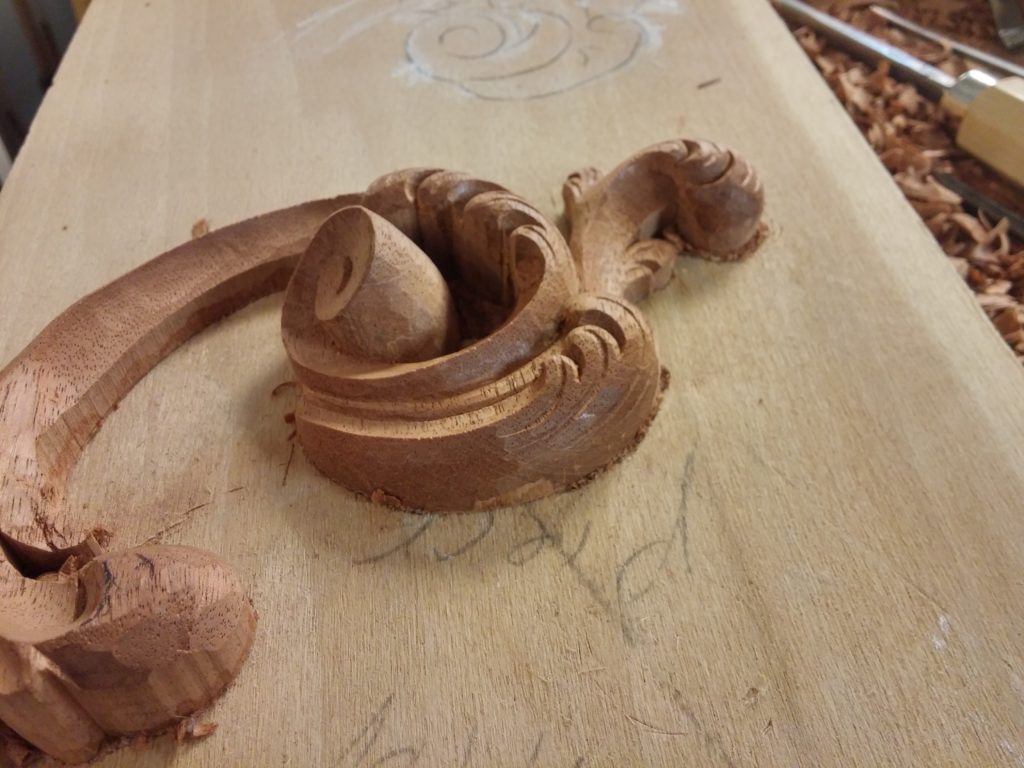
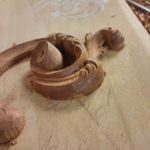
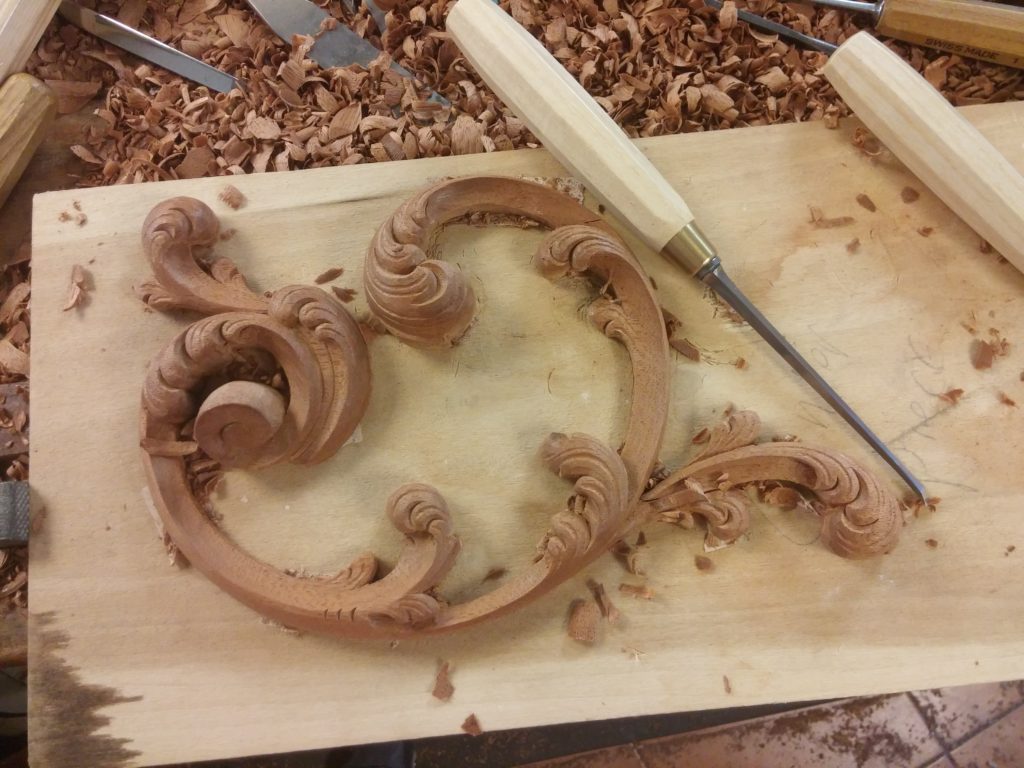
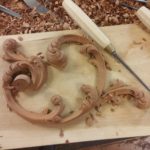
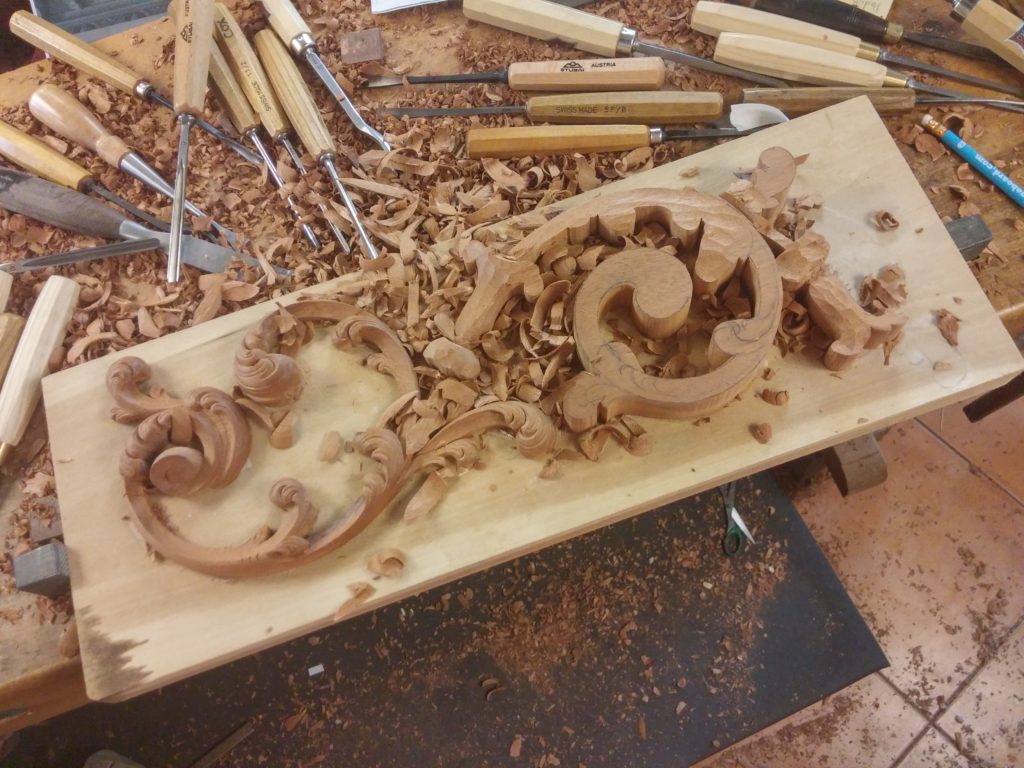
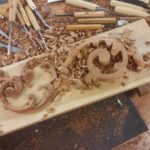
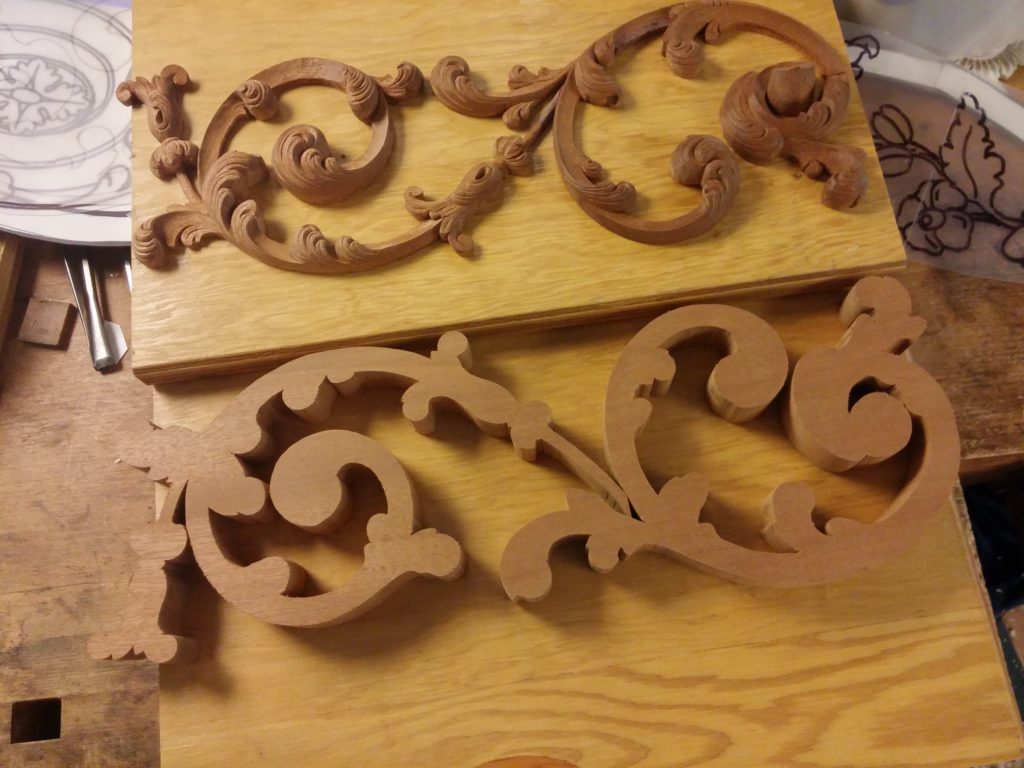
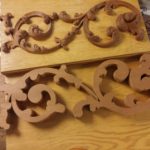
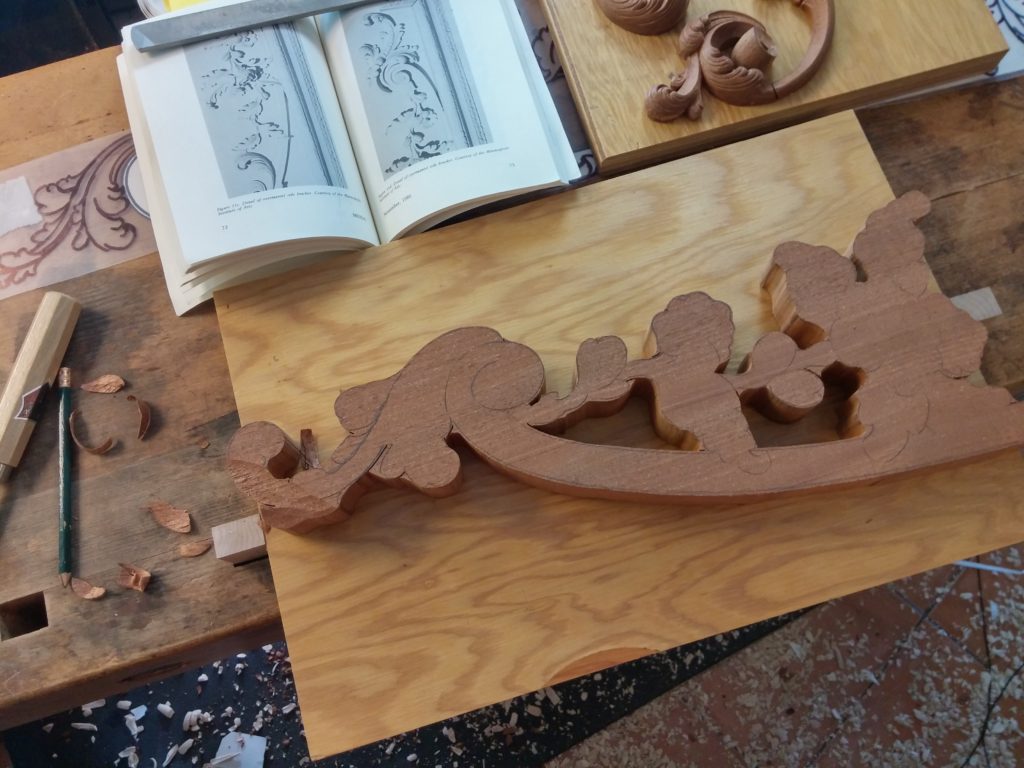
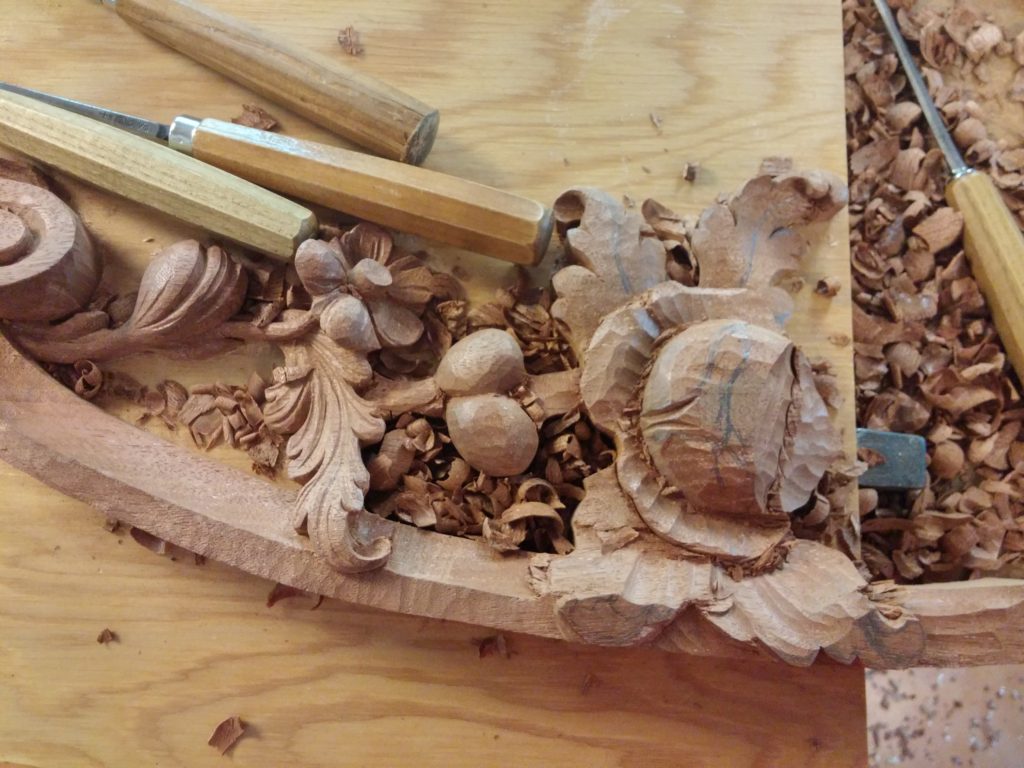
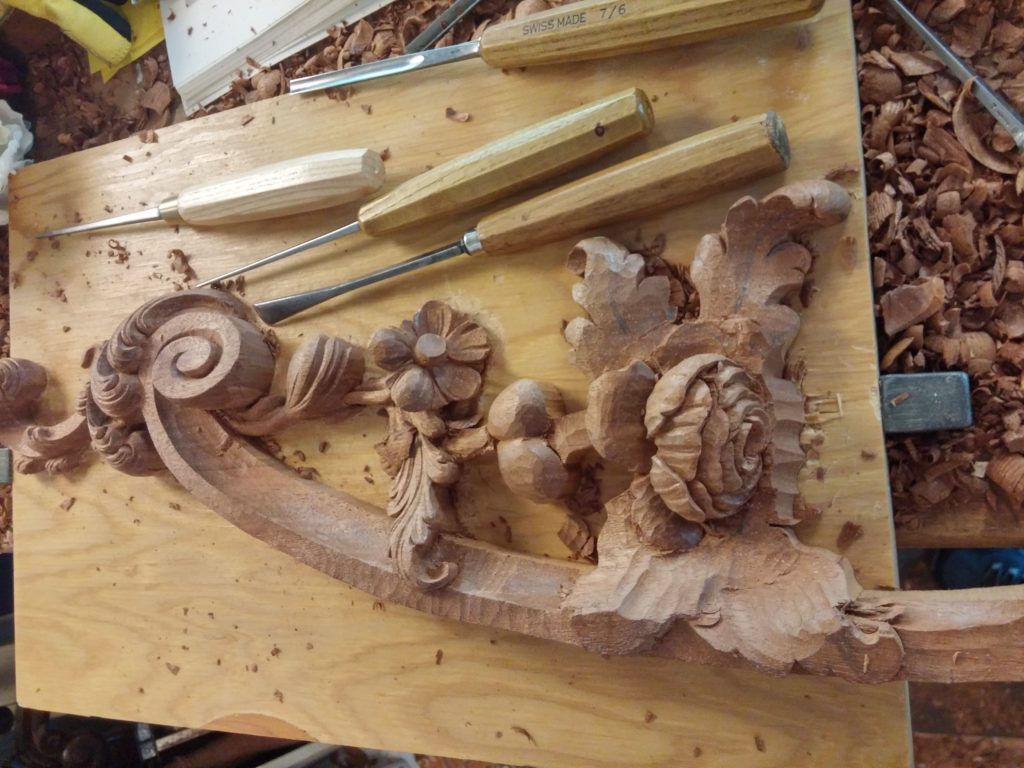
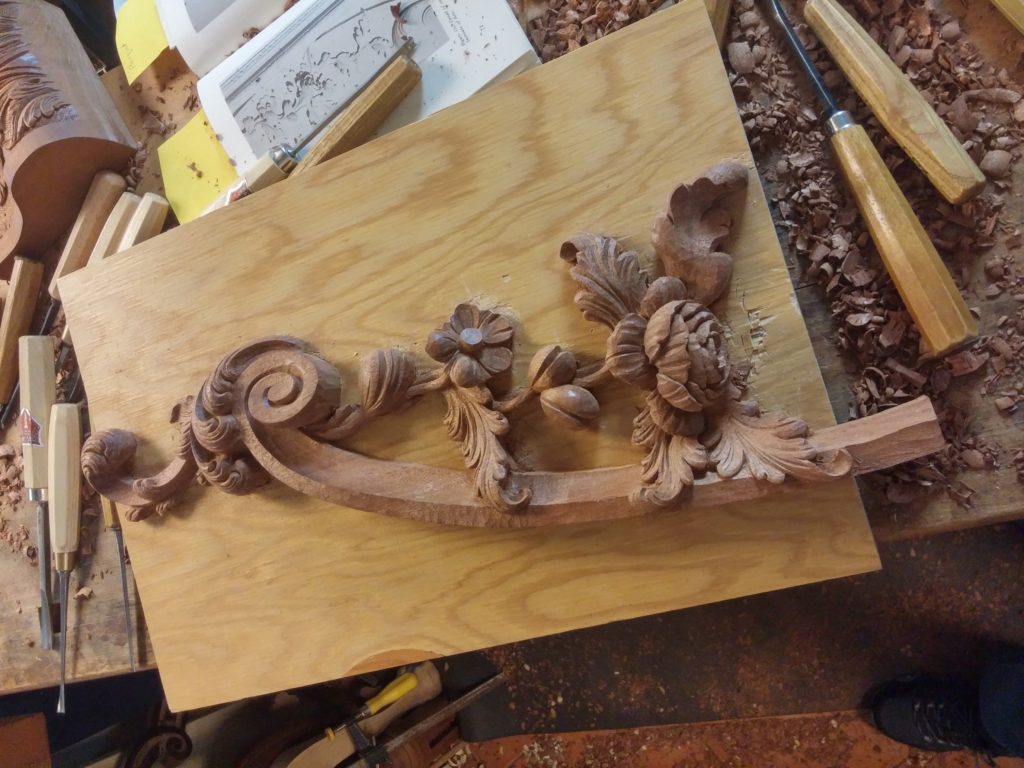
And I am currently working on one side of the overmantel scroll. This is an amazing challenge and has to go slowly to discover the shape in 1-1/4″ mahogany. It’s so much fun!

My cat wanting help with the designing.
Getting ready to start after cutting it out on a scroll saw and attaching it to a temporary backer board with double sided tape
Shaping the Rococo leaves and scroll
The Rococo leaves and scroll completed
Working on the vine with leaves and flowers.
And onto starting to shape the rose
Figuring out the twisting leaves
The rose was the most challenging

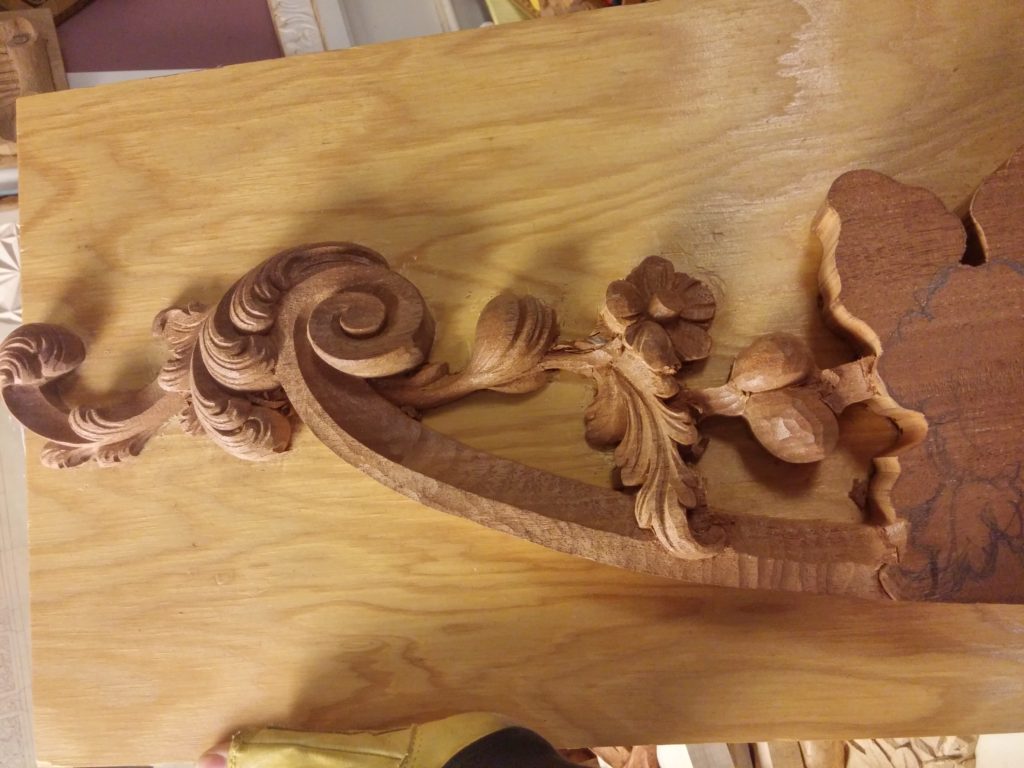
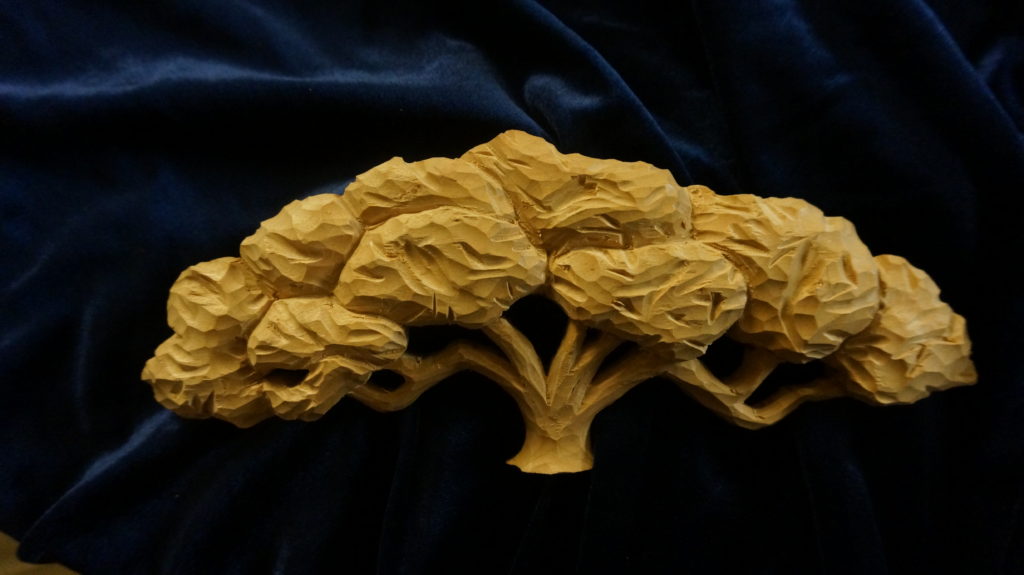
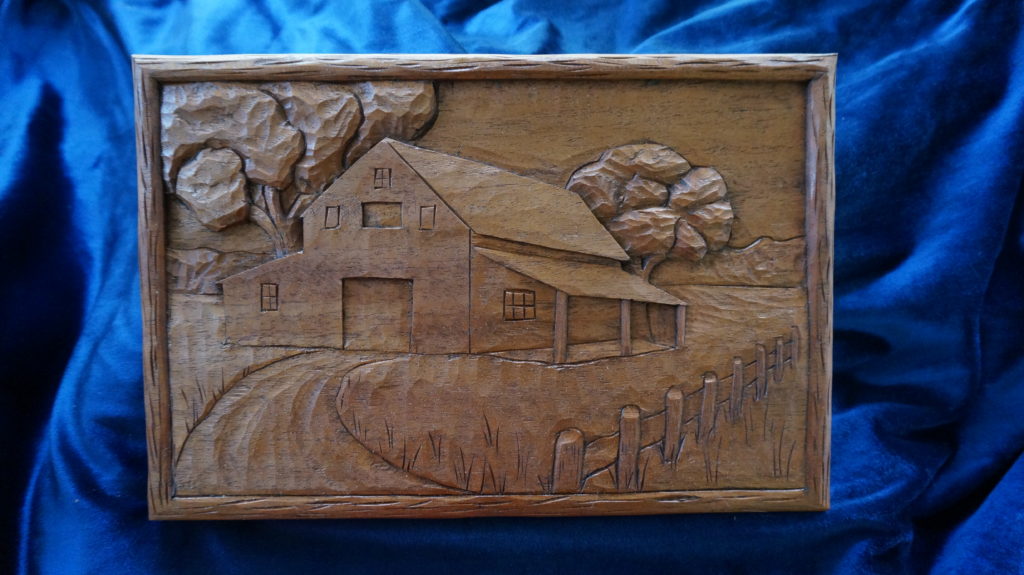
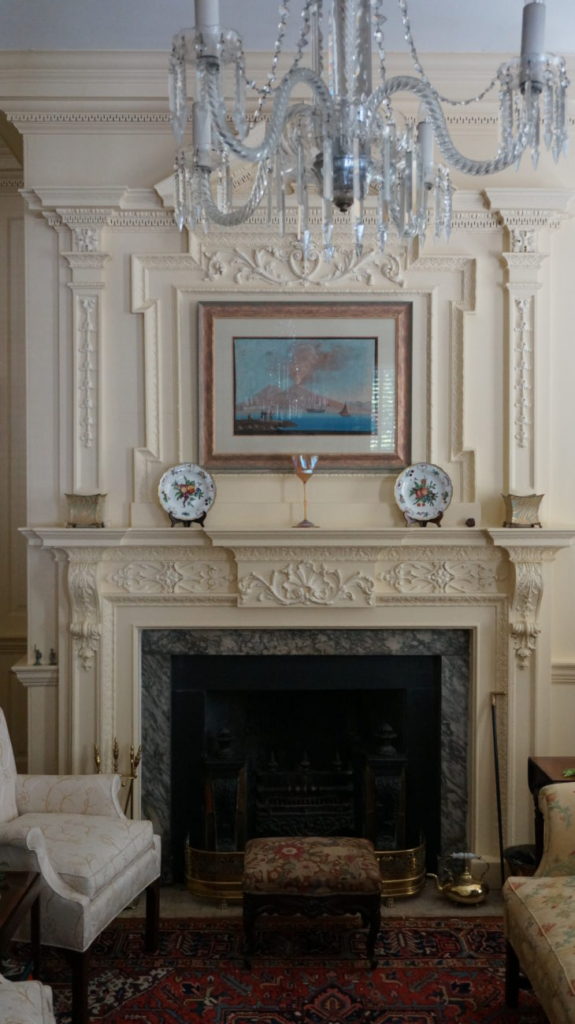
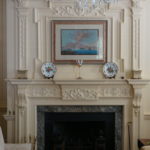
I’m slowly working down the overmantel design. Once this is approved by all involved, then I need to carve the designs in reverse (not nearly as fun as the first time around). Here is a scene from a recent reception at the Charleston home.


Carving Grace…

March 16, 2017 / Mary May / Carving faces, Carving Hands, People, Wood Carving Tips

I recently had several weeks that I could devote to a very unique carving project. Bob Van Dyke, of the Connecticut Valley School of Woodworking generously gave me a large block of mahogany (8″ x 10″ x 21″) that a friend had given him. It must have come from a large beam because there was evidence of small nail holes, but it was definitely old mahogany – probably Honduran.

In its block form, it was difficult to tell what quality it was. The surface was rough and the grain was a complete mystery… until I began to carve. And then it began to sing…

I had been walking past this block of wood in my workshop for nearly 6 months. It was a bit intimidating, and I tried to ignore it. But it kept taunting me. I continued to pass by it, pretending it did not exist. Since I am often carving commissioned pieces, I don’t have the opportunity to carve my own designs much… and when the opportunity does come along, I’m not sure what to do. This piece of mahogany was begging for something unique and special, and I needed to wait for the right time… for inspiration. And it just wasn’t coming. I also knew that when I began carving on this piece of wood that I would need to focus on that, and nothing else until it was finished. With my schedule as crazy as it often is, that’s another difficult task.

When I finally had a few weeks to “play”, I decided I needed to begin – even if I wasn’t quite sure where it would go. I hoped that the design would emerge as I began to carve. I clamped this magnificent block of mahogany between my bench dogs on my workbench. I imagined that I wanted to carve a woman with curling, flowing hair. But that was the extent of it.

The process of carving directly into the material without referring to a model is called “direct” carving. A woman was in there somewhere. I just needed to begin chipping the wood away and find out where and who she was.

https://www.marymaycarving.com/blog/wp-content/uploads/2017/03/20170123_114647.mp4

I could have taken an aggressive grinder to remove the “waste” wood, but decided to proceed with mallet and chisel. Without having a specific design, how do you know what is “waste” wood, anyway? This process of slowly chipping away helped me to discover the design as I carved. Not knowing exactly where she would appear made me over-cautious to not remove too much wood too quickly and then limiting my design. Once it’s removed, that it!

To use the most of this square block, I decided to make her face and nose fit into one of the corners and it took 2 days to get the general “block” shape off – with a LOT of chiseling. And then it was just patiently chipping away to find her face. Carving the hair could come anytime, but the face was the real challenge. I also left a large block of wood under her chin where I was possibly going to have her hand gently rising up touching her neck – maybe. I wanted to leave the option open, just in case… but was not committing to anything at that point.


Another decision I made at this point was to have her face tilting upward slightly. My desire was to create a peaceful woman in a gentle, relaxed posture. This created challenges that I did not realize until I began shaping her face, as all the details in the face are affected by this slight upturned angle. I had a mirror in front of me as I was carving, so I guess she naturally ended up having some of my features. Looking at an actual face helps tremendously in carving details.

Her eyes were closed, which added a particular challenge in itself (how do I use myself as a model with closed eyes?). I also discovered that a woman’s brow and eye have subtly gentle shapes. I was having great difficulty getting her eyes to look right, so in frustration I decided to step away from my carving and run some errands. I was waiting in line at the bank and began studying the features of the bank teller. Aha! She was about 25 and the area where the brow flowed into her eye was exactly what I was looking for! She must have thought I was a bit odd because I kept staring at her the entire time I was waiting in line. I immediately went home and corrected the issues I was having with her eyes.

For the next 2 weeks I spend many late nights completely consumed with bringing personality into this block of mahogany. I carved her hand gently touching her neck, and carved curl after curl spiraling around her head. It was the most fun I have had in a long time. I was truly in my element and the wood was some of the most beautiful carving wood I have ever carved.


A commission of carving a historical Charleston fireplace was soon coming up and I knew I had to finish her before starting into another project, or she would never get fully finished. She would be one of those “I’ll finish that someday” projects and I have enough of them around my workshop. She seemed quite upset that I would soon be putting her aside, so she decided to slip out of the bench dogs, leap off my workbench, scrape down my shin and land on the top of my foot. So much for a peaceful spirit! Fortunately she wasn’t damaged, but my shin and pride were what hurt the most.

I worked several more late nights finishing the curls on her hair, and finally had to put the chisels down. I decided to lightly sand her face and hand to create a satiny, smooth surface that would contrast with her hair. I then put 2 coats of thinned down shellac (2 parts denatured alcohol with 1 part shellac) on her, lightly sanding her face and hands between coats. I also put wax on her and buffed her skin to a satin finish. I was very pleased with her (and she was pretty pleased with herself).

Shortly after putting the final touches on her I was sitting in church and she revealed her name as “Grace”. We all need a bit of Grace in our lives…

Check out photos of my journey with Grace and recent projects on my Instagram page, and Happy Carving everyone!

Learn to carve the Amazing Acanthus Leaf

January 13, 2017 / Mary May / Acanthus book, Acanthus Leaves, Wood Carving Education, Wood Carving Tips

I will be teaching a weekend class on how to carve the Amazing Acanthus Leaf at Connecticut Valley School of Woodworking, March 4 & 5.

DSC08754

DSC09272

This class is open to all experience levels – from brand-new carvers to those who have carved for many years. We will cover a lot in this class, starting from basic carving techniques and going over tool safety, tool sharpening, how to draw the acanthus leaf, and how to carve the leaf photographed above.

I have taught this as a weekend class before at Lie-Nielsen Toolworks, and we actually were able to fit it all in! It was a pretty intense weekend, but we managed to get through everything and everyone went home with a (nearly) completed carved acanthus leaf. And above all, it was more fun than anyone should be allowed to have!

This class will be happening several months before my book on carving acanthus leaves comes out by Lost Art Press, so you’ll get a head start! You can see some of Chris Schwarz’s blog posts about the book here:

  • In the Works: Carve the Acanthus Leaf by Mary May
  • Get Updates on Mary May’s Carving Book
  • Mary May’s Carving Book is In-House
  • How Mary Made her Mark

If you can’t make it to this class, here is a list of other classes I will be teaching in 2017. Or contact me through my “contact” and we can set something up here in Charleston, SC. It’s a beautiful area of the country with amazing history. Come for a vacation, and carve while you’re here!

A Glance at Stone Carving

January 11, 2017 / Mary May / Wood Carving Tips

I recently finished a commission to carve a marble memorial stone for the historic Magnolia Cemetery here in Charleston, SC. The carving was in Colorado Yule marble – a beautiful, white marble with subtle grey and brown veins and it carves wonderfully. If you ever have a chance, you must go visit a town in Colorado called “Marble” that is at the end of a very long, meandering and scenic road, and follows along a twisting mountain river. As you get closer to Marble, strange things begin to appear along the edges of the river – massive square blocks of white marble – just sitting there. On the other side of Marble, there is a huge marble quarry and cave in the side of the mountain. For a stone carver it is an absolute dream world. And for the non-stone carver, it’s equally fascinating. We discovered that the large stones along the side of the river had fallen off rafts years ago as they tried to get the stone moved to lower ground. They do things the easy way now – trucks.

20161219_155812_HDR

It’s been several years since I carved stone and this project was a pleasant change of pace from my regular woodcarving. One thing I notice as I am carving stone – because of the slow, methodic pace of carving, I find it easier to discover shapes. Often with woodcarving, it is easy to become impatient and remove too much wood and thus lose the “flow” of the shape. The simple nature of stone carving – removing minute particles of stone with each chip – causes the shapes to develop and mature naturally, albeit more slowly. There is something almost hypnotic with gently chipping away with a rhythmic tapping. I’m not sure if I would want to carve stone daily, but it was an absolute pleasure to get dusty and chip, chip, chip – losing myself in this staccato rhythm.

Here is a Youtube video of carving part of the ribbon.

My client, a local Charlestonian, asked me last spring (2016) if I could carve a memorial stone for her late husband who passed away in November, 2015. At the time I was so busy with teaching and finishing writing my book on acanthus leaves that I told her I would be happy to help, but I probably wouldn’t be able to get started until the fall or winter of 2016. She and her family were planning a memorial at Christmas, 2016, and wanted to be able to present the stone at that time. In my optimistic (and somewhat delusional) look, I told her “Sure, that would not be a problem”.

As it happened, the book writing process turned out to be a much more intensive process than I thought and we didn’t actually order the stone until October. It was delivered to my workshop December 8. That gave me roughly 2 weeks to complete the entire carving which included lettering, a laurel wreath with a ribbon, and the cross. I apologized to my client and explained that this was not something that should be rushed, and I did not want to promise anything (but I sincerely hoped to get this completed in time for the family’s memorial). I told her I would do my best.

Then, out of the blue, I get a call from a friend of mine, John Paul Huguley, who works with graduates of the American College of the Building Arts, a local college specializing in teaching the traditional building crafts. John Paul often helps graduates of the school find work in their field of study. He asked me if I had any work for Sam, a recent graduate of the stone carving program. I have known John Paul for over 10 years, and he has never asked me if I had any stone carving work before. What amazing timing! So I took Sam on as my assistant, and I’m so glad I did.

20161215_124504_HDR

The laurel wreath before shaping.

20161219_120354_HDR

Beginning to shape the wreath.


For the next 2 weeks, we chiseled, chipped, sanded and routed to create shapes and letters in a beautiful, white marble. Even though Sam had never carved marble before, he was trained as an skilled stone mason. He understood how to create contours and shapes and the basic nature of stone and caught on quickly to the nuances of marble carving.

20161219_135344_HDR

Sam chiseling away in the cold and rain.

20161220_120737_HDR

My Canadian relatives made fun of me needing a “toque” in South Carolina.


Three of the days it rained and the temperatures were in the 40’s. For Charleston, that is COLD! Sam is from Wisconsin, so he was somewhat used to this. I also grew up in Wisconsin and Minnesota, but it has been way too long for my blood to remember or appreciate that kind of cold. We set up a tent so we could stay dry, but the chill in the air definitely confirmed I had become a real wimp.

On Wednesday, December 21, we put the final polishing on the carving (sanded through my gloves and I have no fingerprints left). December 22 McCarthy Monuments came to very gently pick the stone up from my workshop. On the morning of December 23 we gathered at Magnolia Cemetery to watch them install the stone (and also put our opinions in). They were so gracious to work with us on such a tight deadline, and it all worked out amazingly.

Loading up the stone from my workshop.
Offloading the stone at Magnolia Cemetery.
Gently...
Placing the stone.
Leveling the stone.
At last...
It's final placement.

This was not only creating art that I love, but it was also a real honor to help a family celebrate the life of a loved one. I am so pleased we were able to complete this on time.


Looking back at 2016…

January 4, 2017 / Mary May / Acanthus book, Acanthus Leaves, Antique furniture reproduction, Online carving school, Wood Carving Education

2016 was an amazing year! It was active with teaching at a variety of different schools around the country, keeping up with filming and adding a new instructional video each week to my online school, and finishing writing a book on Carving the Acanthus Leaf. Yes, it was a crazy, busy, but incredible year.

20160129_173354_HDR

I love to travel and teach. It gets me out of my workshop (because if I allow myself, I can easily turn into a hermit) and actually gets me to socialize with other human beings. Last year I taught at The Woodwright’s School (Roy Underhill’s school), Connecticut Valley School of Woodworking, Lie-Nielsen Toolworks, Port Townsend School of Woodworking, Center for Furniture Craftsmanship, Savannah Technical College, and also taught carving seminars at MESDA (Museum of Early Southern Decorative Arts) at Woodworking in America and the SAPFM (Society of American Period Furniture Makers) Mid-year conference. Yes, when I put it all together in a paragraph, it was a busy year. I have just updated my 2017 class and seminar schedule, and it’s looking just as active.

Many new instructional videos were also made this past year for my online carving school. One episode was added each week (every Thursday morning) and roughly totaling 40 hours of video. They ranged from basic, beginner carving projects to highly advanced designs, and everywhere in-between. Some were based on period furniture details, while other were unique designs – just for fun. Here are photos of what lessons were added (click on the photo to see a short Introduction Video of the lesson – you also have the option on the Introduction Video page to purchase each lesson as a download if you are not a Premium Member of my school):

Charleston Rice Bed - Rice Sheaf
Carving a Live Oak Applique
Charleston Rice Bed - Carving Capital with Water Leaves
Charleston Rice Bed - Carving Drapery
Carving a Celtic Cross
Carving a Classical Ribbon
Carving Butterflies on a Keepsake Box
Carving a Convex Scallop Shell
Carving Gadroon Molding
Carving a Concave Scallop Shell
Carving a Country Scene
Carving a Byzantine Style Bellows
Carving Christmas Springerle Cookie Molds
Carving the Art Nouveau Style on a Bellows
Carving a Lion Head
Carving a Lion Head
Carving a Feather
Carving a Feather
Carving an Acanthus Leaf on a Tea Table Leg
Carving a Barn Owl
Carving a Barn Owl
Carving a Pomegranate Branch
Carving Snowflakes
Carving Snowflakes
Carving the Madonna and Child
Carving a Poinsettia
Carving Acorns
Carving Acorns
Carving Oak Leaves
Carving Oak Leaves

And as a grand-finale (in case I felt like I had too much spare time) I completed writing a book – The Acanthus Leaf – A Rite of Passage for the Classical Carver. This is being published by Lost Art Press and Christopher Schwarz is hoping to have it published by summer. This is my first book, and I was amazed at how all-consuming this was. I just never realized what was involved and I have an amazing respect for anyone who undertakes a book writing project.

DSC04256 DSC08025

It’s exciting to think about what 2017 will bring!

New instructional videos available through Lie-Nielsen Toolworks

December 10, 2016 / Mary May / Wood Carving Tips

I now have 4 different instructional videos through Lie-Nielsen Toolworks.

Over the past few years I have spent several weeks in lovely Warren, Maine filming instructional videos. That part of the country is amazing and I am trying to set up our schedule so my husband and I can spend July and August (or more) in this area, and get out of the South Carolina heat.

You may or may not know, but much of my work is making instructional carving videos in my workshop and adding a video each week to my online carving school. The way I am set up, I have 3 different cameras set on tri-pods to get different angles of my work, and I carve and talk through the project – “thinking out loud”. Then my son, Caleb, edits the video, takes out any goofy comments I make, chooses the correct camera angle, adds the tool identification, and helps it all make sense. So – not a huge, intense production. But when a video is added every week, how much time can you really spend?

When Deneb from Lie-Nielsen contacted me several months before filming my first video, he asked me if I could send my “script”. What’s that? I wondered. I’ve never used a script in my life! I usually just ramble on and let the cameras run. Now I was starting to get nervous. So I said “Sure, I’ll send that to you in a few days.” I soon discovered how the “professionals” did it. A script – Hmmm, who would have thought?

The filming process for each video was intense. Four full days of professional videographers (Harry Kourvakorian & co.) making sure the lighting was right, adjusting the sound, waiting for large trucks to pass by, and filming stage by stage through my script. There were times when the simplest 15-second shot took 10 takes to get it right (they were so patient with me). Why did I get so nervous? I think it was because other people were in the room and I am used to being completely by myself with just my chisels, wood and cameras. I can’t imagine being one of these famous actors doing a 2-hour movie over a 6-month period. But then again if I was getting paid a few million dollars, who can say??

After several months of editing, reviewing, and editing again, the video was finally ready! And it’s amazing how those 4 chaotic, stressful days of filming came down to a well-organized, professional instructional video. I’m so glad I used my “script”!

Here is a direct link to Lie-Nielsen’s website.

marymaycarvingdvd-1
2-dvd-mm-frc
2-dvd-mm-ctg
2-dvd-mm-cp

Here are the direct links to purchase the DVDS:

Basic Woodcarving Techniques
Floral Relief Carving
Carving the Traditional Greenman
Carving the Pineapple

Here are the direct links to purchase the downloadable videos:

Basic Woodcarving Techniques
Floral Relief Carving
Carving the Traditional Greenman
Carving the Pineapple

Happy Carving!

‹1234›»

Watch a Sample Lesson from my Online School

Your Free Membership offers 12 Free Lessons. See more at My School of Traditional Woodcarving.
Facebook You Tube Google plus Linked In twitter-24

Recent Posts

  • Carving the Acanthus Leaf Book with Videos and Study Casts
  • Last Chance to Pre-Order Carving the Acanthus Leaf Book
  • Enter to win FREE resin castings of acanthus leaves
  • Preview a FREE Chapter of my Carving the Acanthus Leaf Book
  • Carving the Acanthus Leaf – Now Available for Pre-Order
news-sm

Keep up with my online Woodcarving School

A weekly newsletter tells of the latest video episode. My monthly newsletter announces upcoming video lessons, carving tips and tricks, a free template and class schedule.

Categories

  • Acanthus book
  • Acanthus Leaves
  • American College of the Building Arts
  • Antique furniture reproduction
  • Book Review
  • Brookgreen Gardens
  • Cartouche
  • Carving wildlife
  • Carvings for churches
  • Chair Carving
  • Charleston Rice Bed
  • Creche
  • europe trip
  • Finials
  • Fleur-de-lis
  • Grinling Gibbons
  • Guest Blogger
  • Handworks Show
  • intaglio- maple leaf
  • Magazine articles
  • On-Line Woodcarving articles and TV interviews
  • Online carving school
  • People
  • Philadelphia Highboy
  • Savannah
  • Scrolls
  • Shows
  • Society of American Period Furniture Makers
  • Tools
  • TV Shows
  • Uncategorized
  • Videos
  • Violin Scroll
  • WIA Show
  • Wood Carving Education
    • Ball and claw foot
    • letter carving
    • Mary's story
    • Tips & Tricks
    • Woodcarving classes
  • Wood Carving Projects
    • Acanthus Leaf Repair on Tables
    • Bed Carving
    • Carving faces
    • Carving Hands
    • Carving Reeds
    • Celtic design
    • Church carving in Savannah
    • Coat of Arms
    • College Sign
    • Corinthian Capitals
    • Deep relief carving
    • Dragon Carving
    • Egg and Dart Molding
    • Kings Head Bracket
    • Misc. Antique Furniture Repair
    • Newport Shell
    • Period Furniture Carving
    • Picture Frame
    • Rosettes
    • Shell and Acanthus Leaf
    • Shell Niches
    • Shell wall sconce
    • Sunburst
  • Wood Carving Tips

Archives

  • January 2018 (1)
  • November 2017 (1)
  • October 2017 (2)
  • September 2017 (1)
  • July 2017 (1)
  • April 2017 (1)
  • March 2017 (1)
  • January 2017 (3)
  • December 2016 (2)
  • July 2016 (1)
  • May 2016 (1)
  • April 2016 (1)
  • March 2016 (1)
  • February 2016 (1)
  • January 2016 (2)
  • November 2015 (3)
  • October 2015 (3)
  • July 2015 (1)
  • June 2015 (2)
  • May 2015 (2)
  • April 2015 (4)
  • March 2015 (4)
  • February 2015 (5)
  • January 2015 (9)
  • December 2014 (8)
  • November 2014 (6)
  • October 2014 (6)
  • September 2014 (9)
  • August 2014 (4)
  • July 2014 (8)
  • June 2014 (2)
  • May 2014 (8)
  • April 2014 (13)
  • March 2014 (3)
  • February 2014 (1)
  • January 2014 (3)
  • December 2013 (1)
  • November 2013 (1)
  • October 2013 (5)
  • September 2013 (5)
  • August 2013 (2)
  • July 2013 (8)
  • June 2013 (3)
  • May 2013 (3)
  • April 2013 (5)
  • March 2013 (9)
  • February 2013 (3)
  • January 2013 (3)
  • December 2012 (6)
  • November 2012 (5)
  • October 2012 (5)
  • September 2012 (4)
  • August 2012 (4)
  • July 2012 (6)
  • June 2012 (5)
  • May 2012 (7)
  • April 2012 (8)
  • March 2012 (7)
  • February 2012 (9)
  • January 2012 (11)
  • December 2011 (8)
  • November 2011 (7)
  • October 2011 (21)
  • September 2011 (18)
  • August 2011 (7)

Blogroll

  • Bob Easton
  • Giant Cypress
  • High Rock Woodworking
  • Matts Basement Workshop
  • Modern Woodworkers Association
  • Penultimate Woodshop
  • Renaissance Woodworker
  • The Sunday Woodcarver
  • The Wood Whisperer
  • Tom's Workbench
  • Wood Central
  • Wood Net
  • Wood Talk Online

Links

  • Alan Breed
  • Alf Sharp
  • American College of the Building Arts
  • Charles Neil Woodworking
  • Charles Ramberg Furniture Maker
  • Christopher Schwarz
  • Connecticut Valley School of Woodworking
  • Dan Hamilton
  • Greg Guenther Wood Group
  • Highland Woodworking
  • Kelly Mehler School of Woodworking
  • Lucy Churchill
  • Lumber Jocks Woodworking Showcase
  • Marc Adams School of Woodworking
  • Mark Van Abbema
  • Philip Lowe
  • Pro Woodworking Tips
  • Ronnie Sextion
  • Society of American Period Furniture Makers
  • Studio 3d Creations
  • Thaddeus Stephens College of Technology
  • The Acanthus Workshop, LLC
  • The Mill, Inc
  • The Renaissance Woodworker
  • The Woodwright's School
  • Wood Carving Guide
  • Woodcraft Supply
  • Woodworking Workshops of the Shenendoah Valley
Mary May - Woodcarver - Copyright © Cornerstone Creations, LLC, 2015
Privacy Policy

Thank you

Your feedback have been received.

Close