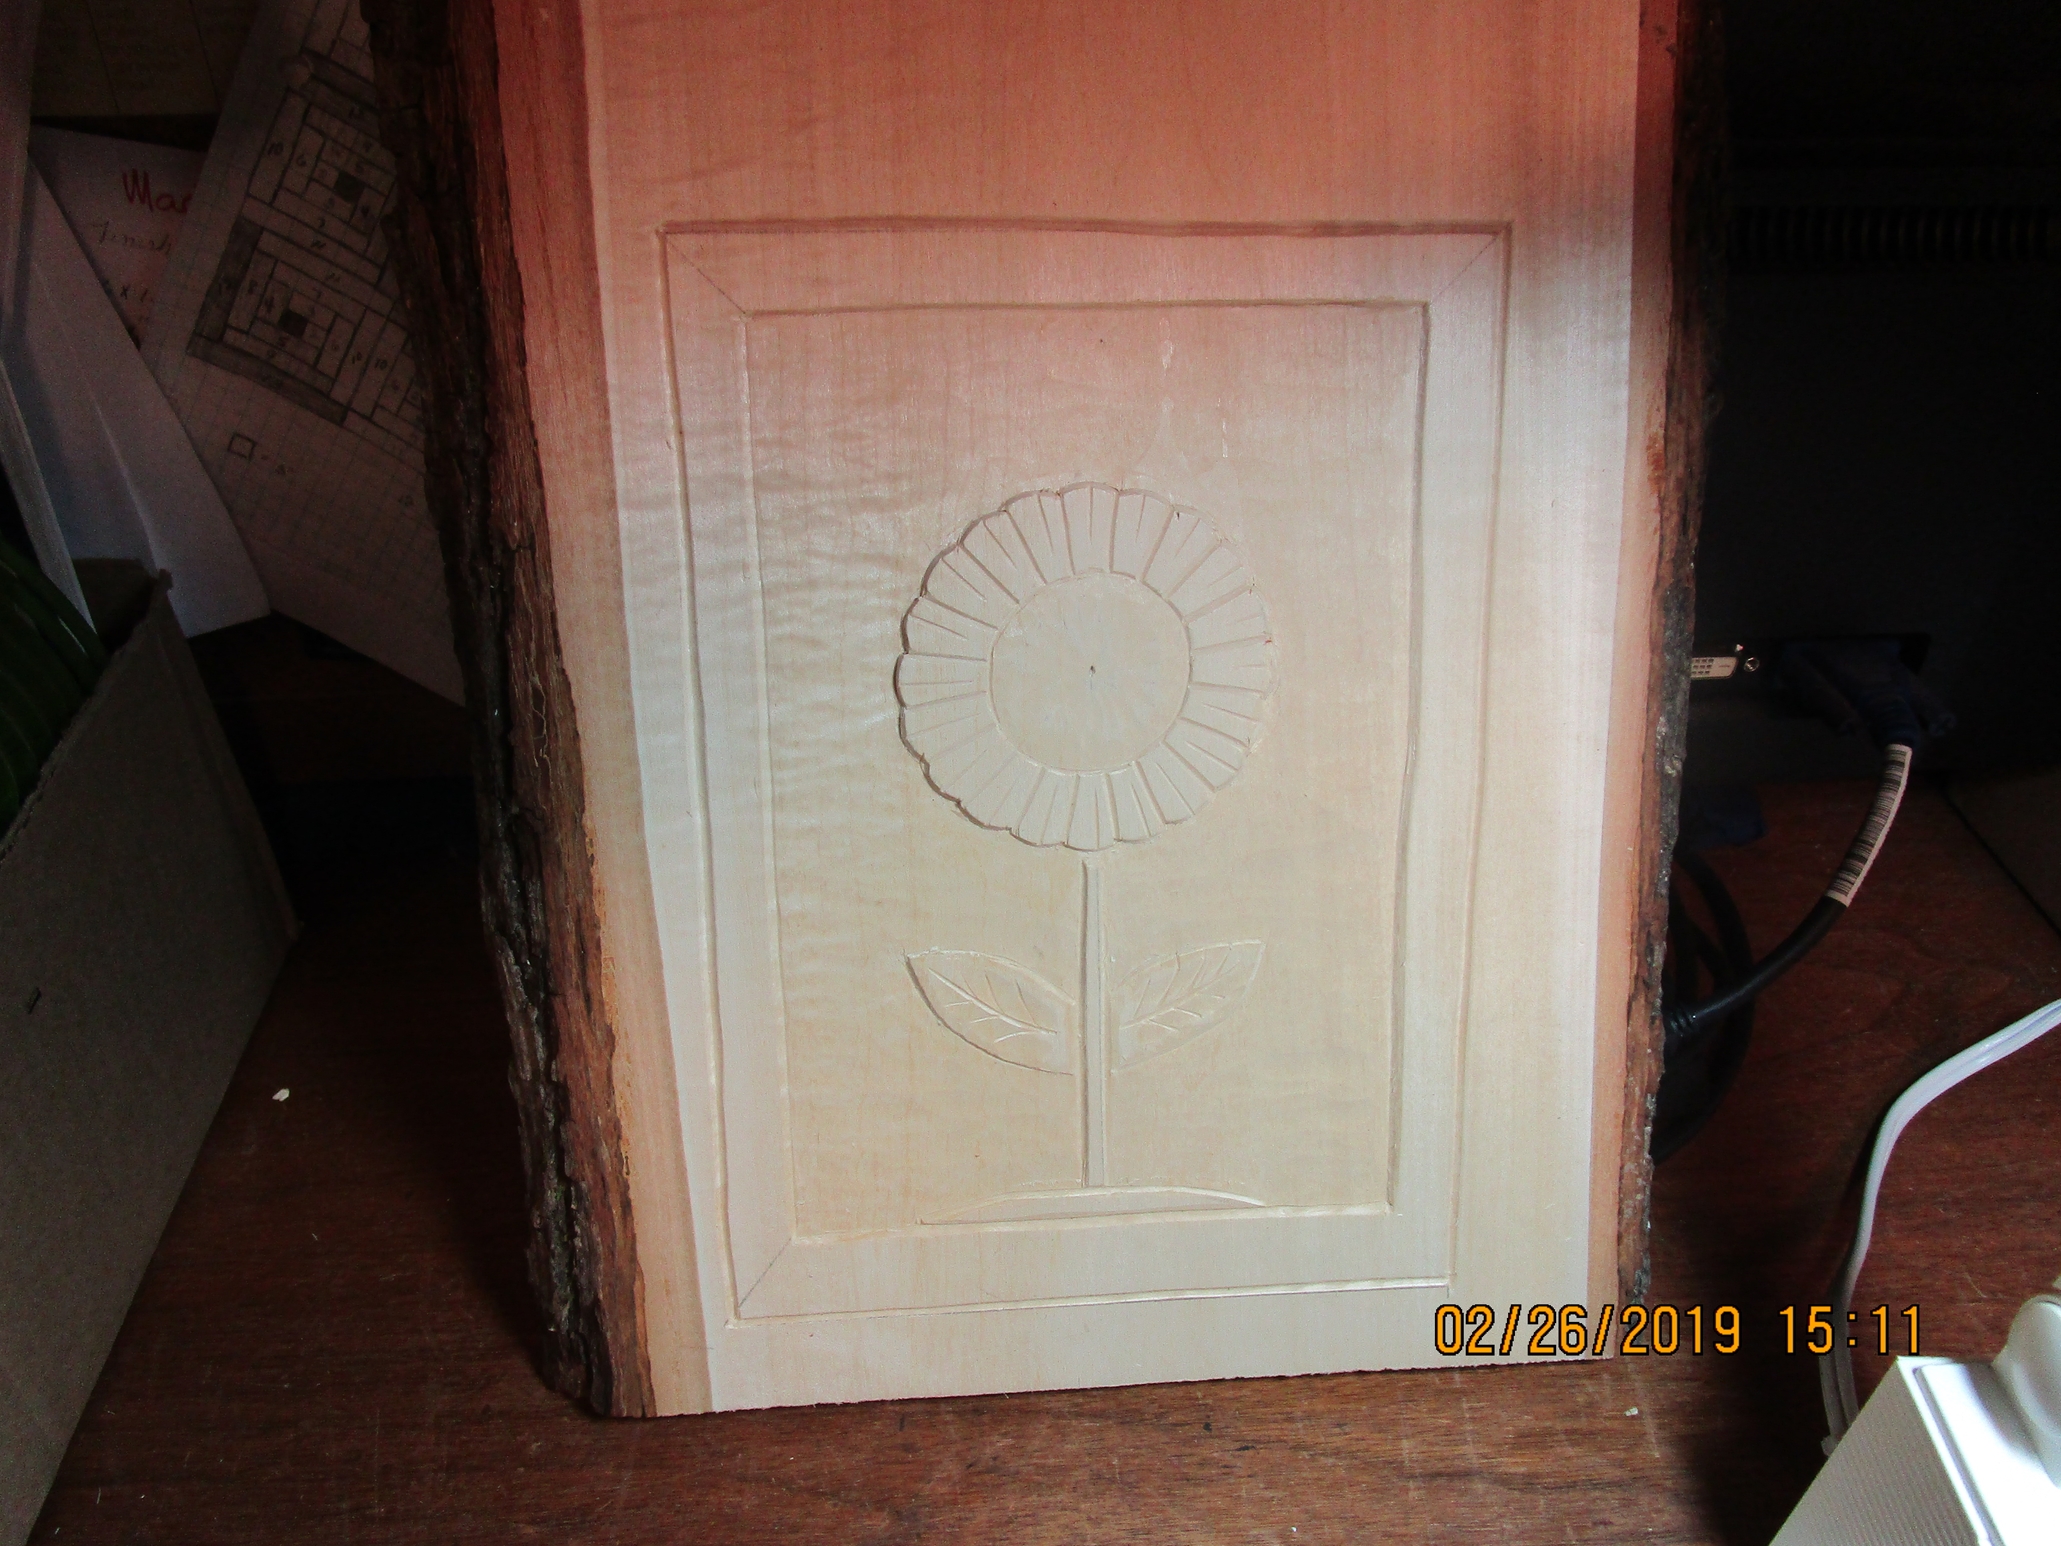
Relief Flower, Having a technique issue.
Quote from Thomas Danielson on February 26, 2019, 3:59 pmI continue to find myself facing the same problem with lining in and eliminating tool marks when I bring the background up it. I spend a lot of time trying to correct the condition and cannot figure out what Im doing wrong. Im going to do this one again. I eventually get it cleaned up but there is something Im doing wrong
When I rough in with my V-gouge should I stay father away from the feature with the v gouge before beginning the line in with the plunge cut ? Any suggestions? Sometimes its the bottom of my v gouge sometimes its the edge of the gouge I am lining in with, too deep maybe.
I continue to find myself facing the same problem with lining in and eliminating tool marks when I bring the background up it. I spend a lot of time trying to correct the condition and cannot figure out what Im doing wrong. Im going to do this one again. I eventually get it cleaned up but there is something Im doing wrong
When I rough in with my V-gouge should I stay father away from the feature with the v gouge before beginning the line in with the plunge cut ? Any suggestions? Sometimes its the bottom of my v gouge sometimes its the edge of the gouge I am lining in with, too deep maybe.
Uploaded files: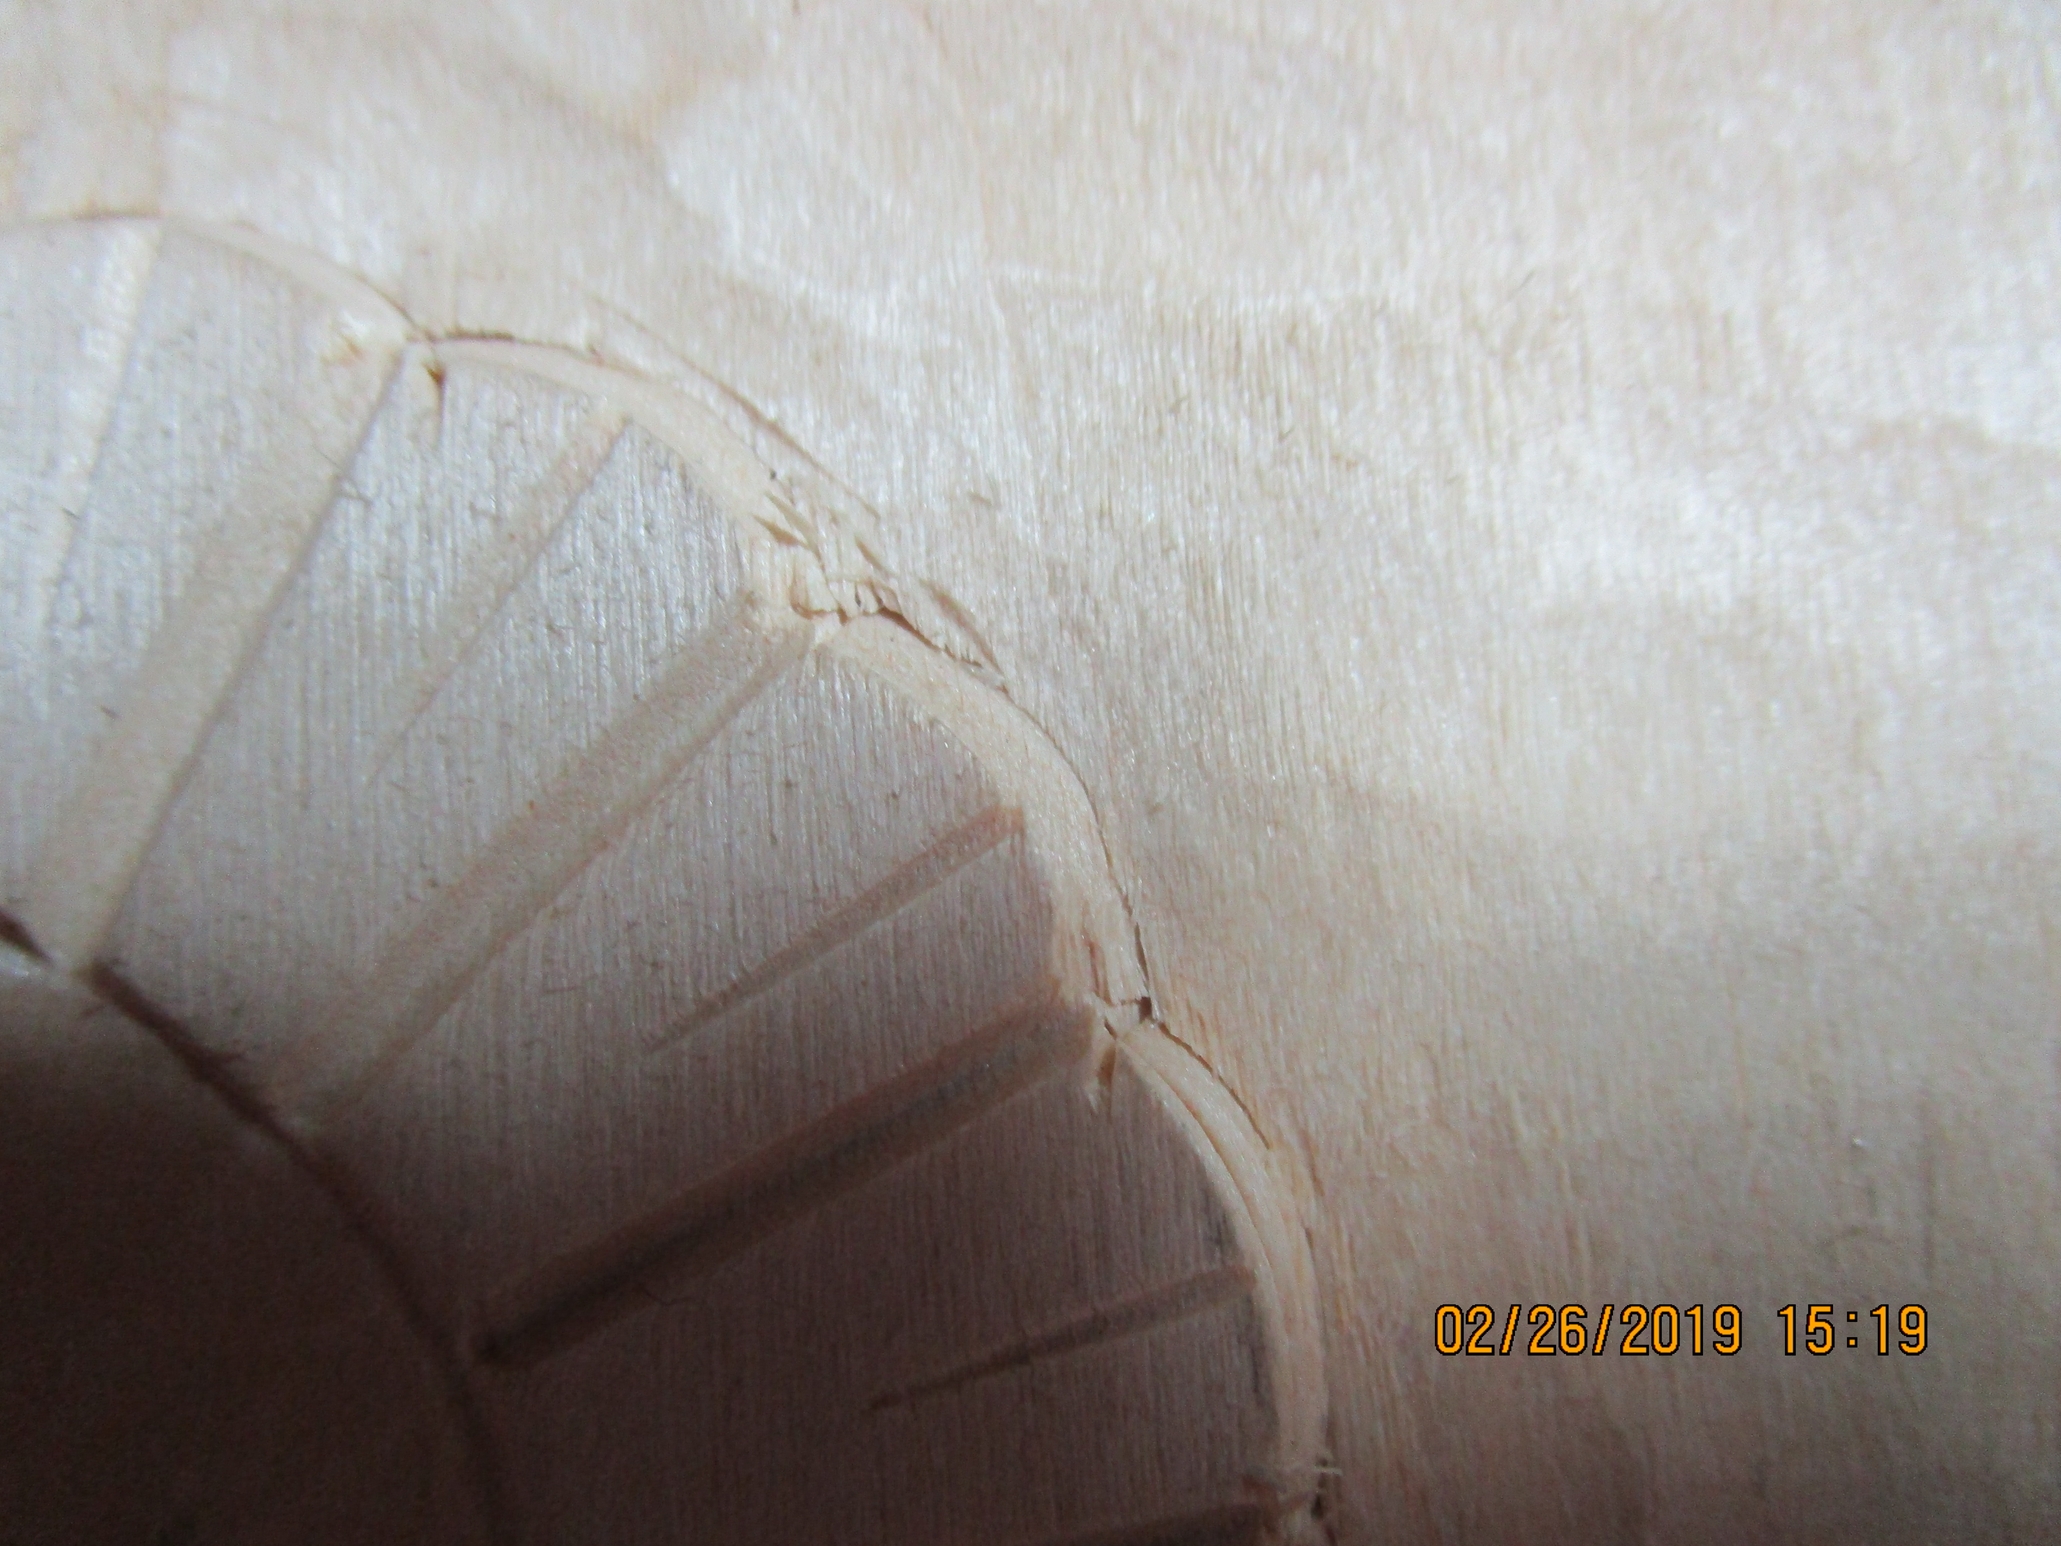
Quote from Michael Evans on February 26, 2019, 5:35 pmHi Thomas,
The first photo shows that your background is pretty shallow. That means you really have to keep the initial cuts shallow or you will get too deep very quickly. The main idea behind outlining is to allow the carver to carve up to the feature edge without putting undo pressure on the details which can weaken or break out the short grain. Therefore moving away from the feature when outlining tends defeat the purpose. Using smaller tools would act as a reminder to keep it shallow since corners would dig in. You might also want to try a veiner instead of a v tool for initial outlining and only do stabbing cuts as necessary after the background has been established. Don't think of the stabbing cuts as stop cuts but as paring to the desired feature wall. Have fun.
Hi Thomas,
The first photo shows that your background is pretty shallow. That means you really have to keep the initial cuts shallow or you will get too deep very quickly. The main idea behind outlining is to allow the carver to carve up to the feature edge without putting undo pressure on the details which can weaken or break out the short grain. Therefore moving away from the feature when outlining tends defeat the purpose. Using smaller tools would act as a reminder to keep it shallow since corners would dig in. You might also want to try a veiner instead of a v tool for initial outlining and only do stabbing cuts as necessary after the background has been established. Don't think of the stabbing cuts as stop cuts but as paring to the desired feature wall. Have fun.
Quote from Thomas Danielson on February 26, 2019, 10:00 pmThanks Micheal
I think Ive been miss-using stop cuts. Im pretty much stuck with a 12-6 V and (3) 14mm 3,5,7 sweep and (2) 6mm 3 and 5 sweep gouges, so I can make them work. I have I good idea of what you have suggested and will apply. I really appreciate your input. again Thank again
Thanks Micheal
I think Ive been miss-using stop cuts. Im pretty much stuck with a 12-6 V and (3) 14mm 3,5,7 sweep and (2) 6mm 3 and 5 sweep gouges, so I can make them work. I have I good idea of what you have suggested and will apply. I really appreciate your input. again Thank again
Quote from Lucy Fox on February 27, 2019, 4:13 pmHello Thomas
your problem is very much universally felt I think. When I’m working in relief I tend to experiment with the depth of the stop cut. When I have decided on the depth I want I try to gauge the stop cut just right so that it fits this depth but this is something that has only just started to get easier. There’s usually a lot of altering and going back and forth but I have found that the more you carve the easier this gets and the less clean up is needed. I think you will find too that as you get more experienced the fewer cuts you will need to make to get the design right. This is something that just happens over time. The important thing is to keep enjoying the process and the beauty of the wood and things will fall into place. Happy carving!
Hello Thomas
your problem is very much universally felt I think. When I’m working in relief I tend to experiment with the depth of the stop cut. When I have decided on the depth I want I try to gauge the stop cut just right so that it fits this depth but this is something that has only just started to get easier. There’s usually a lot of altering and going back and forth but I have found that the more you carve the easier this gets and the less clean up is needed. I think you will find too that as you get more experienced the fewer cuts you will need to make to get the design right. This is something that just happens over time. The important thing is to keep enjoying the process and the beauty of the wood and things will fall into place. Happy carving!
Quote from MaryMay on March 4, 2019, 7:40 amHello Thomas,
This is probably the most common issue that beginning students come across. It can come from several possibilities -
- The v-chisel is cut too deep (then the background simply needs to be lowered below the v-cut)
- The original gouge that carved the stop cut (vertical cut) that defines the outer edge may not quite fit along the shape, and extends into the background. The way to solve this, if you don't have a gouge that fits exactly, tip the tool slightly so that it does not go so deep into the background.
- Often it takes 2 or 3 or more stop cuts to reach the desired depth. If you go quite deep, this is more likely. As a result, each cut has the potential to create the "fuzz" effect and also a "stepped edge. If you make additional cuts along the edge, make sure those final cuts sheer the edge (stay vertical and actually cut the entire edge) and not just skim over the surface, potentially creating steps and the edge then begins to slant out slightly.
- It's important to make sure that the cuts that you make are confident and defined, and that simply comes with experience with the tool, the wood, and knowing what the limitations are. The more you have the tools in your hand, the more decisive these cuts are.
So keep playing, experimenting, and having fun!
Hello Thomas,
This is probably the most common issue that beginning students come across. It can come from several possibilities -
- The v-chisel is cut too deep (then the background simply needs to be lowered below the v-cut)
- The original gouge that carved the stop cut (vertical cut) that defines the outer edge may not quite fit along the shape, and extends into the background. The way to solve this, if you don't have a gouge that fits exactly, tip the tool slightly so that it does not go so deep into the background.
- Often it takes 2 or 3 or more stop cuts to reach the desired depth. If you go quite deep, this is more likely. As a result, each cut has the potential to create the "fuzz" effect and also a "stepped edge. If you make additional cuts along the edge, make sure those final cuts sheer the edge (stay vertical and actually cut the entire edge) and not just skim over the surface, potentially creating steps and the edge then begins to slant out slightly.
- It's important to make sure that the cuts that you make are confident and defined, and that simply comes with experience with the tool, the wood, and knowing what the limitations are. The more you have the tools in your hand, the more decisive these cuts are.
So keep playing, experimenting, and having fun!